How to Make Professional Looking Videos From Start to Finish
Great-looking videos don't just happen by accident. They're the result of a deliberate, three-part process: thoughtful pre-production (all the planning), careful production (the actual filming), and detailed post-production (the editing and finishing touches). If you master these stages, you can turn a basic idea into something that truly hooks your audience.
The Foundation of Every Great Video
Before you even touch your camera, the real work begins. This initial planning stage, or pre-production, is like the blueprint for a house. It’s where you take a fuzzy concept and sharpen it into a clear, actionable plan. This is where you decide what every shot will be and how each scene pushes your story forward.
Honestly, skipping this step is the number one mistake I see people make. It almost always leads to a chaotic shoot, missed shots, and a nightmare in the editing room trying to piece it all together.
When you have a solid plan, you know exactly what you need to capture. This means you can work faster on set, you won't have weird continuity errors, and you’ll remember to grab all the B-roll and extra shots that make a story feel complete. Think of it as your secret weapon for making a video that looks and feels professional right from the start.
Define Your Core Concept and Audience
The first thing to nail down has nothing to do with gear—it's about clarity. What is the single most important thing you want your viewers to walk away with? And who, exactly, are you talking to? A quick tutorial for a total beginner will look and feel completely different from a sleek, cinematic ad for a luxury brand.
Getting this right early on informs every other decision you'll make. A high-energy video for TikTok needs quick cuts and punchy visuals to keep a young audience engaged. On the other hand, an educational video for industry professionals needs a calmer pace and clean, steady shots to build credibility.
Your core concept is your creative North Star. Every choice—from the script's tone to the music you pick—should point back to it. That's how you create a final product that feels cohesive and intentional.
Scripting and Storyboarding Your Vision
With your concept locked in, it's time to get it down on paper. A script gives your video a narrative backbone, mapping out everything that will be said and shown. Even if you're making an unscripted vlog, a simple bulleted outline is a lifesaver. It keeps you on track and ensures you don't forget any key points.
Next, you translate that script into a visual plan with a storyboard or a simple shot list. You don't have to be a great artist—stick figures and quick notes work just fine. For each scene, jot down the camera angle (like a wide shot or a close-up), what's happening, and any props or locations you'll need. This simple document is an absolute game-changer on filming day, turning what could be a stressful scramble into a calm, organized checklist.
This workflow shows how you move from a basic idea to a concrete filming plan.
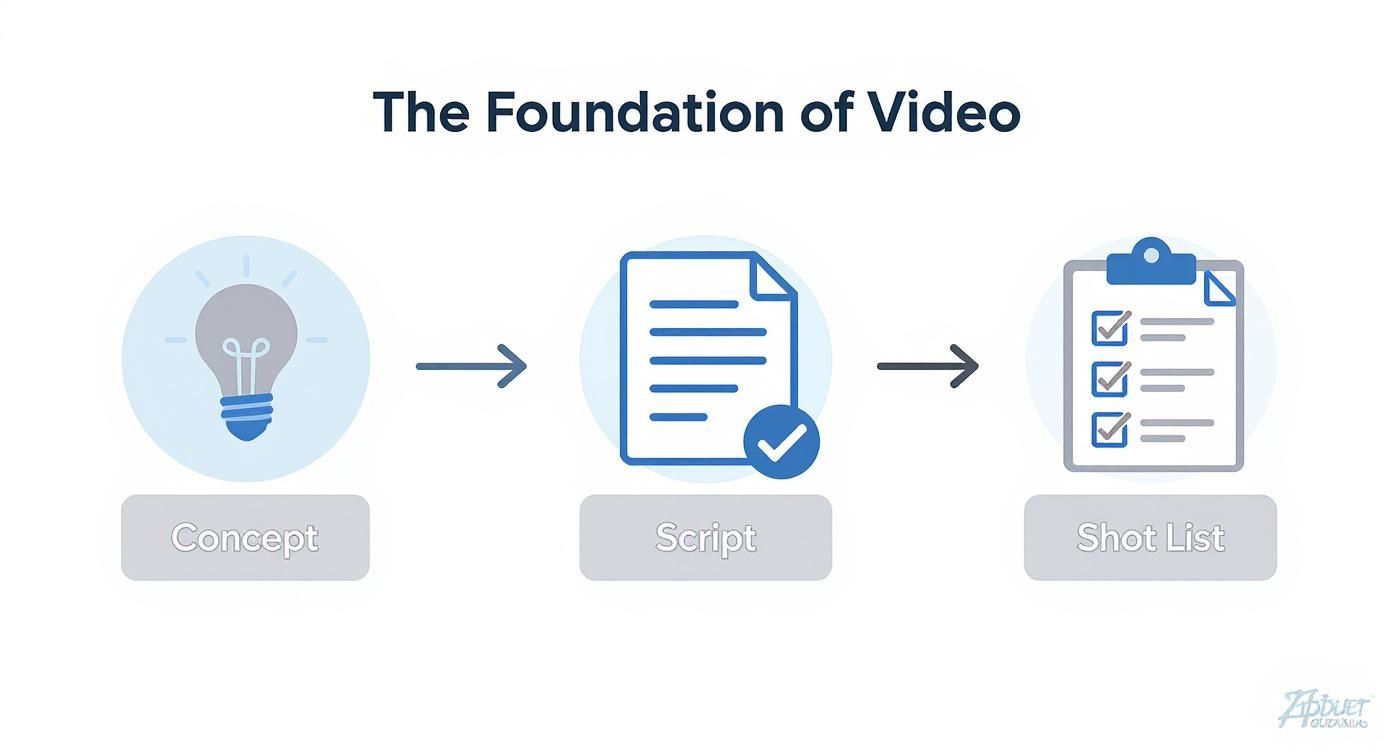
By the time you hit record, this foundational work ensures all the big creative and logistical questions have already been answered.
To put this in perspective, the global video production market was valued at around USD 297 billion in 2024. Despite its size, the industry is plagued by inefficiency, with things like a 47% rise in budget overruns becoming common. These stats show just how crucial a disciplined pre-production process is, whether you're a solo creator or a big studio. You can discover more insights about video production market trends and see why planning is key to staying on track.
The table below breaks down exactly why each of these pre-production steps is so important for the final quality of your video.
Key Pre-Production Elements and Their Impact
| Element | Purpose | Impact on Professional Quality |
|---|---|---|
| Core Concept | Defines the video's primary message and goal. | Ensures the final video is focused, coherent, and resonates with its intended audience. |
| Target Audience | Identifies who the video is for. | Guides decisions on tone, pacing, and style to maximize viewer engagement and impact. |
| Script/Outline | Structures the narrative and dialogue. | Prevents rambling, ensures all key points are covered, and creates a logical, compelling story flow. |
| Storyboard | Visually maps out each shot and scene. | Creates a clear visual guide for filming, ensuring stylistic consistency and a polished aesthetic. |
| Shot List | A detailed checklist of all required shots. | Guarantees all necessary footage (including B-roll) is captured, preventing gaps in the edit. |
In short, taking the time to plan not only saves you from major headaches later but is also the most direct path to creating a video that looks truly professional.
Mastering Your Visuals and Camera Settings
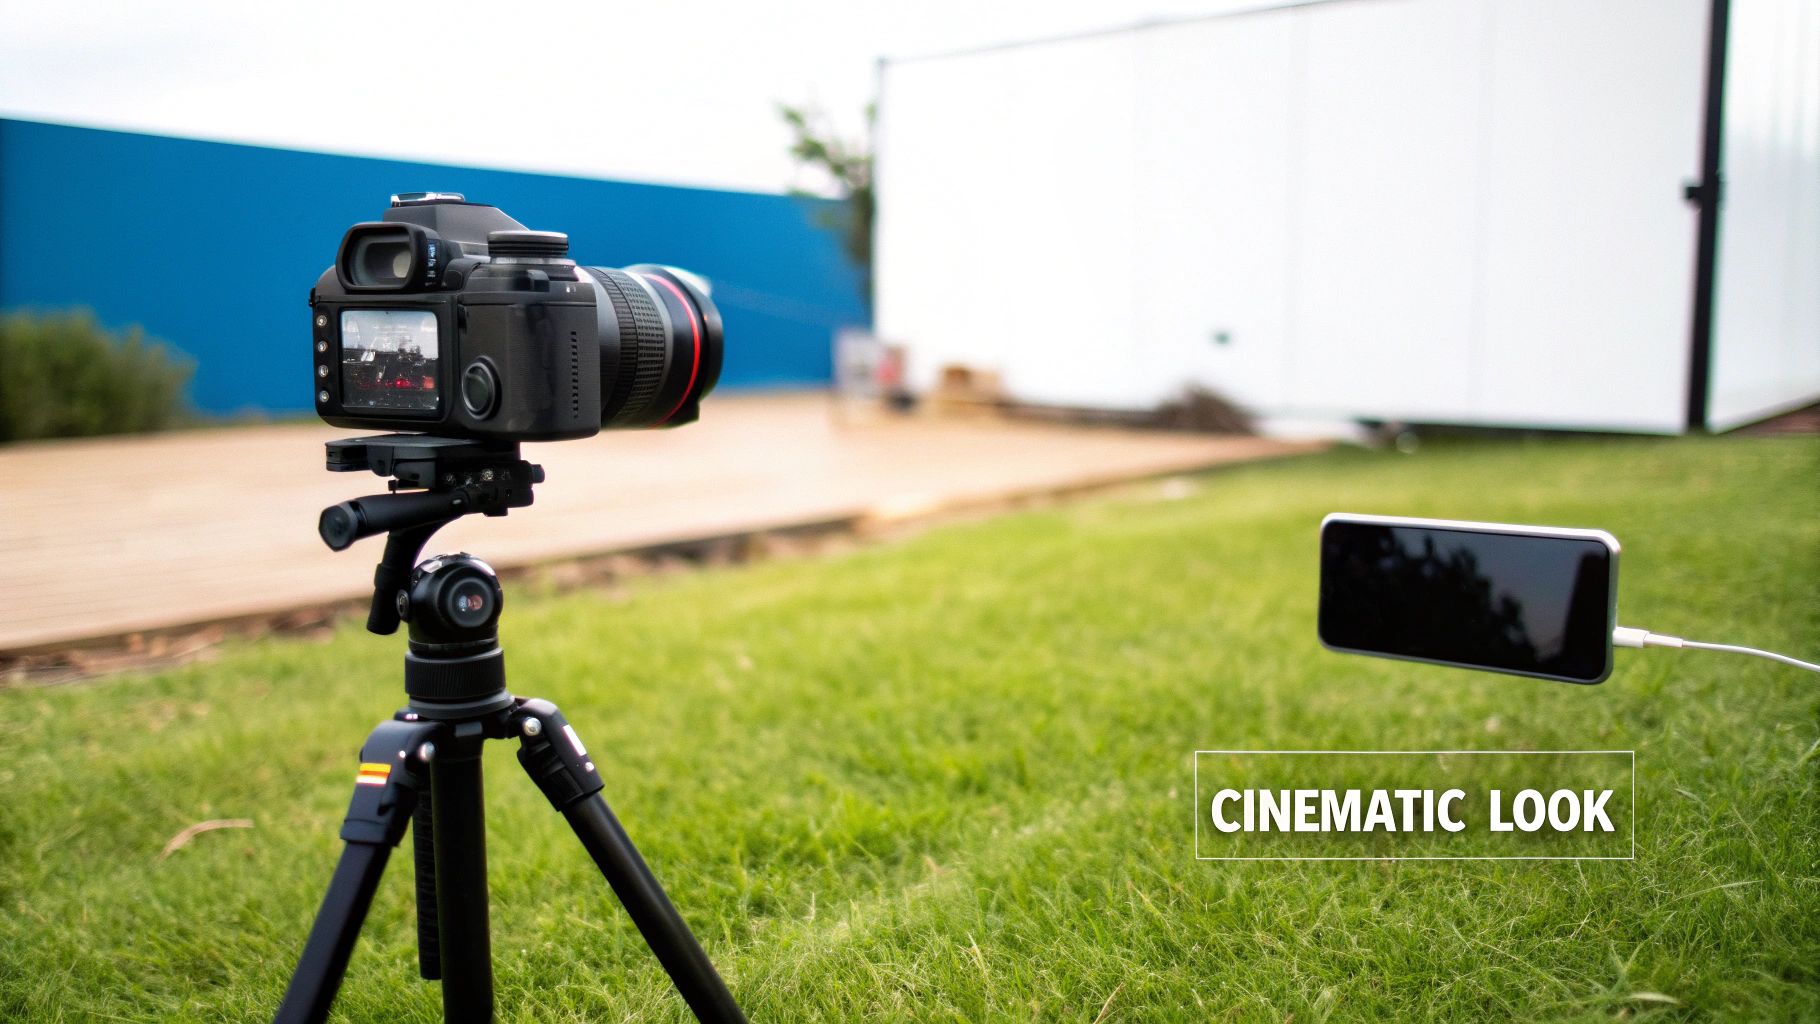
Okay, you've done the prep work. Your plan is solid. Now it’s time for the fun part: actually shooting your video. This is where your vision starts to become reality, and it really comes down to three things: how you frame your shots (composition), how you light your scene, and the technical settings you dial into your camera.
Don't worry, you don't need a film degree for this. We're going to skip the dense theory and jump straight into practical techniques you can use today. Whether you're working with a high-end cinema camera or just the phone in your pocket, these fundamentals are what separate flat, boring footage from something that feels dynamic and professional.
Crafting Compelling Compositions
At its core, composition is just the art of arranging stuff in your frame. It's a silent storyteller. Good composition guides your viewer's eye where you want it to go, making your shots feel intentional and balanced instead of accidental.
The quickest way to level up your shots is by using the Rule of Thirds. Just imagine a tic-tac-toe grid over your screen. Instead of sticking your subject smack in the middle, try placing them on one of the lines or at a point where the lines cross. It's a simple change that instantly makes your shot feel more alive. Pretty much every modern camera and smartphone has a grid overlay you can turn on to help you out.
Once you get comfortable with that, start looking for other ways to build a better frame:
- Leading Lines: Look for natural lines in your environment—a road, a fence, a hallway—and use them to point the viewer’s eye toward your subject.
- Framing: Use a doorway, a window, or even tree branches to create a natural frame around your subject. This adds a ton of depth and makes the shot feel more deliberate.
- Depth: Don't let your video feel flat. Create a sense of a three-dimensional world by consciously placing elements in the foreground, middle ground, and background.
These aren't complicated rules, but using them will immediately lift your footage beyond that simple point-and-shoot look.
The Power of Good Lighting
Lighting is everything. It does way more than just let you see what's happening; it sets the mood, creates depth, and tells the audience what to look at. Honestly, bad lighting is probably the #1 giveaway of an amateur video. The good news? You don't need a Hollywood budget to get it right.
Your best friend is often the sun. If you want a soft, flattering look for a person on camera, just have them face a big window. The diffused natural light wraps around them beautifully and kills harsh shadows. Pro tip: never, ever film someone with a bright window directly behind them. Your camera will freak out, and your subject will turn into a dark, faceless silhouette.
When you need more control, the industry-standard is a simple three-point lighting setup.
- Key Light: This is your main, brightest light. Position it off to one side of the camera.
- Fill Light: A softer light placed on the opposite side. Its only job is to "fill in" the dark shadows created by the key light.
- Backlight: Sometimes called a hair light, this goes behind your subject. It creates a subtle glow that separates them from the background and gives the shot a polished, professional edge.
You can totally fake this with lamps you already own. A harsh desk lamp can be softened by bouncing it off a white wall or even by shining it through a white bedsheet (just be careful with heat!).
A well-lit subject instantly appears more credible and professional. Even if the content is fantastic, harsh shadows or a poorly exposed face can distract the viewer and weaken your message.
Demystifying Your Camera Settings
Getting out of "auto" mode is the key to unlocking creative control. Understanding the relationship between aperture, ISO, and shutter speed—often called the "exposure triangle"—is what lets you dictate exactly how your video looks and feels.
Aperture (f-stop): Think of this as the pupil of your lens. A low f-stop number (like f/1.8) means the opening is wide, which lets in lots of light and creates a very shallow depth of field. This gives you that beautiful, blurry background (bokeh) that makes your subject pop. A higher f-stop (like f/8) keeps much more of the scene in focus, which is great for sweeping landscape shots.
Shutter Speed: This controls how long the sensor is exposed to light for each individual frame of video. For smooth, natural-looking motion, you'll want to follow the 180-degree rule. The rule of thumb is simple: your shutter speed should be double your frame rate. So, if you're shooting at 24 fps (the standard for a cinematic look), your shutter speed should be 1/50th of a second.
ISO: This is your camera's sensitivity to light. You want to keep this as low as possible. A low ISO, like 100 or 200, gives you a super clean image with no grain. As you raise the ISO to shoot in darker places, you're artificially brightening the image, which introduces digital "noise" or graininess. Always try to add more physical light before you start cranking up the ISO.
These three settings are in a constant dance. Change one, and you'll likely need to adjust another to keep your exposure right. The best thing you can do is just spend an afternoon playing with them. That hands-on practice is the fastest way to learn how to make videos that look exactly the way you imagined them.
Capturing Audio That Commands Attention
If there’s one secret that separates the amateurs from the pros, it’s this: people will forgive a shaky camera, but they will not tolerate bad audio. It's an instant dealbreaker. Poor sound—whether it’s muffled, echoey, or full of distracting noise—immediately signals low quality and can completely tank your video's credibility.
You have to think of audio as 50% of your video. Neglecting it is like filming with the lens cap on.
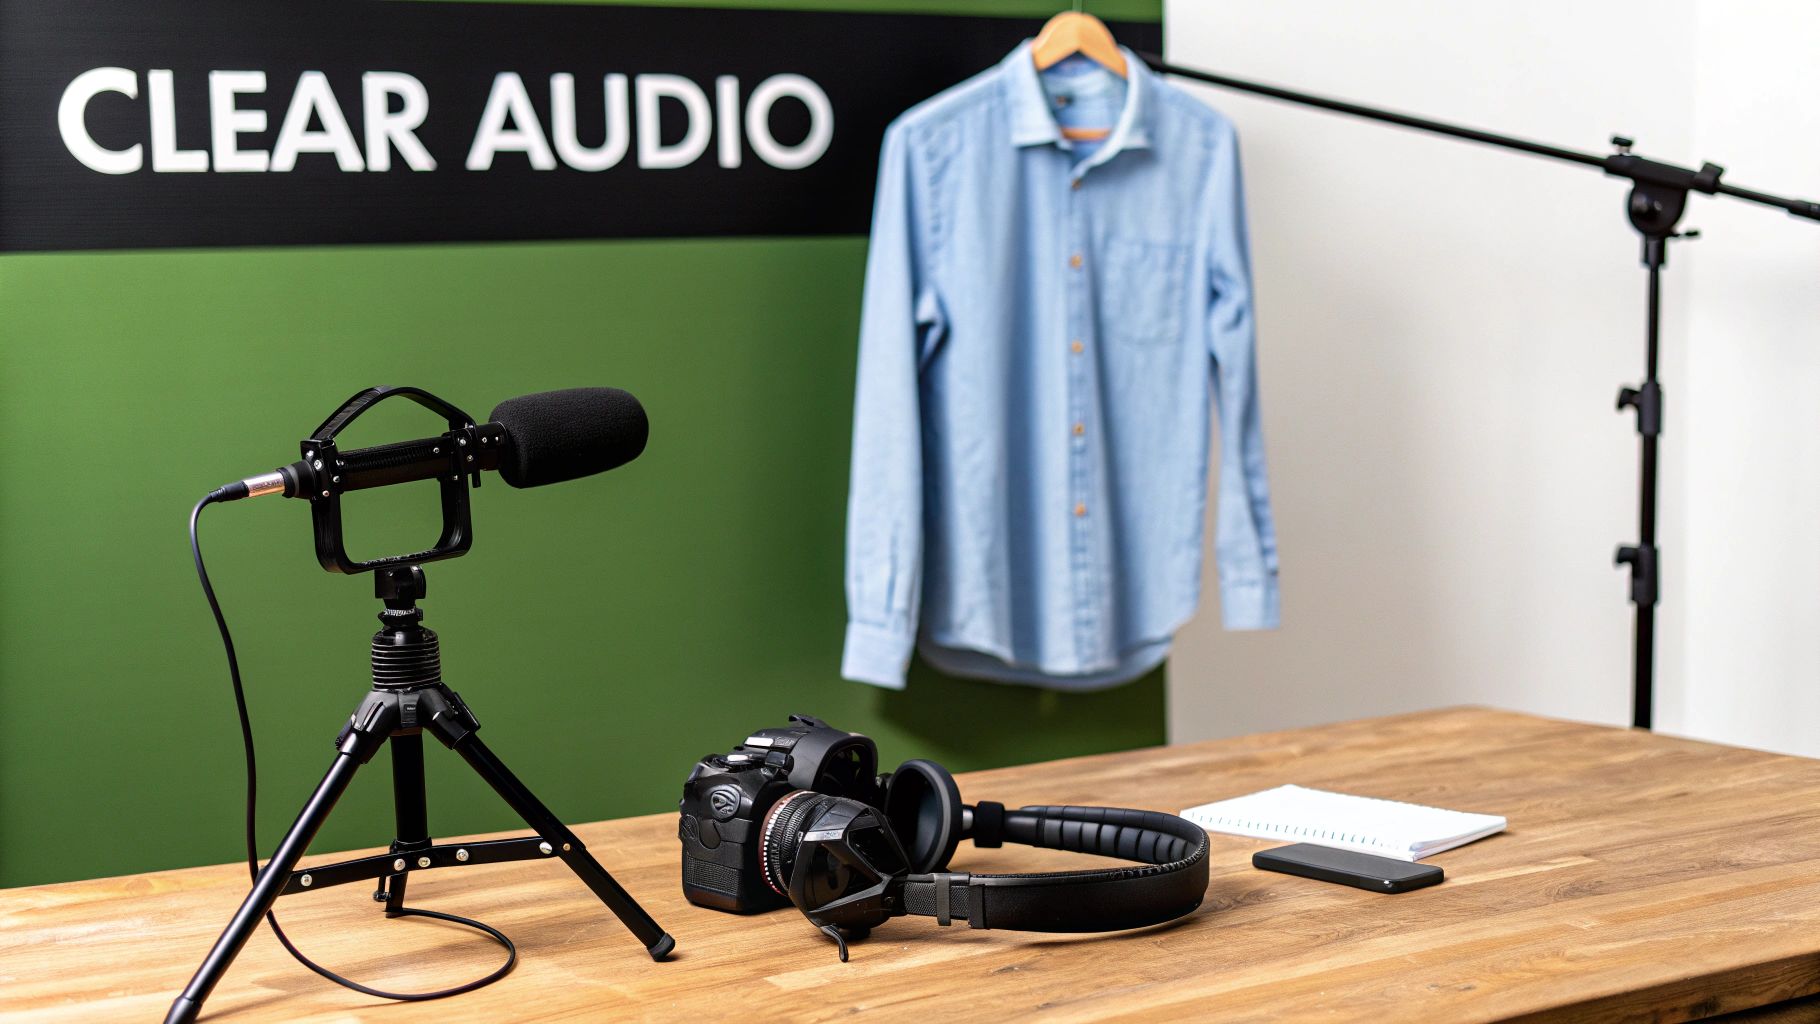
The built-in mic on your camera or phone is designed to pick up everything, from every direction. That's great for capturing the general vibe of a room, but it’s terrible for clear dialogue. It grabs every echo, passing car, and air conditioner hum right along with your voice. Honestly, the single best investment you can make to elevate your video quality is an external microphone.
Choosing the Right Microphone for the Job
Not all mics are built the same, and the right one really depends on what you're filming. The golden rule is simple: get the mic as close to the sound source (your mouth) as possible. That one principle solves most audio problems.
- Lavalier Mics (Lavs): These are the small mics that clip onto your shirt. They're fantastic for interviews or any talking-head video because they isolate your voice and stay at a consistent distance, even when you move. You can find affordable wired versions for your smartphone that are a great place to start.
- Shotgun Mics: These are highly directional, meaning they capture sound from wherever you point them while rejecting noise from the sides. They often mount right on top of your camera, making them perfect for "run-and-gun" shooting or capturing sound from someone just out of the shot.
- USB/Condenser Mics: If you're recording a voiceover at your desk for a tutorial or podcast, nothing beats a dedicated USB condenser mic. It delivers that rich, studio-quality sound that immediately feels more professional.
The biggest pro-level habit you can adopt is to monitor your audio live. Don’t just hit record and hope for the best. Plug a pair of headphones into your camera or recorder while you're filming. It's the only way to know exactly what the mic is picking up, letting you catch problems like wind noise or a rustling shirt before you ruin a perfect take.
Taming Your Recording Environment
Your location is just as important as your gear. A big, empty room with hard surfaces is an echo chamber, and that reverb will make your audio sound hollow and cheap.
The good news is you don't need a full-on sound booth to fix this. Try recording in a room with soft surfaces—things like carpets, curtains, couches, and even bookshelves do a great job of absorbing sound waves. If you’re still hearing an echo, hanging a few heavy blankets on the walls just out of frame can work wonders. This simple trick, known as sound dampening, can make a spare bedroom sound much closer to a pro studio.
Finally, watch your audio levels. You want the meter to be bouncing somewhere in the -12dB to -6dB range. If it’s constantly hitting the red (0dB), your audio will be distorted or "clipped," which is nearly impossible to fix later. It's always better to record a little too quiet and boost it in the edit than to record too loud and be stuck with unusable, distorted sound. Mastering these audio fundamentals is a critical step in learning how to make professional looking videos.
Polishing Your Project in Post-Production
You’ve shot all your footage—great work! But the real magic, the part that transforms a collection of clips into a professional-looking video, happens in post-production. This is where your story truly comes to life.
A powerful edit can elevate good footage to greatness, while a sloppy one can tank even the most cinematic shots. Think of this stage as the final performance, where you control the rhythm, emotion, and flow of your entire project. It's an absolutely essential step.
Choosing Your Editing Software
Your editing software is your creative command center, and thankfully, you have more choices today than ever. You don’t need the most expensive program out there; you just need the right tool for the job.
- Great Free Options: Tools like the free version of DaVinci Resolve, CapCut, and iMovie are fantastic starting points. They’re more than capable of handling basic edits, color adjustments, and audio mixing.
- Industry-Standard Powerhouses: If you're ready to level up, programs like Adobe Premiere Pro, Final Cut Pro, and the full DaVinci Resolve Studio are the go-to choices for professionals. They offer unmatched control, advanced features, and seamless integration with other creative tools.
Most paid programs offer free trials. My advice? Take them for a spin. See which one feels intuitive to you before you commit.
Here’s a quick look at some popular options to help you decide.
Comparing Popular Video Editing Software
Choosing the right tool can feel overwhelming, so this table breaks down the key players to help you find the best fit for your needs and skill level.
| Software | Best For | Key Features | Pricing Model |
|---|---|---|---|
| Adobe Premiere Pro | Professionals & Content Creators | Seamless Adobe CC integration, advanced multi-cam editing, robust color tools, huge plugin library. | Subscription |
| Final Cut Pro | Mac Users & Apple Ecosystem | Magnetic timeline, fast performance on Apple hardware, 360-degree VR editing, strong organizational tools. | One-time Purchase |
| DaVinci Resolve | Color Grading & All-in-One Workflow | Industry-leading color correction/grading, integrated VFX (Fusion) and audio (Fairlight), powerful free version. | Freemium/One-time Purchase |
| CapCut | Beginners & Social Media | User-friendly interface, built-in templates and effects, auto-captioning, optimized for mobile video. | Free (with in-app purchases) |
Ultimately, the best software is the one that doesn't get in the way of your creativity. Once you've made your choice, you're ready to start building your story.
The Art of Pacing and Assembly
The first step in any edit is the "rough cut." This is where you lay out all your main footage (your A-roll) on the timeline in sequential order. Don't sweat the small stuff here—just get the core narrative structure down.
With the foundation in place, you can start refining the pacing. This is the heartbeat of your video, dictated by how long you hold on a shot before cutting to the next. Short, punchy cuts create energy and excitement, which works great for a high-energy promo. In contrast, letting a shot breathe with a longer duration can build suspense or give the viewer time to absorb important information.
A well-paced video just feels right. It pulls the viewer along without them even noticing. Lingering too long can cause boredom, while cutting too fast can create confusion. Your pacing should always serve the story.
This is also the perfect time to bring in your B-roll. This supplemental footage is your secret weapon for making edits invisible and adding visual interest. Did your interview subject stumble over a word? No problem. Just cut out the mistake and cover the jump with a relevant B-roll clip. The audience will never know.
Enhancing Your Visuals With Color
Color is an incredibly potent tool for setting the mood. This process usually involves two key stages: color correction and color grading.
- Color Correction: This is the technical fix. Your goal here is to make the footage look natural and consistent across all your clips. You'll be adjusting exposure, contrast, and white balance to make sure skin tones look right and a white wall actually looks white.
- Color Grading: This is the fun, creative part. After correcting your footage, you can apply a stylistic "look" to evoke a specific emotion. Think of the cool, desaturated blues in a sci-fi film or the warm, golden glow of a nostalgic home video. A tasteful grade is a hallmark of professional work.
Learning how to edit videos like a pro is about mastering these details to turn raw clips into a cohesive, engaging final product.
And the demand for that polish is undeniable. With a projected 3.65 billion people consuming video content by 2025 and 54% of consumers wanting to see more videos from brands, delivering high-quality content is no longer optional.
Adding Final Touches: Graphics and Sound
Your video is assembled and the color looks great. Now it's time for the finishing touches that tie everything together.
Adding simple, clean text and graphics can make a huge difference. A well-designed lower third that introduces a speaker or a subtle animated title sequence can instantly boost your video's professional feel. Remember, the goal is to support the content, not distract from it.
Finally, never underestimate the power of sound design. This is more than just making sure the dialogue is clear. It includes:
- Music: A carefully chosen music track can completely define the emotional tone of your video.
- Sound Effects (SFX): Small, subtle sounds—like a whoosh when text appears on screen—make the visual world feel more alive and dynamic.
Make sure to balance all your audio layers. Dialogue or voiceover should always be front and center, with music and sound effects tucked neatly underneath to support the mix without overwhelming it.
Working Smarter, Not Harder, with AI Tools
https://www.youtube.com/embed/tR2RCzEJn7w
You no longer need a Hollywood-sized budget or a massive crew to create a video that looks and sounds incredible. Artificial intelligence has completely changed the game, automating the tedious, repetitive work and giving creators powerful production tools that were once out of reach.
This isn't about replacing human creativity. It's about amplifying it. Think of AI as your tireless production assistant, handling the grunt work so you can focus on what really matters: your story.
This shift couldn't come at a better time. More and more businesses are bringing video production in-house to keep up with the constant demand for content. The numbers don't lie: with YouTube expected to hit 2.85 billion users by 2025, the appetite for high-quality video is only growing. Back in 2021, 50% of companies were already creating their own videos to maintain creative control and connect with their audience.
Kiss the Post-Production Grind Goodbye
One of the biggest time-sinks in video creation is post-production. This is where AI makes an immediate impact. Instead of manually scrubbing through hours of footage to find the best takes, smart tools can analyze your clips and pull the best moments for you, sometimes even assembling a rough cut based on your script.
It's also a lifesaver for tasks like creating subtitles. Need to know how to transcribe MP4 to text? AI-powered services can do it in minutes, a job that used to take hours of painstaking manual typing. This makes your videos more accessible and gives your SEO a nice boost.
Here are a few other ways AI is reshaping the editing workflow:
- Smart Clip Selection: AI can scan your footage for technical quality, like focus and stability, and even identify specific actions or emotions, flagging the most usable clips.
- Automatic B-Roll: Some platforms can read your script and automatically suggest relevant B-roll or stock footage to visually support your story.
- Custom Music on Demand: Forget endlessly searching stock music libraries. Just describe the mood and tempo you want, and AI can generate a unique, royalty-free track tailored to your video.
Dialing Up Your Audio and Video Quality
Beyond just saving time, AI tools can seriously upgrade the technical quality of your final product. This is a huge help if you're working with footage shot in less-than-ideal conditions.
AI-powered audio enhancement is a game-changer. These tools can isolate dialogue, surgically remove background noise, and even kill room echo with a single click. Suddenly, a recording from your home office can sound like it was captured in a professional studio.
The same magic applies to your visuals. Got some older, low-resolution footage you want to use? AI upscaling can intelligently increase the resolution, making it look sharp and crisp on a modern 4K screen. It analyzes the existing pixels and smartly generates new ones to fill in the detail, giving new life to archival clips or salvaging a shot that wasn't perfect.
Platforms like Auralume AI are bringing many of these tools together under one roof, letting you generate cinematic clips from a text prompt or upscale your existing videos. By weaving AI into your process, you gain a massive advantage, creating professional-grade videos faster and more efficiently than ever before.
Frequently Asked Questions
When you first dive into making videos, it feels like a new question pops up every minute. Let's tackle some of the most common ones I hear from creators, with some straight-to-the-point advice to get you on the right track.
What’s the Single Most Important Thing for a Professional-Looking Video?
You might think it’s the crystal-clear visuals, but ask any veteran filmmaker, and they’ll tell you the same thing: high-quality audio is the real secret sauce.
Viewers are surprisingly unforgiving when it comes to bad sound. If they hear distracting background noise, a hollow echo, or muffled voices, they’re gone. A shaky shot might be artistic, but bad audio just feels cheap and makes it hard to follow along.
Clear, crisp sound instantly makes you seem more credible and professional. Seriously, spending a few bucks on a basic lavalier mic for your phone will give you a bigger leap in quality than buying a new camera. Treat your sound just as seriously as you treat your visuals—it’s that important.
How Can I Get Better Lighting Without Buying Expensive Gear?
Good news: you don't need to drop a ton of cash on a pro lighting kit. The best, most powerful light source you have is totally free. It’s the sun.
There's a reason the pros love it. Just place your subject so they’re facing a big window. This gives you beautiful, soft, and flattering light that wraps around the face and gets rid of harsh shadows. The one thing to avoid at all costs is shooting with a bright window behind your subject. This backlight will completely fool your camera, turning the person into a featureless silhouette.
If you're stuck filming at night or in a room without windows, get creative with regular household lamps. Don’t point them directly at the subject. Instead, bounce the light off a white wall or ceiling, or even hang a white bedsheet (at a safe distance!) in front of the lamp to create a DIY softbox. The goal is always soft, even light.
What Are the Biggest Editing Mistakes Beginners Make?
A few classic editing blunders can scream "amateur." Just keeping these in mind will make your final video feel ten times more polished.
- Awkward Jump Cuts: Chopping up an interview in the middle of a sentence is jarring. Instead of just deleting the "um" or mistake, cover the cut with B-roll footage or switch to another camera angle. It's a simple trick that makes the edit invisible.
- Bad Audio Levels: Your background music should set a mood, not fight for attention. A huge rookie mistake is having the music so loud that you can't hear the person speaking. The main dialogue should always be king.
- Clashing Colors: When you stitch together clips filmed at different times or places, the colors can look all over the place. Take a minute to use your editing software's basic color correction tools to make sure the white balance, exposure, and contrast match from shot to shot. It creates a much more cohesive, professional feel.
Do I Really Need a 4K Camera?
Nope. Not even close. While 4K gives you more pixels to play with for cropping or reframing later, this is a point I can't stress enough: a well-shot 1080p video will always look better than a poorly shot 4K video.
Things like good lighting, solid composition, a steady shot (please use a tripod!), and clean audio matter so much more than resolution. Most smartphones today shoot incredible 1080p video that’s perfect for YouTube, TikTok, or even corporate work. Get the fundamentals right with the gear you already own before you even think about upgrading to 4K.
Ready to bring your ideas to life with stunning visuals in seconds? Auralume AI is an all-in-one AI platform that turns your text prompts and images into cinematic video clips, giving you access to the world's best models in one place. Start creating your professional-looking videos today.