
Video Best Format: Master Containers, Codecs, and Exports (video best format)
If you're looking for the single best video format, I have to break it to you: there isn't one. The right choice is all about what you plan to do with the video. Are you uploading it to YouTube? Editing a high-end film project? Or maybe just archiving precious family memories?
The best format is always a careful balance of two things that work together: the container and the codec. Let's break that down.
So, What Is a Video Format, Really?

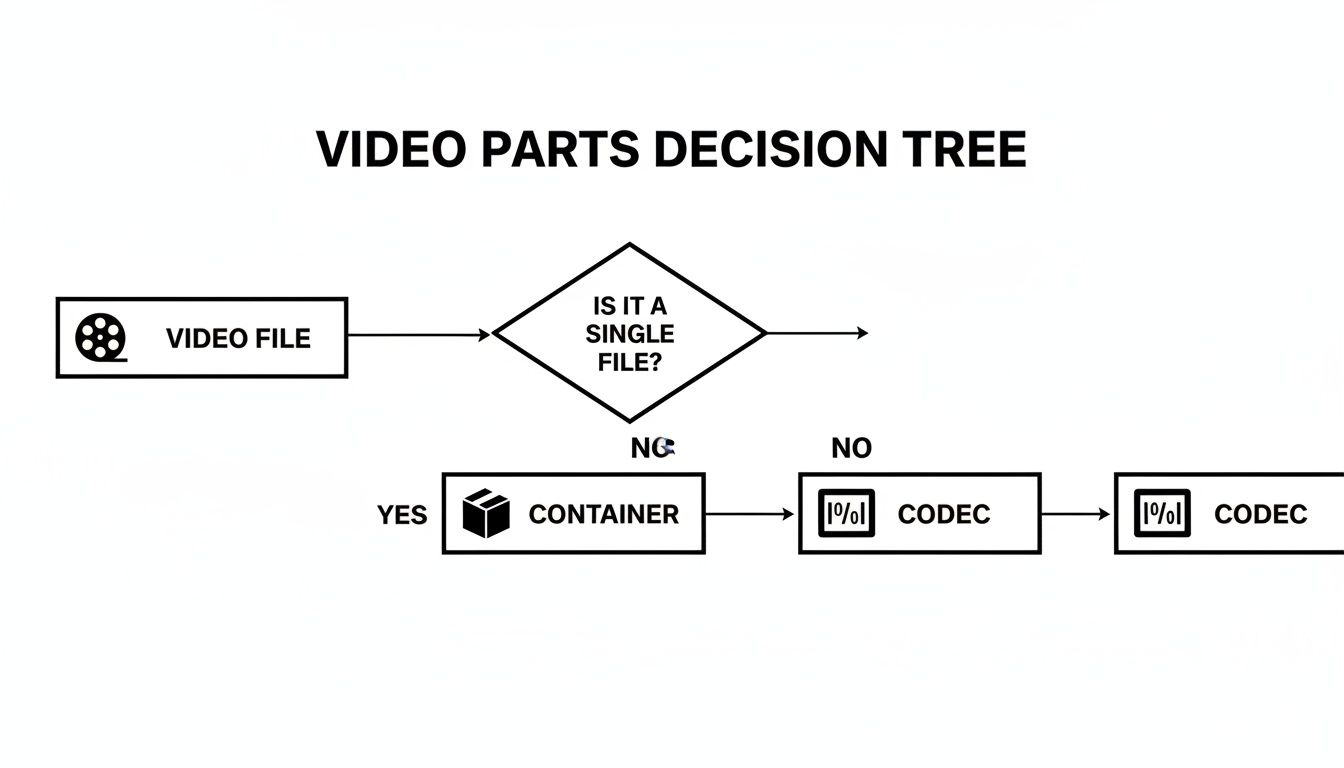
Most people think of a video format as the file extension, like .mp4 or .mov. That's part of the picture, but it's not the whole story. It's much more helpful to think of a video file as a package deal with two distinct parts.
Getting a handle on how these two parts interact is the first real step toward mastering your video exports for any situation.
- The Container: This is the file type you see (MP4, MOV, AVI). Think of it like a shipping box. It doesn't change what's inside, but it holds all the pieces together—the video, the audio, and extra data like subtitles or chapter markers. The container dictates compatibility.
- The Codec: This is the software that compresses (and decompresses) the video data to make it a manageable size. Raw video files are enormous, and the codec is what shrinks them down for streaming or sharing. This directly affects both file size and visual quality. Common codecs include H.264, HEVC (H.265), and ProRes.
The Container and Codec Partnership
Let's stick with that shipping box analogy. The container is the cardboard box itself—say, an MP4. The codec is how you fold up the contents to make them fit inside. For web streaming, you'd want to fold it very efficiently, which is what the H.264 codec does.
But if you were sending delicate, high-end materials to a professional editor, you might use a sturdier box (an MOV container) and fold the contents less aggressively to preserve every single detail (using the ProRes codec).
The gold standard for most everyday uses is the MP4 container packed with the H.264 codec. This combo gives you a fantastic blend of high quality, small file sizes, and playback compatibility on just about every device, browser, and social media platform out there.
To help you get started, here’s a quick-glance table comparing the most common formats and where they shine. We'll dig deeper into the specifics later, but this should help you find the best video format for your immediate needs.
Common Video Formats and Their Best Uses at a Glance
| Container | Common Codecs | Best For | Key Benefit |
|---|---|---|---|
| MP4 | H.264, HEVC (H.265) | Web streaming, social media, general use | Universal compatibility & great compression |
| MOV | ProRes, H.264 | Professional video editing (macOS) | High-quality, edit-friendly data |
| AVI | DivX, XviD | Older Windows-based editing, archival | High quality (often uncompressed) |
| MKV | Various (open source) | Storing movies with multiple audio/subtitle tracks | Extreme flexibility and features |
As you can see, the "best" format is always the one that fits your specific workflow, from shooting and editing all the way to final delivery.
Containers vs. Codecs: A Practical Guide
To really nail down the best video format for your project, you first have to understand that a video file isn't just one thing. It's actually a team effort between two key pieces of technology: a container and a codec. Once you get how these two work together, you'll be able to create videos that not only look fantastic but also have manageable file sizes and play flawlessly wherever you need them to.
Think of it like shipping a fragile painting. The container is the crate you put it in. It could be a standard cardboard box (.mp4), a heavy-duty wooden crate (.mov), or a custom-built case with special compartments (.mkv). The crate itself doesn't change the painting, it just holds everything together so it can get from point A to point B. And just like in the real world, some galleries (or platforms) will only accept certain types of crates.
The codec, on the other hand, is how you pack the painting inside that crate. Did you roll it up to make it smaller? Or did you keep it flat, surrounded by protective foam? That's what a codec does—it compresses your video and audio data. This decision is a direct trade-off that affects both the final quality (how pristine the painting looks) and the file size (how big and heavy the crate is).
So, What's a Video Container?
The container is what you see as the file extension—that .mp4 or .mov at the end of a filename. Its main job is to bundle all the different parts of your video into one neat, organized package.
It’s basically a digital binder that keeps multiple data streams perfectly in sync:
- The Video Track: All the visual data that creates the moving image.
- The Audio Track(s): The sound, whether it's dialogue, music, or effects. Some containers, like MKV, are great because they can hold several audio tracks for different languages.
- Metadata: All the extra stuff, like subtitles, chapter markers, a thumbnail image, and other technical info.
The container you choose determines which codecs you can use and what special features are available. MP4, for instance, is the universal standard—it plays on just about everything, making it a go-to for the web and social media. On the other hand, MOV, an Apple creation, is a favorite in professional editing circles because it plays nicely with high-quality codecs like ProRes.
Key Takeaway: The container is just the wrapper. It dictates where your video can play, but it doesn't control the visual quality. It's simply holding the compressed data inside.
And What's a Codec?
If the container is the box, the codec (short for coder-decoder) is the magic that shrinks your massive raw video files into something you can actually use. Without codecs, a 4K movie would eat up terabytes of space, making it completely impossible to stream or even download. A codec compresses the data for storage and then decompresses it when you hit play.
Choosing a codec always comes down to a balancing act between three things:
- Quality: How much detail is kept from the original footage.
- File Size: How much space the final video takes up.
- Processing Power: How hard your computer or phone has to work to play it back.
This is exactly why we have so many different codecs. H.264 (AVC) is the king of the internet for a reason—it strikes an amazing balance between great quality and small file sizes, making it perfect for YouTube and TikTok. Its newer cousin, HEVC (H.265), is even more efficient, delivering the same quality at roughly 50% smaller file sizes. The catch? It needs a more powerful, modern device to decode it smoothly.
This whole idea of packaging digital information isn't just a video thing. To get a broader perspective, it's helpful to look at how audio file formats and digital containers follow very similar principles. At the end of the day, creating the perfect video is all about pairing the right codec with the right container for the job at hand.
Choosing the Right Video Format for Each Platform
Now that we’ve untangled the difference between a container and a codec, it’s time for the practical stuff. Picking the best video format isn't just a technical box-ticking exercise; it's about matching your video's DNA to the environment where it will live. Different platforms have their own rules and quirks, and choosing the right settings from the start is the key to making your content look sharp, load fast, and play without a single glitch.
Think of it like this: every video file you create involves two fundamental choices. You have to pick the "box" it comes in (the container) and the "language" it speaks (the codec).
Getting this combination right is what separates a smooth, professional-looking video from a pixelated, buffering mess. Let's break down the winning formulas for the places your videos are most likely to end up.
Best Format for Social Media Platforms
When you're posting to the fast-paced worlds of TikTok, Instagram, and YouTube, speed and compatibility are the name of the game. These platforms are going to re-compress your video no matter what you upload, so your job is to give their algorithms a pristine source file to work from.
For this universe, the MP4 container with an H.264 codec is the undisputed champion. It’s the closest thing we have to a universal language in video—it just works, everywhere. This combination keeps file sizes manageable for quick uploads and ensures smooth playback, even for viewers on spotty mobile connections.
- Container: Stick with MP4. It's the required standard across the board for a reason.
- Codec: H.264 (AVC) hits the sweet spot between quality and file size. While newer codecs are technically more efficient, H.264 offers rock-solid reliability that can't be beaten.
- Audio Codec: AAC is the perfect partner for H.264 video within an MP4 container.
Short-form video is king on these apps. In fact, a huge 29.18% of marketers now consider it their primary format, showing just how much the landscape has shifted. If you want to dig deeper into this trend, check out the key insights from HubSpot's 2025 marketing report.
Best Format for Online Streaming Services
For longer videos on platforms like YouTube and Vimeo, you can shift your focus more toward quality. These sites are built to handle bigger, more detailed files and give viewers the option to stream in high resolutions. While the trusty MP4/H.264 combo is still a great choice, you’ve got a little more room to play.
Pro Tip: Always upload the highest quality version of your video you can. YouTube and Vimeo will automatically create smaller, lower-quality versions for viewers on slower connections, but they can't magically add detail that wasn't in your original file to begin with.
Here’s what to aim for on these platforms:
- Container: MP4 is still the top recommendation for its fantastic compatibility and streaming performance.
- Codec: H.264 remains the reliable workhorse. But, if you're uploading 4K or HDR footage, it's worth considering H.265 (HEVC). It delivers quality that's just as good (or better) than H.264 but in a much smaller file size, which can seriously cut down your upload times.
- Resolution: Export and upload at the native resolution you edited in, whether that’s 1080p (1920x1080) or 4K (3840x2160).
Best Format for Professional Workflows
Inside a professional workflow—from the edit suite to the archive server—the priorities change completely. Here, we're all about preserving every last drop of image quality and maintaining flexibility for color grading, visual effects, and any future edits. Gigantic file sizes and limited playback compatibility are trade-offs we're willing to make.
For Video Editing
During the edit, your computer needs to be able to access and manipulate video frames instantly without getting bogged down. This is where "intermediate" or "mezzanine" codecs come in. They are designed for performance, not small file sizes.
- Container: The MOV container is a post-production staple, especially if you're in the Apple ecosystem. It was built from the ground up to handle high-bitrate, edit-friendly codecs.
- Codec: Apple ProRes is the undisputed king of the editing world. It uses very light compression, preserving incredible detail and color depth, which is an absolute must for serious color grading. For PC-based editors, Avid DNxHD is the equivalent high-performance codec.
For Archiving and Storage
When a project is finished, you need to archive it in a format that ensures it will look just as good in ten years as it does today. This is about creating a perfect digital master copy that can withstand the test of time.
- Container: Both MOV and MXF (Material Exchange Format) are excellent for archival. MXF is a robust, professional-grade container you'll often find in broadcast environments.
- Codec: For a true "digital negative," ProRes 4444 XQ is a fantastic choice. For ultimate preservation, a lossless codec like FFV1 captures every single bit of data from your master file. The files are enormous, but you can rest easy knowing nothing has been lost.
Mastering Your Export Settings for Flawless Quality
Picking the right container and codec gets you most of the way there, but your export settings are where the magic really happens. This is your final chance to dial in the quality, sharpness, and smoothness of your video, making sure it looks just as good on someone else's screen as it does on yours.

Moving beyond the default presets gives you total control. Let's break down the three pillars that define your video's quality: bitrate, resolution, and frame rate.
What is Video Bitrate?
Think of bitrate as the amount of data you're packing into every second of video. The more data (a higher bitrate), the more detail, richer colors, and sharper the image will be, especially in scenes with a ton of movement. The trade-off? A much larger file.
A lower bitrate creates a smaller, more manageable file that’s easier to upload and stream. But if you push it too low, you’ll start to see those ugly compression artifacts—think blocky, pixelated messes where smooth gradients should be.
Your editing software will usually offer two ways to handle this:
- Constant Bitrate (CBR): This is the simple approach. It applies the same amount of data to every single second of your video, from a static talking head to a chaotic action sequence. It’s predictable but not very efficient.
- Variable Bitrate (VBR): For almost any online video, this is the way to go. VBR is smart—it allocates more data to complex, high-motion scenes that need it and less to simple, static shots. This gives you the best of both worlds: great quality where it counts and a smaller overall file size.
Choosing the Right Resolution
Resolution is simply how many pixels make up the frame of your video, usually shown as width by height. More pixels mean a sharper, more detailed picture. The two you’ll see most often are 1080p (1920x1080) and 4K (3840x2160).
For most things you post online, 1080p is still the sweet spot, giving you fantastic quality without creating a massive file. That said, exporting in 4K, even if you’re uploading to a 1080p platform like Instagram, can produce a noticeably crisper final video. You're giving the platform's compression algorithm much more information to work with, which often leads to a better-looking result after it’s been processed.
A good rule of thumb is to always export at your project's native resolution. If you shot and edited in 4K, export in 4K. Downscaling during your export throws away detail you can never get back.
Setting the Ideal Frame Rate
Frame rate, measured in frames per second (FPS), is what gives your video its sense of motion. It’s literally the number of still images flashed on the screen every second.
You’ll typically work with one of three standards:
- 24 FPS: The classic cinematic look. This is what gives movies that signature motion blur and feel. It's perfect for narrative pieces or anything you want to feel more dramatic and film-like.
- 30 FPS: This is the standard for TV broadcasts and most general online content. It provides a clean, smooth motion that looks natural for everything from vlogs and tutorials to corporate marketing videos.
- 60 FPS: Need to capture fast action or create buttery-smooth slow motion? 60 FPS is your friend. It’s ideal for sports, video game footage, and any scene where clarity during rapid movement is key.
Knowing the specific requirements for different platforms is also crucial. For social media, for instance, you'll want to consult a guide on Facebook video ad sizes and dimensions to get every detail right.
And don't forget the audio! Pairing your video with the AAC (Advanced Audio Coding) codec at a bitrate of 192-320 kbps will ensure your sound is just as clear and crisp as your visuals.
Common Video Format Problems and How to Fix Them
We’ve all been there. You export a video that looks perfect on your computer, but the moment you upload it, things go haywire. The image is suddenly pixelated, the audio is out of sync, or the platform flat-out refuses to play it. These technical glitches are frustratingly common, but the good news is they usually have simple fixes.
Think of this section as your troubleshooting toolkit. We'll break down the most frequent video playback issues and walk through exactly how to solve them, getting your content back to looking and sounding the way you intended.
Why Your Video Looks Blurry or Pixelated
This is probably the number one complaint I hear from creators. Your video is crystal clear on your desktop, but looks like a blocky mess after uploading to Instagram or YouTube. The problem almost always boils down to two things: bitrate or resolution.
Social media platforms are ruthless with compression. To save on server space and ensure everyone can stream content smoothly, they re-compress every single video that gets uploaded. If the file you give them already has a low bitrate, their compression algorithm has very little data to work with, and it crushes what's left, leaving you with that dreaded pixelated look.
The Fix:
- Pump Up the Bitrate: When you export, don't be shy. Use a Variable Bitrate (VBR) and set your target well above the platform's minimum recommendation. Giving their algorithm more data to chew on results in a much cleaner final product.
- Trick the Algorithm with Higher Resolution: This is a fantastic pro-tip. Even if your final video will be viewed at 1080p, exporting and uploading it in 4K often nudges the platform into using a higher-quality compression profile, which preserves a surprising amount of detail.
Key Insight: You can't stop platforms from re-compressing your video, but you can give their algorithms a much better starting point. Always feed them the highest quality source file you possibly can to minimize the damage.
Solving File Size and Conversion Headaches
The other major hurdle is dealing with a video file that's just too massive to upload or is in a format a particular website won't accept. You need to get that file size down or switch its container, all without sacrificing the quality you spent hours perfecting.
The Fix:
- Switch to a More Efficient Codec: If you initially exported with an older or less common codec, simply re-exporting using H.264 or H.265 (HEVC) will make a huge difference. HEVC is a powerhouse for efficiency, often creating files up to 50% smaller than H.264 with nearly identical visual quality.
- Use a Dedicated Conversion Tool: Sometimes you just need a quick fix without having to re-open your entire editing project. This is where a free tool like HandBrake is a lifesaver. It lets you quickly convert your video into a web-friendly MP4/H.264 format and gives you precise control over the final file size and quality.
Got Questions About Video Formats? We've Got Answers.
Even with the basics down, you probably still have a few questions rattling around. That’s perfectly normal. Let's dig into some of the most common things creators ask so you can lock in your workflow with total confidence.
What's the Absolute Best Format for Pure Quality?
If we're talking about jaw-dropping, no-compromises quality where file size is no object, then you need to look beyond the usual web formats. Your standard MP4 with an H.264 codec is a "lossy" format. It's brilliant for streaming because it intelligently throws away some data to keep files small, but it's not the top of the quality mountain.
For pure, unadulterated video, you need a lossless or "visually lossless" codec.
- Apple ProRes: This isn't a single codec but a whole family (like ProRes 422 HQ or the beefier ProRes 4444). It’s the gold standard for professional editing, holding onto incredible detail and color information that's essential for heavy color grading.
- Avid DNxHD: Think of this as the PC world's answer to ProRes. It delivers the same high-quality, post-production-friendly performance for Windows-based workflows.
- Uncompressed: This is the absolute peak. It captures every last bit of data, but the files are monstrous. We're talking astronomically large, making them impractical for anything short of high-end visual effects or archival purposes.
For almost any professional project, ProRes inside a MOV container is the winning combination for keeping quality maxed out during production and editing.
Can I Change a Video's Format Without Losing Quality?
Yes, but there's a huge catch. It all depends on how you change it. You need to know the difference between transcoding and remuxing.
Transcoding is the process of decompressing your video, changing something fundamental (like the codec or bitrate), and then squishing it back down. Every single time you transcode from one lossy format to another, you lose a bit of quality. Think of it like making a photocopy of a photocopy—each new version gets a little blurrier.
Remuxing, however, is a different beast entirely. It's like taking the video and audio streams out of one box (the container) and simply placing them in a new one. For instance, if you move an H.264 video stream from an MKV container to an MP4 container, you can do it with zero quality loss because the video data itself was never touched.
So Why Is MP4 So Unbelievably Popular?
Simple. MP4’s massive popularity comes down to hitting a perfect trifecta: great quality, small file sizes, and universal compatibility. It’s the "just right" format that serves the needs of almost everyone, online and off.
It became the default for a very good reason: it just works. Everywhere. Your phone, your smart TV, your web browser, every social media app—they all play MP4s without a second thought. This incredible compatibility, powered by the super-efficient H.264 codec, makes it the most dependable and surefire way to share your videos with the world.
Turn your creative concepts into stunning visuals in seconds with Auralume AI. By combining leading AI video models with intuitive tools like our Prompt Wizard and Video Upscaler, we make it simple for anyone to produce cinematic-quality content. Explore the future of video creation at https://auralumeai.com.