How to Add Motion to Photos A Modern Creator's Guide
Adding motion to photos is one of the best ways I've found to make my static images feel alive and stop people from scrolling. It's about taking a beautiful, flat picture and breathing life into it, whether that's the subtle steam rising from a coffee cup or a dramatic camera pull-out that reveals a wider scene. This isn't just for video pros anymore—it's a game-changer for everyone.
Why Animated Photos Are Your New Secret Weapon

Let's get past the obvious. We all know moving visuals grab more eyeballs than static ones. The real magic, though, is how that motion completely transforms the story you're telling. An animated photo doesn’t just show a moment; it pulls the viewer into that moment, creating a much stronger connection and making them feel something.
Telling Bigger Stories with Small Movements
Think about a real estate agent’s photo of a gorgeous home. A static shot is fine, but what if a subtle lens flare swept across the living room? Suddenly, the space feels warm and inviting. Or imagine a coffee shop making its latte art swirl gently—that simple product shot just became a cozy, sensory experience.
These tiny details build layers of context and emotion that a still photograph can't quite capture on its own. It's this ability to tell a richer, more complete story that makes animated photos so incredibly effective. They perfectly bridge the gap between photography and video, giving you the best of both worlds.
Accessible and Cost-Effective Creation
Just a few years ago, creating this kind of effect meant wrestling with complex software and having a serious budget. Today, things are completely different. What was once a high-end trick is now a go-to content strategy, largely because the animation market is exploding—it's projected to hit USD 953.31 billion by 2035.
This massive growth is fueled by the demand for video-like content without the crazy production costs. A single minute of traditional animation can run into the thousands. Thankfully, new AI-powered tools have opened the door for everyone, allowing you to create professional-looking motion in seconds. To get the most out of these creations, it's smart to explore some viral video marketing strategies for photography. You can also dive deeper into the animation market's growth trends at Market.us.
Strategic Benefits of Animating Your Photos
Turning your static images into dynamic visuals isn't just a cool creative trick; it's a strategic move. Here’s a quick breakdown of how it pays off in both marketing and storytelling.
| Benefit | Impact on Marketing | Impact on Creative Storytelling |
|---|---|---|
| Increased Engagement | Stops the scroll on social feeds, leading to higher likes, shares, and comments. | Captures attention instantly, allowing the narrative to unfold more effectively. |
| Higher Memorability | Dynamic visuals are processed more deeply by the brain, making your brand stick. | Creates a lasting emotional imprint that makes the story more impactful. |
| Versatile Content | Repurpose one photo into multiple assets for different platforms (Reels, Stories, ads). | Allows for richer scene-setting and mood establishment without a full video shoot. |
Ultimately, animating your photos is an efficient way to elevate your content, making it work harder for you across every channel.
Creating Subtle Magic with Cinemagraphs
Cinemagraphs are where photography and video collide in the most captivating way. Instead of making the whole scene move, you isolate a single, mesmerizing loop of motion inside a photo that’s otherwise completely frozen. This little trick can transform a static image into a piece of living art, pulling the viewer's eye right where you want it.
The effect is subtle but incredibly powerful. Imagine steam gently rising from a coffee cup while the rest of the cafe is still, or one candle flame flickering on a birthday cake. This focused motion adds a layer of sophistication and mystery that feels almost magical, making your content impossible to ignore in a busy feed.
Choosing Your Perfect Source Video
The secret to a killer cinemagraph starts with the right video clip. You can't just grab any footage and hope for the best—you have to be intentional. The number one rule is stability. This is why shooting on a tripod is absolutely essential. The tiniest camera shake will instantly shatter the illusion.
You're hunting for scenes with a clear, repeatable motion that can loop without anyone noticing. Here are a few ideas to get you started:
- Flowing water: Think waterfalls, rivers, or even rain trickling down a window.
- Gentle breezes: A flag waving, someone's hair blowing, or leaves rustling on a tree.
- Atmospheric effects: Rising steam, swirling smoke, or flickering city lights.
The whole point is to find a natural movement that can be stitched together end-to-end without a jarring jump.
"The most successful cinemagraphs feel like a captured breath—a moment suspended in time, except for one small, perfect detail. The secret is finding a natural rhythm in the world and isolating it."
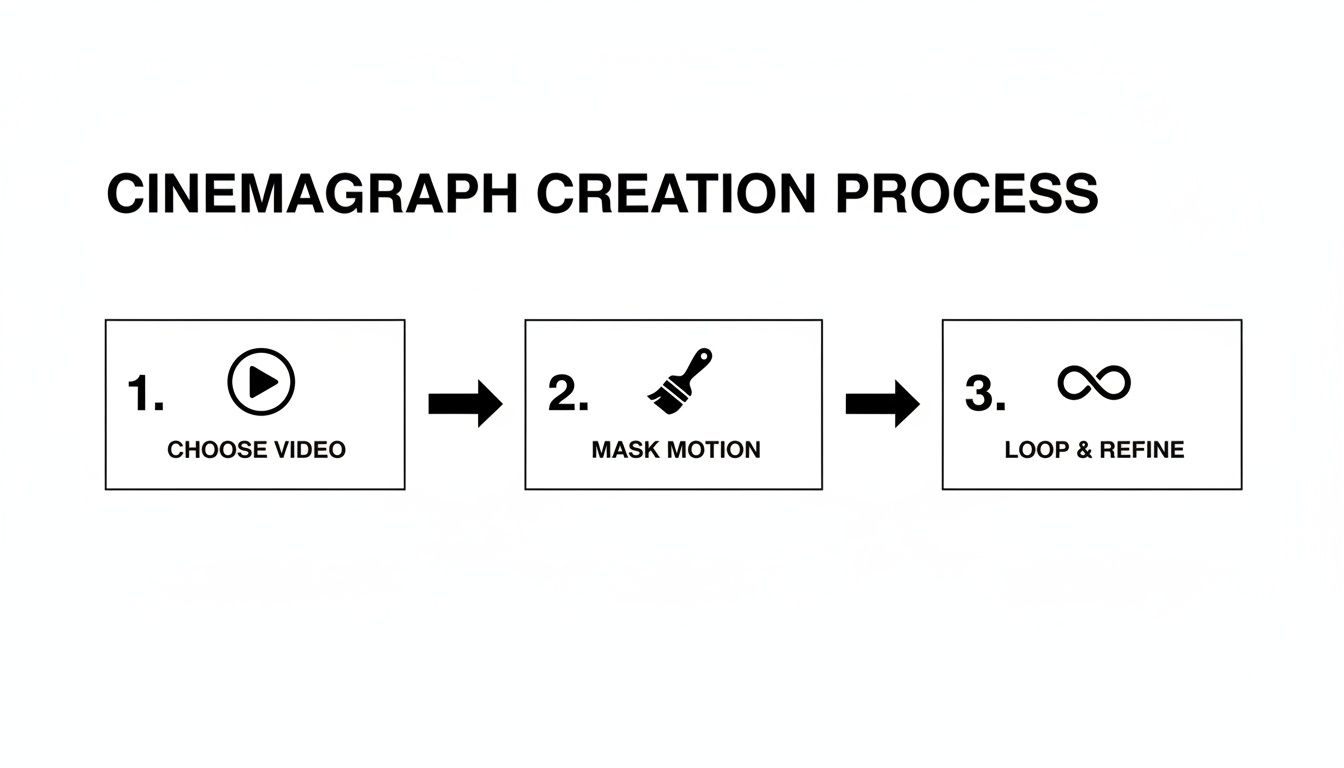
The Art of Masking and Looping
Got your steady video clip? Now for the fun part. The core of the technique is creating a "mask" to tell your software which part of the image gets to move. You’ll essentially paint over the area you want to animate, while everything outside that mask stays perfectly still. So, for a waterfall shot, you'd carefully mask out just the water itself.
Nailing the loop is the last, and most critical, step. This means trimming your video clip so the last frame transitions flawlessly back to the first. Many tools have features like "crossfading" or "blending" to help smooth this out, so you don’t get a harsh, obvious cut. To truly master this, understanding some pro strategies for converting video to animated GIF is a huge help for creating that subtle, endlessly repeating motion. After all, a seamless loop is what sells the entire effect.
Building Immersive Worlds with the Parallax Effect
Where a cinemagraph freezes most of the frame to isolate one movement, the parallax effect does the complete opposite. It breathes life into the entire image, making it feel like you're moving through a three-dimensional space.
This technique, often called 2.5D animation, creates a really impressive illusion of depth. It works by slicing your photo into different layers—foreground, subject, background—and then moving them at slightly different speeds. Think about looking out a car window: the trees right by the road fly past, while the mountains in the distance barely seem to move. That's parallax.
The result is a dynamic, almost cinematic shot that pulls the viewer right into the scene. It's a fantastic choice for landscape photos, portraits with a distinct foreground and background, or any image where you want to evoke a real sense of scale. This is how you add motion to photos in a way that feels like an actual camera move.
Preparing Your Image for Depth
A convincing parallax effect is built on a foundation of careful prep work. The first—and most important—job is to separate your main subject from its background cleanly. I can't stress this enough: the quality of your final animation depends almost entirely on how well you create these layers.
Modern tools with smart selection features, like Adobe Photoshop's "Select Subject" or other AI-powered background removers, can give you a massive head start. That said, I've found they rarely get it perfect on the first try. You'll almost always need to jump in and refine the edges manually. I usually spend a good bit of time with a soft brush on a layer mask, perfecting tricky areas like hair or fuzzy edges to avoid that harsh, "cutout" look.
My go-to trick: After you've lifted your subject onto its own layer, you're left with a hole in the background. Use Photoshop's "Content-Aware Fill" to intelligently patch that empty space. This gives you a complete, uninterrupted background, allowing you to pan or zoom your virtual camera without revealing any blank pixels behind your subject.
Layering and Animating for a 3D Feel
With your subject and background on separate layers, you can finally start animating. In a program like Adobe After Effects, you'll switch your workspace to 3D and physically push the layers apart in Z-space. By moving the subject layer a little closer to the "camera" and the background layer further away, you establish that initial sense of depth.
Now, you introduce a virtual camera and start animating its movement. Even a slow, subtle pan from left to right or a gentle push-in will make the layers drift at different rates, producing that classic parallax motion.
To really sell the effect and make it feel truly immersive, think about adding even more layers.
- Mid-ground elements: Is there anything between your subject and the far-off background, like a tree or a building? Put it on its own layer.
- Foreground details: Adding something close to the lens—like out-of-focus leaves, falling snow, or a lens flare—dramatically enhances the feeling of depth.
- Atmospheric touches: I love adding subtle elements like floating dust motes or a light haze on a separate layer. It’s these little details that make a scene feel alive.
The core process—choosing your source, isolating the parts you want to move, and then refining the animation—is a fundamental skill in this creative space.
This workflow shares the same basic principles as building a parallax effect. Both techniques rely on carefully isolating elements. Every deliberate camera pan or subtle animation helps transform a flat, static image into a much more immersive world.
Turning Still Photos into Moving Stories with AI
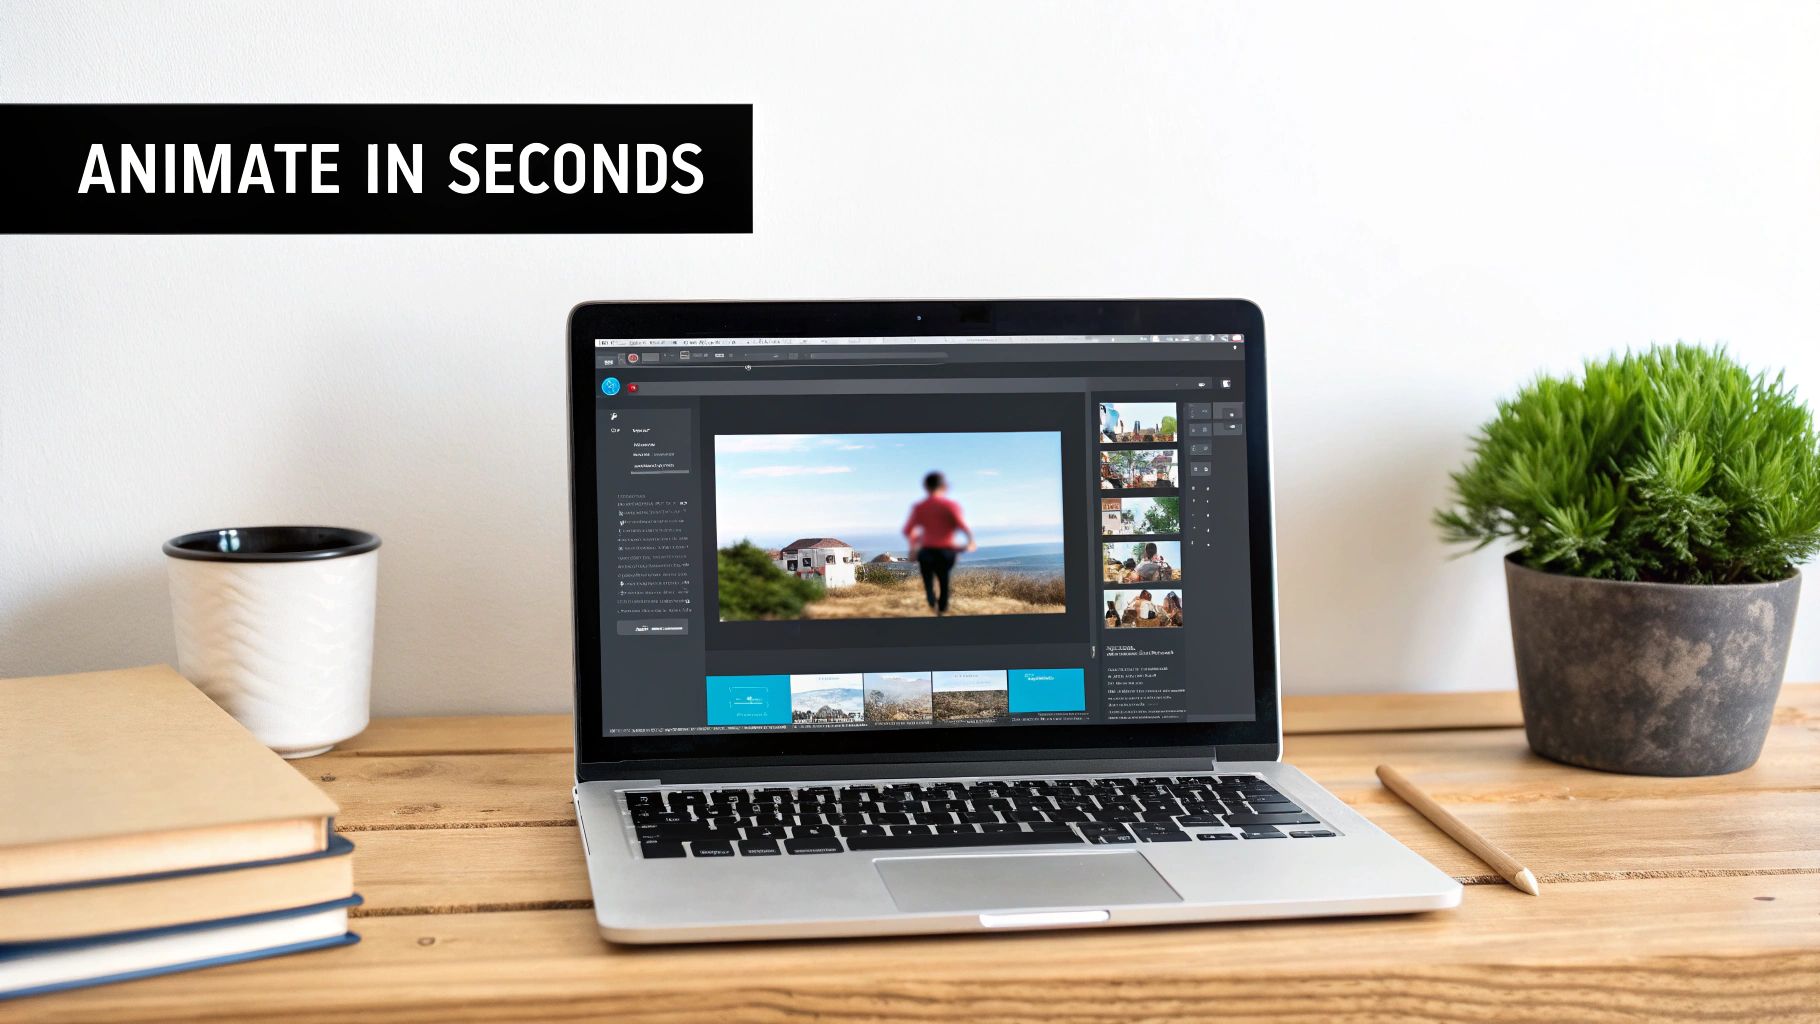
While the hands-on control of creating a cinemagraph or a parallax effect is rewarding, it's also time-consuming. What if you could get stunning results in just a few clicks? That's where AI video generation tools come in, and frankly, they've changed everything.
Instead of meticulously masking layers or trying to get a perfect loop, you can now upload a static image and simply describe the motion you envision. The AI takes your text prompt and brings the photo to life, generating everything from subtle camera pans to complex depth effects automatically.
This isn't just a niche trend; it's a massive shift in how we create. The market for generative AI in animation is projected to explode from USD 652.1 million in 2024 to an incredible USD 13.39 billion by 2033. Why? Because creators are ditching tedious keyframing for simple, intuitive text commands. You can dig into the numbers in the full generative AI in animation market report.
From Simple Prompts to Cinematic Results
The beauty of using AI is how quick and intuitive it can be. You don't need a background in animation to create something that looks professionally done. The real skill is learning how to communicate your vision to the AI through clear, descriptive prompts.
Here are a few examples of prompts I've used that worked really well:
- For a portrait: "Cinematic slow zoom in on the subject, subtle wind blowing through her hair."
- For a landscape: "Gentle forward dolly shot, clouds drifting slowly across the sky."
- For an object: "Subtle steam rising from the coffee cup, soft focus pull to the background."
See how specific those are? Using words like "cinematic," "subtle," and "gentle" helps the AI understand the mood you're going for, not just the action. The more vivid your language, the more believable the final animation will be.
A great prompt doesn't just tell the AI what to do; it tells the AI how to feel. The more specific and evocative your language, the more nuanced and believable the final motion will be.
Choosing the Right AI Engine for Your Image
Not all AI models are created equal. Some are fantastic at realistic camera movements, while others excel at animating natural elements like fire or water. This is why having access to multiple models under one roof is a game-changer.
A platform like Auralume AI is a great example. It brings together several of the top video generation models—like Sora, Pika, and Kling—into a single, easy-to-use interface. This lets you upload your photo, write one prompt, and see how different engines interpret it.
You might find one model nails the smooth pan you wanted while another creates more realistic-looking clouds. This flexibility lets you match the right technology to your specific image, giving you total creative freedom without the technical headache. You can check out the Auralume AI platform to see how it works.
Getting Your Animated Photos Out Into the World: Export and Upscaling Tips
You’ve brought your photo to life and created something stunning. But the job is only half done. Now comes the critical part: getting that animation out into the world looking just as good as it did on your screen. Exporting isn't just a technical step; it's the final bridge between your creative work and how your audience actually sees it.
The wrong settings can absolutely crush your animation, turning a crisp, beautiful piece into a blurry, compressed mess. This is especially true on social media platforms, which are notorious for aggressively re-compressing video to save their own bandwidth. To get ahead of this, you need a smart export strategy that's tailored for where you plan to share your work.
MP4 vs. GIF: Why There’s Only One Real Choice
The first decision you'll face is the file format. While GIFs have a certain nostalgic charm and loop automatically, they are an ancient technology with serious drawbacks. They're stuck with a tiny palette of only 256 colors, which is why they often look grainy and dated. They also create surprisingly large files for even short clips.
For pretty much any modern application, MP4 is the clear winner. It supports millions of colors, provides far better compression (meaning smaller file sizes for much higher quality), and it’s the native format for every social platform that matters. Your animated photos will simply look sharper, load faster, and play more smoothly as an MP4.
Platform-Specific Export Settings That Actually Work
To beat the dreaded social media compression, you have to play their game. By giving the algorithm a high-quality file that already meets its preferred specs, you minimize how much it has to re-process and degrade your video.
Here are my personal, field-tested settings for the most popular platforms:
- Instagram Reels & TikTok: These platforms are all about vertical video. Export your work in a 9:16 aspect ratio at a resolution of 1080x1920 pixels. I find that a bitrate between 10-15 Mbps is the sweet spot for maintaining quality without making the file too huge.
- YouTube Shorts: YouTube can handle a bit more data. I still stick with 1080x1920 pixels for Shorts, but I'll push the bitrate up to 15-20 Mbps to squeeze out every last drop of quality.
- Website Banners: For a website hero section, loading speed is king. An MP4 at 720p or 1080p with a bitrate around 5-8 Mbps usually strikes the perfect balance between looking good and not slowing down your site.
The goal is to hand the platform an almost-perfect file so its compression algorithm has less work to do. A high-quality source file is your best defense against a blurry, pixelated final result.
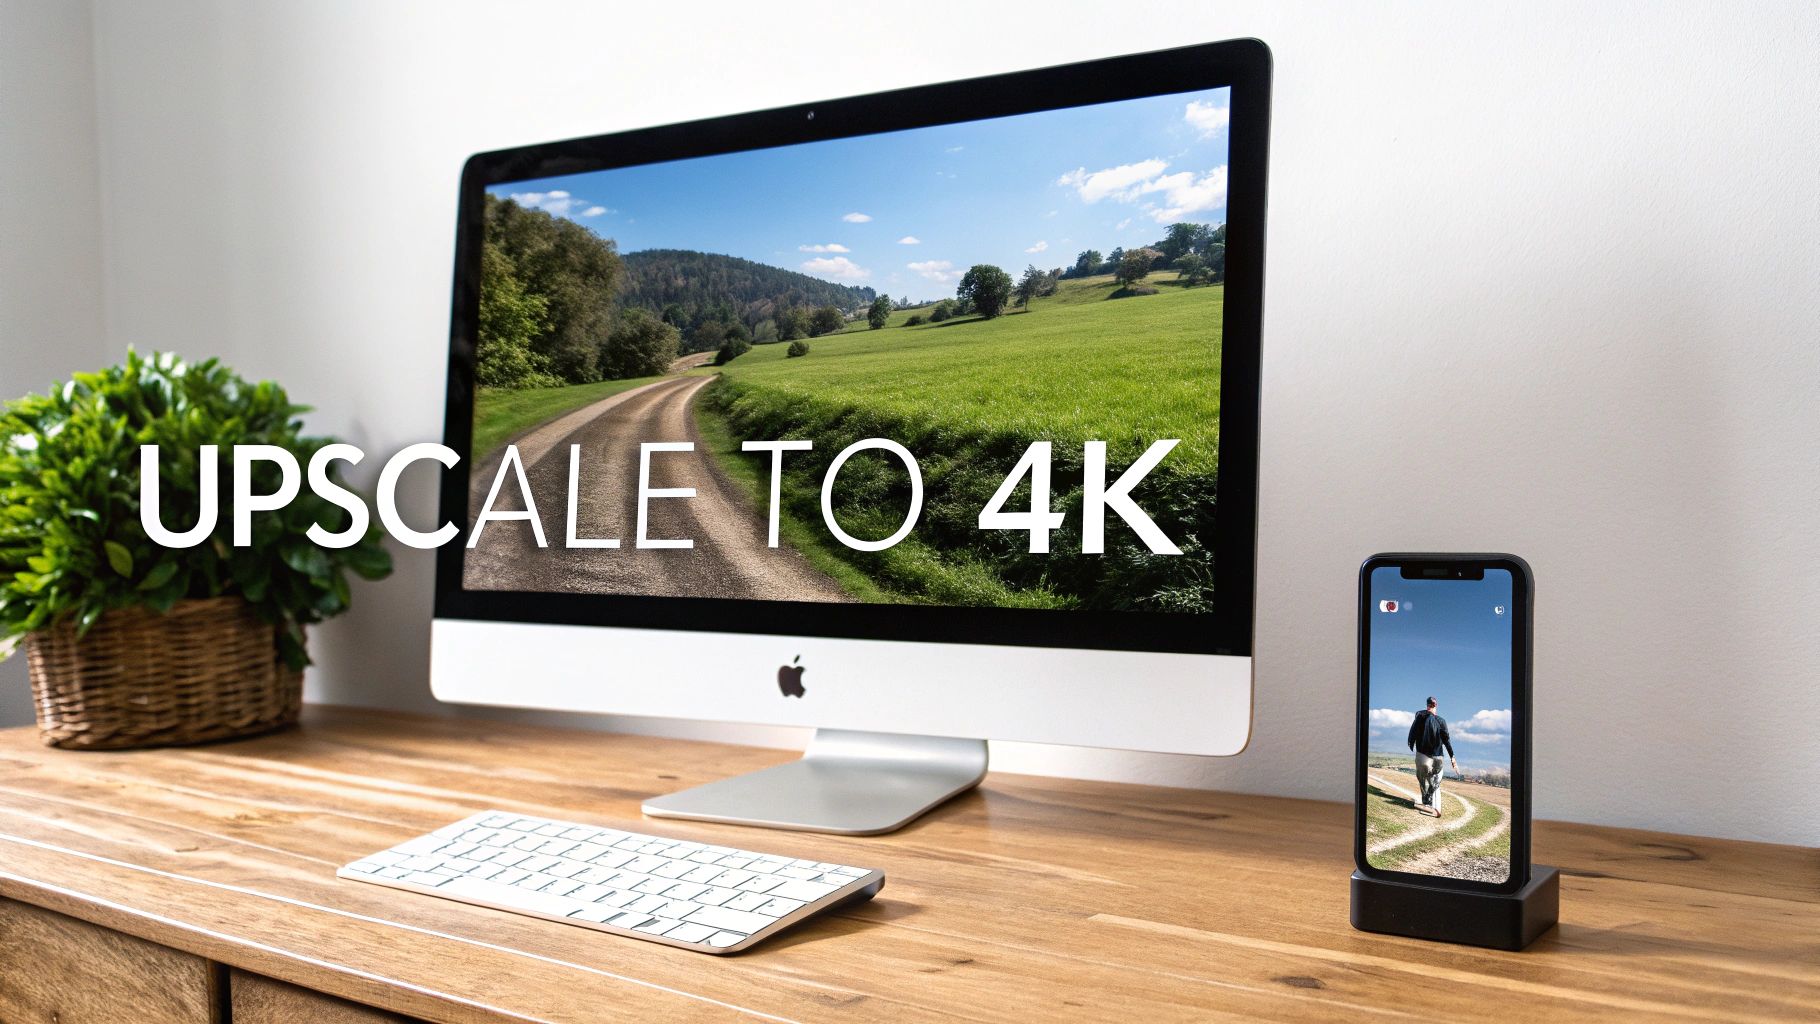
Taking Your Animations from HD to 4K with AI
What happens when your source photo or initial AI animation isn't quite high-res enough for a big screen? This is where AI upscaling becomes your secret weapon. Instead of just stretching a video and making it blurry, modern AI upscalers intelligently predict and add new detail to authentically increase the resolution.
Tools like the built-in Video Upscaler in Auralume AI are designed for exactly this. You can feed it a standard 1080p animated photo and let it work its magic, transforming it into a stunningly sharp 4K clip. The AI analyzes the existing pixels and generates new ones to fill in the gaps, resulting in a final video that looks clean and professional on any high-resolution display.
A Few Common Questions About Animating Photos
Once you start exploring photo animation, you’ll inevitably run into a few questions. I definitely did when I first started. To save you some of that initial trial and error, I've gathered answers to the most common sticking points I see creators run into.
Think of this as your quick-start guide to clear those first few hurdles.
What Kind of Photo Works Best for Animation?
Not all photos are created equal when it comes to adding motion. The best ones usually have a few things in common.
For a classic parallax effect, look for an image with a clear, defined subject that stands out from the background. That natural separation is what makes it easy to create distinct layers and give the illusion of depth.
If you're aiming for a cinemagraph, you'll want a photo that already implies some kind of repeatable motion. Think about a waterfall, steam rising from a coffee cup, or the gentle flicker of a candle. These are perfect candidates because the motion feels inherent to the scene.
And for AI-driven animation? High-resolution images with good lighting and lots of detail are always your best friend. The more information the AI has to analyze, the more realistic and nuanced the final motion will be. I’d steer clear of photos that are too busy or have a totally flat, uniform background—it’s much tougher to create a believable sense of depth in those cases.
Can I Really Do This on My Phone?
You absolutely can. Plenty of mobile apps are built specifically for creating simple cinemagraphs or parallax effects right from your phone. They're great for making quick edits and just getting a feel for the whole process.
But, if you're after top-tier quality or the more sophisticated AI features, a web-based tool is usually the better option. A platform like Auralume AI, for instance, does all the heavy lifting in the cloud. That means you can use your phone's browser to tap into seriously powerful AI models without needing a monster of a computer. It really opens up professional-grade animation to just about anyone.
My Pro Tip: When animating photos, subtlety is everything. The goal isn't to create a jarring, obvious effect. It's to make the motion feel like a natural part of the original image. Slow, smooth movements will almost always look more polished than fast, jerky ones.
How Do I Make the Motion Look Natural and Not… Weird?
The secret sauce is restraint. I know the temptation is to make everything move dramatically, but my biggest piece of advice is to lean into subtlety.
When you're building a parallax effect, keep the camera motion slow and steady, just like it would be on a real-world camera dolly. A gentle drift is far more effective than a rapid pan.
For cinemagraphs, the entire magic trick relies on a perfect, seamless loop. You have to make sure there's no visible "jump" when the animation resets. It’s worth spending a little extra time on this to get it right.
With AI tools, this same principle applies to your prompts. Instead of asking for a "massive explosion," try a more nuanced prompt like "subtle embers glowing and drifting upwards." The surest path to an authentic-looking result is to focus on animating the elements that would naturally move in real life—hair blowing in the wind, clouds drifting across the sky, or ripples on the water.
What's the Difference Between Animating a Photo and Creating AI Video From Scratch?
This is a really common point of confusion, but the distinction is actually pretty straightforward.
When you add motion to a photo, you’re starting with your own image as the base. The AI analyzes the content of that specific picture and generates movement for the elements already in it. This technique is often called Image-to-Video.
Creating AI video from scratch, on the other hand, is known as Text-to-Video. You start with nothing but a text prompt, and the AI generates an entirely new video scene from that description alone.
So, animating an existing photo gives you full control over the initial shot and composition. Text-to-Video gives you the freedom to create something brand new, straight from your imagination.
Ready to see what your own photos are capable of? Auralume AI makes it incredibly simple to bring static images to life. You can turn your favorite shots into stunning, cinematic videos in just a few clicks. Give Auralume AI a try for free.