
How to Improve Video Quality for Professional Results
If you're wondering why your videos don't have that polished, professional look, let's get right to it. The secret isn't just one thing; it’s about nailing three distinct phases: your shooting environment, your camera settings, and your work in post-production. Focusing on these three areas is the most direct path to getting those sharp, clean results you're after.
Your Blueprint for Crystal-Clear Video

Great video quality isn't about finding a magic bullet. It’s about building a solid, repeatable workflow. Too many creators fall into the trap of thinking a pricey camera is the only answer. While good gear certainly helps, a smart process can make footage from any camera—from a top-tier cinema rig to the phone you're holding—look incredible.
Think of it like building a house. You need a solid foundation, a strong frame, and a refined finish. If any one of those is weak, the final product suffers. This guide is your step-by-step plan, breaking down each stage with practical advice you can use on your very next shoot.
To give you a quick overview of our game plan, here's a look at the core pillars we'll be covering.
| Pillar | Primary Focus | Expected Outcome |
|---|---|---|
| Pre-Production | Controlling your environment—lighting, sound, and shot composition. | Clean, well-lit, and great-sounding raw footage that minimizes problems later. |
| Production | Mastering your camera's manual settings—resolution, frame rate, and exposure. | Capturing technically perfect footage that matches your creative vision. |
| Post-Production | Refining and enhancing your footage through editing, color, and stabilization. | A polished, professional final video that looks and feels cinematic. |
By mastering these three areas, you're building a system for success.
Pre-Production: Get It Right at the Source
First up is everything that happens before you hit record. We're talking about pre-production, and it's all about setting the stage. This is where you'll learn to set up lighting that kills grainy shadows and how to capture audio so clean you won't hear a hint of that annoying background hum. Honestly, getting this right from the start saves you a mountain of headaches in the edit.
Production: Take Control of Your Camera
Next, we get hands-on with the gear during production. This is where we'll demystify your camera's settings. We'll break down the exposure triangle (aperture, ISO, shutter speed) in simple terms and get into the weeds on when to shoot in 4K versus 1080p, or 24fps versus 60fps. This is your chance to tell the camera exactly what you want it to see.
Post-Production: Polish and Perfect
Finally, we'll jump into the edit bay with post-production. This is where the magic happens, turning your raw clips into a finished piece. We'll cover essentials like:
- Stabilization: How to smooth out those bumpy, handheld shots for a buttery-smooth, professional feel.
- Color Correction & Grading: The art of fixing weird color casts and then applying a creative look to set the mood.
- AI Enhancement: We’ll even explore how modern tools like Auralume AI can rescue less-than-perfect footage by upscaling, denoising, and sharpening your video.
The goal is to build a reliable process. By being intentional with your setup, deliberate with your settings, and creative in your edit, you stop guessing and start creating high-quality video every single time.
This structured approach takes the mystery out of it, letting you focus on what really matters—your story. Let's start with that first crucial pillar: mastering your shooting environment.
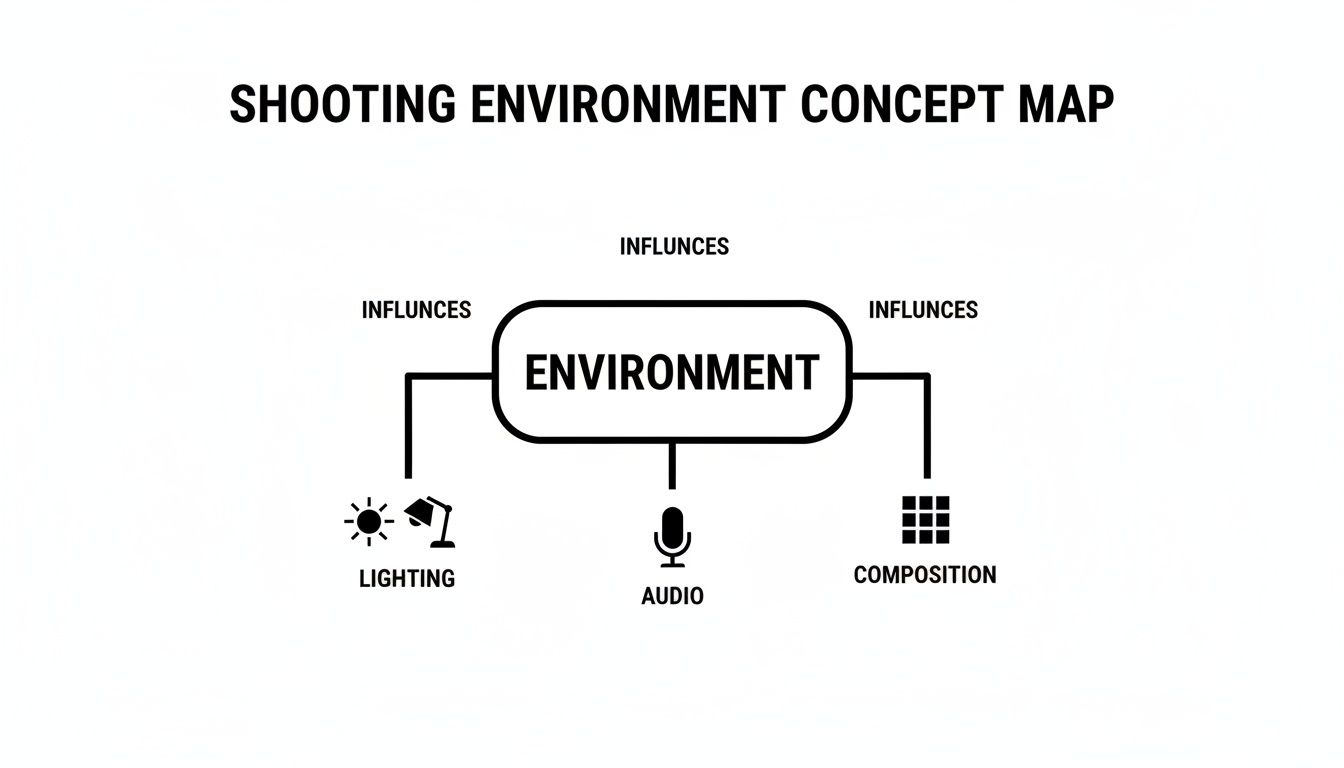
Getting It Right on Set: Your Environment is Everything
If there's one secret to creating incredible video, it's this: nail the shoot. While editing software can work wonders, it’s best used for making great footage even better, not for trying to salvage a disaster. The real magic happens when you master your environment—your lighting, composition, and sound—before you ever press record.
Think of it as solving problems before they even exist. Trying to fix bad lighting in post-production often introduces grainy digital noise and bizarre color shifts. Scrubbing out background noise can easily degrade the speaker’s voice, leaving it sounding thin and robotic. For truly professional results, getting it right at the source isn’t just a good idea; it’s the only way.
Light is Your Most Powerful Tool
Lighting is, without a doubt, the single most important factor for a sharp, clean image. Your camera's sensor is thirsty for light; it needs plenty of it to capture rich detail and accurate color. When you shoot in a dim environment, the camera tries to compensate by cranking up the ISO, which is what creates that ugly, grainy texture we all know as digital noise.
The great news is you don’t need a Hollywood budget to create beautiful lighting. You just need to be deliberate about it.
The Go-To Setup: Three-Point Lighting
For interviews, product shots, or any kind of talking-head video, the three-point lighting technique is the industry standard for a reason. It carves your subject out from the background, adds depth, and produces a flattering, polished look that instantly elevates your video quality.
- Key Light: This is your main light source, and it's the brightest of the three. Set it up about 45 degrees to one side of your subject to create the primary illumination.
- Fill Light: Placed on the opposite side, this is a softer, less intense light. Its job is to "fill in" the shadows created by the key light, preventing them from being too dark and harsh.
- Back Light: Sometimes called a "hair light," this one goes behind your subject. It creates a subtle glowing edge around their head and shoulders, which is the trick to separating them from the background and giving the shot a real sense of dimension.
Don't have three fancy studio lights? No problem. You can get creative! Use a bright lamp as your key, a white poster board as a reflector to bounce light for your fill, and even a small desk lamp for your back light. It's the principle, not the price tag, that matters.
Making the Most of Natural Light
A window is a fantastic, free light source—if you know how to use it. The biggest mistake people make is shooting with a bright window directly behind the subject. This confuses the camera and turns your subject into a dark silhouette. Instead, have your subject face the window to get that beautiful, soft, even light on their face.
Pro Tip: Is the direct sun too intense, creating sharp, unflattering shadows? Just hang a thin white sheet over the window. It works as a perfect diffuser, softening the light and giving you a much more professional look.
Frame Your Shot Like a Pro
The way you compose your shot has a huge impact on how professional your video feels. A well-framed shot isn't just about what's in it; it's about guiding the viewer's eye and creating something that’s visually interesting.
The Rule of Thirds is the first concept every filmmaker learns. Picture a 3x3 grid overlaid on your screen. Instead of sticking your subject smack in the middle, try positioning them along one of the vertical lines or at a point where the lines intersect. This one tiny change immediately creates a more balanced, dynamic, and engaging image.
This is a powerful technique for improving your video quality that costs absolutely nothing. Your shots will instantly look more intentional and thoughtfully crafted.
Don't Let Bad Audio Ruin Your Video
You’ve heard it before, but it’s true: viewers will forgive mediocre video quality, but they will not tolerate bad audio. If your sound is muffled, echoey, or full of distracting noise, people will click away in a heartbeat. The microphone built into your phone or camera is designed to pick up sound from all directions, which is why it’s so good at capturing the air conditioner hum and the dog barking down the street.
Investing in the right microphone for the job is non-negotiable.
- Lavalier (Lapel) Mics: These tiny mics clip right onto a shirt, making them perfect for interviews or any piece to camera. They get the microphone close to the source—the speaker's mouth—for crystal-clear dialogue.
- Shotgun Mics: These are highly directional, meaning they are designed to capture sound from wherever you point them while rejecting noise from the sides. You can mount one on your camera or a boom pole to isolate your subject's voice from a distance.
Before you hit record, just stop for a moment and listen. Is the refrigerator buzzing? Is there traffic outside? Closing a window or turning off an appliance is infinitely easier than trying to surgically remove that noise in post-production.
Optimizing Camera Settings for Maximum Clarity
Relying on your camera’s "Auto" mode is a bit like letting a stranger drive your car—sure, you'll get to your destination, but you miss out on all the control. The single biggest leap you can make in video quality comes from switching to manual. This is where you tell the camera exactly what you want, moving your footage from accidental to intentional.
Taking control means getting comfortable with the three pillars of exposure: aperture, shutter speed, and ISO. They're often called the exposure triangle, and understanding how they play off each other is the secret to getting crisp, perfectly lit shots every single time. It doesn't matter if you're shooting on a bright, sunny beach or in a dimly lit conference room; these settings are your toolkit.
Before you even touch a dial, though, remember that your environment is your starting point. The choices you make with lighting, audio, and composition lay the foundation for everything that follows.
Think of it this way: your camera settings should work with your environment, not fight against it. Nail the setup first, and dialing in the camera becomes ten times easier.
Decoding the Exposure Triangle
The exposure triangle is a constant balancing act. Change one setting, and you'll likely need to adjust another to keep the shot from being too bright or too dark. Each of the three settings affects the brightness, but each also brings its own creative flavor to the image. Mastering this give-and-take is what professional videography is all about.
Here’s a quick rundown of each component:
-
Aperture (f-stop): This is the opening in your lens. A low f-stop number (like f/1.8) creates a wide opening, letting in lots of light and giving you that beautiful, blurry background (a shallow depth of field). A high f-stop (like f/11) does the opposite, creating a small opening that lets in less light but keeps nearly everything in sharp focus.
-
Shutter Speed: This controls how long the camera's sensor is exposed to light for each frame. For video, there's a simple rule of thumb: set your shutter speed to double your frame rate. If you're shooting at 24fps, a shutter speed of 1/50th of a second will produce motion blur that looks natural and smooth to the human eye.
-
ISO: Think of ISO as a digital brightness boost. It’s incredibly useful in low-light situations, but it comes at a cost. Pushing the ISO too high is the number one cause of distracting digital noise (that grainy, staticky look). The golden rule? Keep your ISO as low as you possibly can for the cleanest image.
Pro Tip: Don't get overwhelmed trying to balance all three at once. I usually start by setting my aperture based on the depth of field I want, then lock in my shutter speed based on my frame rate. After that, I use ISO as the final variable to get the exposure just right.
Choosing Your Resolution and Frame Rate
Beyond exposure, two other settings fundamentally define the look and feel of your video: resolution and frame rate. Getting these right from the start is crucial for both clarity and creative style.
The demand for crystal-clear video has never been higher. The global video streaming market hit USD 129.26 billion in 2024 and is expected to skyrocket to USD 416.8 billion by 2030. That’s a massive 21.5% CAGR, driven by viewers who won't tolerate fuzzy streams. Just jumping from 720p to 1080p can make a video feel 40% sharper, and 4K offers four times the pixels of 1080p. If you want to learn more about this trend, you can dig into the video streaming market analysis on Grand View Research.
-
Resolution: This is simply the number of pixels that make up your image. While 1080p (Full HD) is still a perfectly acceptable standard, I strongly recommend shooting in 4K if your camera can handle it. The extra detail gives you a ton of flexibility later to crop, reframe, or apply stabilization in post-production without a noticeable drop in quality.
-
Frame Rate (fps): This is how many individual images your camera captures every second. For that classic, filmic look, 24fps is the industry standard. If you're planning to create buttery-smooth slow-motion shots, you'll want to shoot at 60fps (or even higher, like 120fps) so you can slow it down in your edit without it looking choppy.
Fine-Tuning Your Focus and Color
A couple of final settings can save you a world of hurt in the editing room. Nailing them in-camera is one of the biggest differentiators between amateur and professional-looking footage.
First up is white balance. Ever film a video where the colors just look… off? Maybe everyone looks a little too blue or a little too orange? That's your white balance. Your camera’s "auto" setting is easily confused by mixed lighting. The solution is to set a custom white balance using a simple white or gray card. This tells your camera what "true white" looks like under your specific lights, ensuring all your colors are rendered accurately.
Next, you have to nail your focus. Autofocus has gotten incredibly good, but it's not foolproof. For any important shot, switch to manual focus and use a tool called focus peaking. This feature puts a colored outline (often red, yellow, or blue) on the sharpest parts of your image, giving you a clear visual confirmation that your subject is perfectly in focus. Crisp focus is non-negotiable for high-quality video.
Enhancing Your Footage in Post-Production
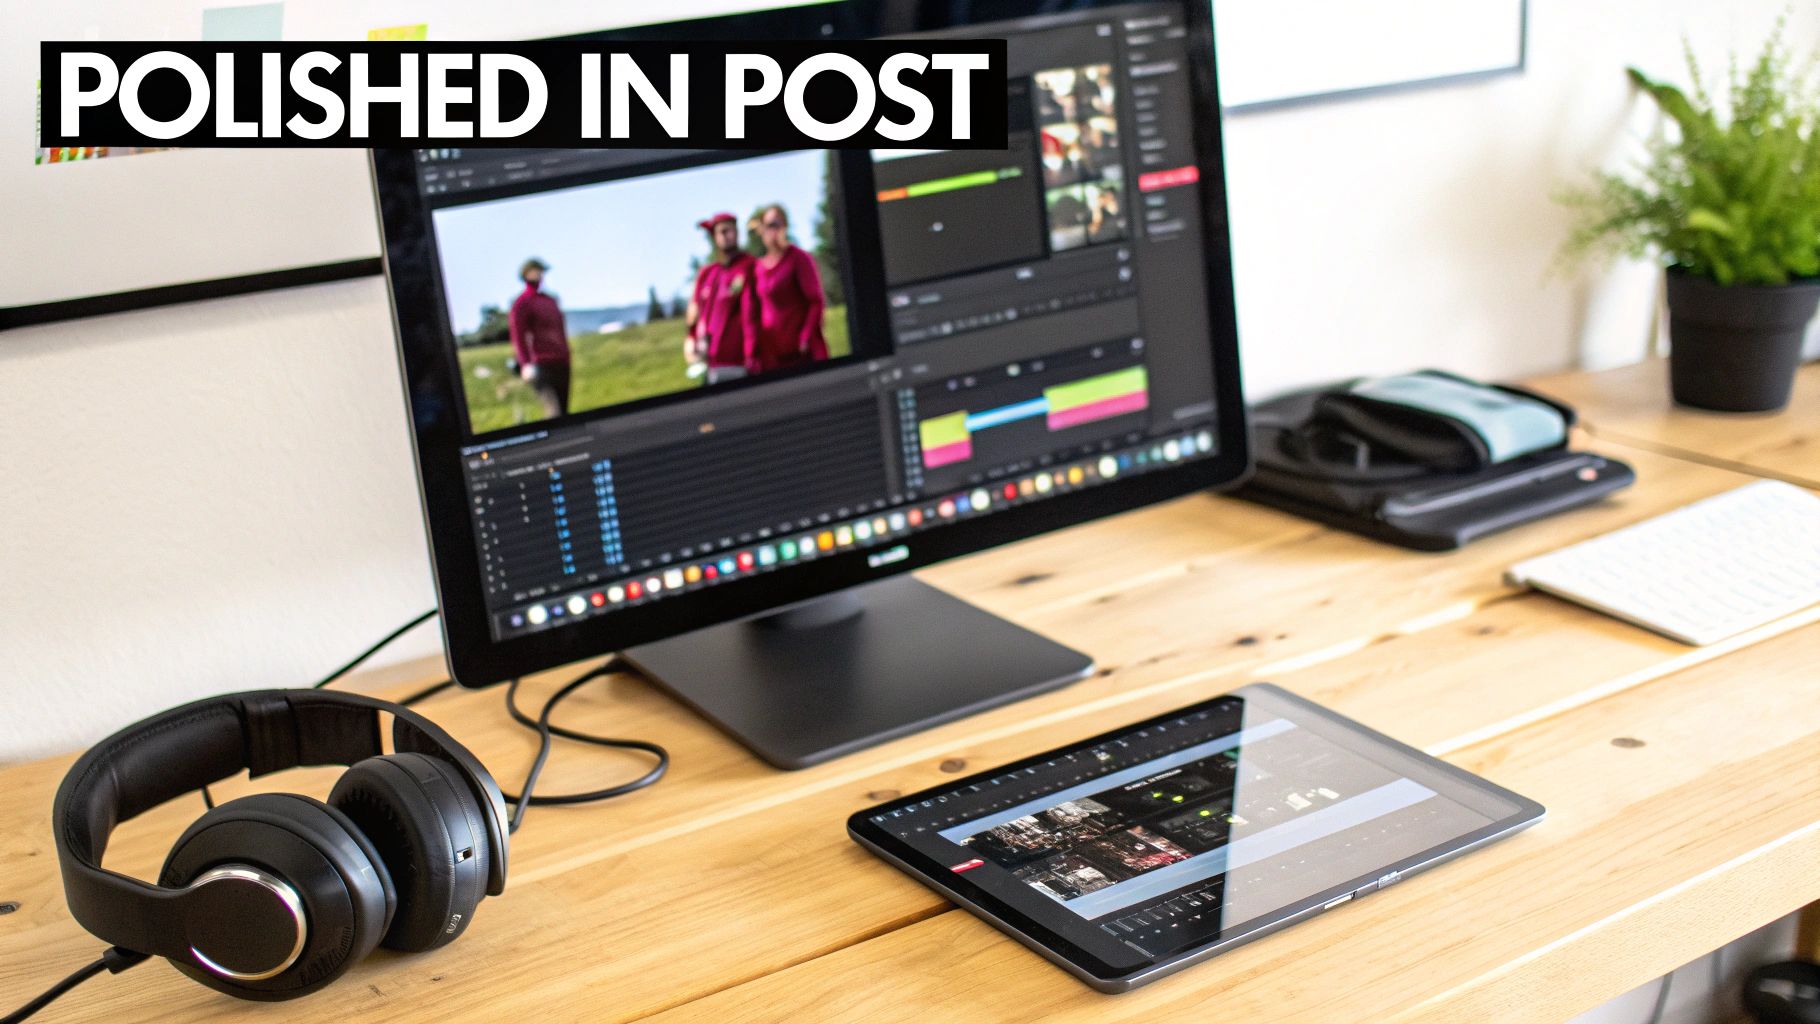
Getting great shots in the camera is only half the job. The real magic, where good footage becomes a great video, happens in the edit. Post-production is so much more than just slapping clips together on a timeline; it's where you polish, fix, and inject the creative soul that makes your work stand out.
This is your chance to correct those little on-set mistakes, guide the audience's emotions, and make sure your video looks incredible, no matter where it's being watched. Think of it as that final 10% of effort that generates 90% of the perceived quality. Let’s dive into the core techniques, from fixing shaky shots to mastering a cinematic color grade.
Taming Shaky Footage with Stabilization
Even with the steadiest grip, a bit of camera shake is almost unavoidable in handheld shots. While a little movement can add energy, too much is just distracting and screams "amateur." Thankfully, this is one of the easiest problems to fix with modern editing software.
Tools like Warp Stabilizer in Adobe Premiere Pro or the built-in stabilization in Final Cut Pro and DaVinci Resolve are incredibly powerful. They work by analyzing your footage frame by frame, then intelligently cropping, rotating, and shifting the image to smooth out the jitters.
A word of caution: don't go overboard. Pushing the stabilization too far can create bizarre warping artifacts or a weird, "floaty" effect that looks unnatural. I always start with a low value, somewhere around 5-10%, and slowly nudge it up until the distracting bumps are gone but the shot still feels authentic.
A Quick Tip: If a clip is just too shaky for software to handle, get creative. You can often salvage it by dicing it into short, punchy cuts or hide the shake with a fast transition like a quick zoom or a whip pan.
Mastering Color Correction and Grading
Color is a language, and it's one of the most powerful storytelling tools you have. When we talk about color in video, we're really talking about two separate but related stages: correction and grading. Nailing these is a massive leap forward when you’re learning how to improve video quality.
-
Color Correction: This is the technical part—the "first aid" for your image. The goal here is to fix problems and create a neutral, true-to-life baseline. This means adjusting the white balance to get rid of weird color casts, balancing your exposure so highlights aren't blown out and shadows aren't crushed, and making sure skin tones look human. Rely on your video scopes (waveform, vectorscope) for this; they give you objective data, which is far more reliable than just eyeballing it.
-
Color Grading: Now for the fun part. Once your footage is corrected and balanced, you can get artistic. Grading is where you apply a specific "look" to create a mood. Do you want a scene to feel warm and nostalgic? Or maybe cold, tense, and futuristic? This is where you can use LUTs (Look-Up Tables) to apply pre-built cinematic styles or dive in and craft a unique palette from scratch.
Using Sharpening Tastefully
A little bit of sharpening can make the details in your video pop, giving it a crisp, high-definition feel. But this is definitely a "less is more" situation. Too much sharpening creates a harsh, overly digital look with nasty-looking edges and exaggerated textures.
Nearly every editing program has a sharpening filter, and the key is to be subtle.
- Apply the effect to your clip.
- Keep the starting value extremely low.
- Zoom your preview window to 100% to see exactly what's happening to the pixels.
- Gently increase the amount until you notice a slight improvement in detail, and then stop.
The viewer should feel the clarity, not see the sharpening. It's an enhancement that should be completely invisible to the average person. As a final polish, you can also learn how to create compelling subtitles for your videos, which boosts both accessibility and audience engagement.
Perfecting Your Export Settings for Delivery
You can do everything right, only to have it all fall apart at the final step: exporting. This is where your edited timeline gets compressed into a single video file, and using the wrong settings can turn your beautiful video into a pixelated mess on YouTube.
Every platform has its own slightly different recommendations, but the following settings are a rock-solid starting point for almost any high-quality web video.
| Setting | Recommendation | Why It Matters |
|---|---|---|
| Codec | H.264 (or H.265/HEVC for 4K+) | This is the gold standard for web video, striking the best balance between quality and file size. |
| Resolution | Match your source (e.g., 3840x2160 for 4K) | Don't throw away detail by exporting at a lower resolution than you edited in. |
| Frame Rate | Match your source (e.g., 23.976 or 29.97) | Mismatched frame rates are a primary cause of jerky, stuttering playback. |
| Bitrate | VBR, 2 Pass | Variable Bitrate (VBR) smartly allocates more data to complex scenes, and a 2-pass encode optimizes it. |
For bitrate, these targets are a great place to start:
- 1080p Video: Target bitrate of 10-15 Mbps
- 4K Video: Target bitrate of 35-45 Mbps
By feeding platforms like YouTube and Instagram a high-quality file, you give their own compression algorithms the best possible source to work with. This final step is what locks in all your hard work, ensuring the video your audience sees is sharp, vibrant, and professional.
Using AI for Next-Level Video Enhancement
Artificial intelligence has completely changed the game for video creators. Seriously. What once took a Hollywood budget and a team of specialists can now be done with powerful software right on your desktop. This tech isn't just about small tweaks; it can rescue footage you thought was a lost cause and push your already good shots into exceptional territory.
Unlike a standard filter that just slaps a mathematical effect over your image, AI models are different. They've been trained on millions of hours of video, so they have a deep "understanding" of what a clean, sharp, and stable image is supposed to look like. From there, they can intelligently reconstruct your footage to match that ideal.
This opens up a whole new world. You can finally fix that grainy low-light shot, upscale your old home movies to brilliant 4K, or create stunning slow-motion from a standard clip. It’s a genuine shift in how we should all be thinking about post-production.
The Magic of AI Video Upscaling
One of the most impressive things AI can do is upscaling. Let’s say you’ve got a 1080p clip that just looks a bit soft on a big 4K TV. Old-school upscaling would just stretch the pixels you already have, leaving you with a blurry, blocky mess.
AI upscaling is a whole lot smarter. The software actually analyzes the content of each frame and intelligently generates brand new, context-aware pixels to fill in the gaps. It can redefine sharp edges and rebuild fine details like the texture of fabric or strands of hair. The result is a 4K video that looks like you shot it natively at that resolution.
And people are noticing. The global Video Quality Enhancement market hit USD 1.74 billion in 2024 and is on track to reach an incredible USD 8.69 billion by 2033—that's a massive 18.3% compound annual growth rate. In the media and entertainment world, which makes up 35% of this demand, studios have seen engagement jump by up to 25% just by enhancing their content.
This is a lifesaver for:
- Restoring old footage: Digitize and upscale family videos from those old tapes in the attic.
- Repurposing content: Take your classic 1080p YouTube videos and re-release them in crisp 4K.
- Mixing resolutions: Seamlessly blend lower-res clips from a drone or action cam into your 4K timeline.
Erasing Grain with AI Denoising
We’ve all been there—shooting in low light and ending up with distracting digital noise, or grain. Traditional denoise filters are a clumsy solution. They often just blur the image to hide the grain, sacrificing the very details you worked so hard to capture. Your footage ends up looking soft and mushy.
AI-powered noise reduction is far more sophisticated. These tools can actually tell the difference between unwanted grain and important image detail. The AI meticulously removes the noise while preserving, and sometimes even enhancing, the sharpness of your subject.
The result is a clean, clear image that looks like it was shot with a much better camera in better lighting conditions. This technique alone can be the difference between an unusable shot and a professional-looking final product.
Creating Silky-Smooth Slow Motion
Another incredible AI trick is frame interpolation. To get buttery-smooth slow motion, you usually need to shoot at a high frame rate, like 60fps or 120fps. If you try to slow down standard 24fps or 30fps footage, it just looks choppy and stuttered because there aren't enough frames to sell the effect.
AI frame interpolation solves this by creating entirely new, artificial frames and inserting them between the original ones. The model analyzes the motion and intelligently predicts what the "in-between" frames should look like. It's how you get that fluid, ultra-smooth slow-motion effect from footage you shot at a normal speed.
To really get the most out of these tools, it helps to dig a little deeper. Check out this AI video editing guide for more hands-on techniques.
Platforms like Auralume AI are bringing all of this power together in one place. By integrating generation and upscaling tools, it gives creators a comprehensive solution for pushing the boundaries of video quality. The future of video editing is here, and it's powered by AI. You can check them out at https://www.auralumeai.com/.
A Few Common Questions About Video Quality
Even with the best gear and a solid plan, you're bound to run into a few snags. Let's walk through some of the questions I hear all the time from creators trying to get that extra bit of polish on their videos.
Is Shooting in 4K Really Worth It for Social Media?
This comes up constantly. Instagram, TikTok, and others are going to compress your video anyway, so why bother with those massive 4K files? The answer is a hard yes, and here’s why.
Think of it as giving the platform's compression algorithm the best possible ingredients. When you feed it a crisp, data-rich 4K file, it has so much more information to work with. Even after it gets squeezed down, the final video will look visibly sharper than if you had started with 1080p.
There's another huge benefit: flexibility in the edit. Shooting in 4K gives you a ton of creative freedom. You can punch in on a shot, completely reframe it, or even apply digital stabilization, all without a noticeable drop in quality. It's like having a built-in safety net.
Why Does My Video Look So Grainy?
That speckled, "sandy" look in your footage is almost always about one thing: not enough light. When your camera's sensor is starved for light, it cranks up its ISO to "see" better in the dark. This brightens the image, but the trade-off is that distracting digital grain, or noise.
Here’s how you can tackle it:
- Throw More Light at It: Honestly, this is the best fix. Move your subject closer to a window, bring in another lamp—whatever it takes. More light lets you keep the ISO low and the image clean.
- Get a "Faster" Lens: A lens with a wide-open aperture (look for a low f-stop number like f/1.8) physically lets more light hit the sensor. It's a game-changer for shooting in dim environments.
- Clean It Up with AI: In post-production, AI denoising tools can be your secret weapon. They’re incredibly good at scrubbing away grain while keeping the important details sharp.
A good rule of thumb is to always try and fix problems at the source. Getting the lighting right on set will always yield better results than trying to fix a noisy shot later. That said, today's AI tools are an amazing fallback for footage that's just a little less than perfect.
What's the Difference Between Bitrate and Resolution?
This one trips a lot of people up, but it's essential for getting your export settings right. Resolution and bitrate are a team, but they do very different jobs.
- Resolution is just the number of pixels that make up your image (like 1920x1080 for HD or 3840x2160 for 4K). Think of it as the canvas size—it defines the potential for detail.
- Bitrate is the amount of data you're using for each second of video, measured in Mbps (megabits per second). It determines how much of that potential detail actually gets recorded and saved.
Here’s a simple analogy: Resolution is the size of your bucket. Bitrate is how much water you put in it. A giant 4K bucket (high resolution) with just a trickle of water (low bitrate) is going to look empty and awful—a pixelated, blocky mess. You have to match a high bitrate to a high resolution to get a truly stunning image.
AI is making a huge impact here. The AI Video Enhancer market is growing at a staggering 19.5% CAGR and is expected to continue through 2030. A big reason for this is that AI can suppress grain by up to 90%, rescuing footage that would have been unusable. This isn't just for Hollywood; it's a massive deal when you consider that around 65% of surveillance cameras operate in low-light situations, a challenge many creators also struggle with. If you want to dive deeper, you can explore more insights on the AI video market's growth.
Ready to see what AI can do for your own footage? Auralume AI has a whole suite of tools, from AI video upscaling to generation, designed to help you turn standard clips into cinematic shots. Start creating with Auralume AI today!