How to Make Educational Videos That Get Results
Making a great educational video doesn't start with a camera. It starts with a plan. Before you even think about hitting 'record,' taking the time to map out your strategy is what separates a forgettable clip from a video that genuinely teaches and engages.
Rushing into production is a common mistake, and it almost always leads to confusing content, wasted time, and a final product that just misses the mark. This pre-production stage is your roadmap—it’s where you decide not just what you want to teach, but how you’ll teach it effectively.
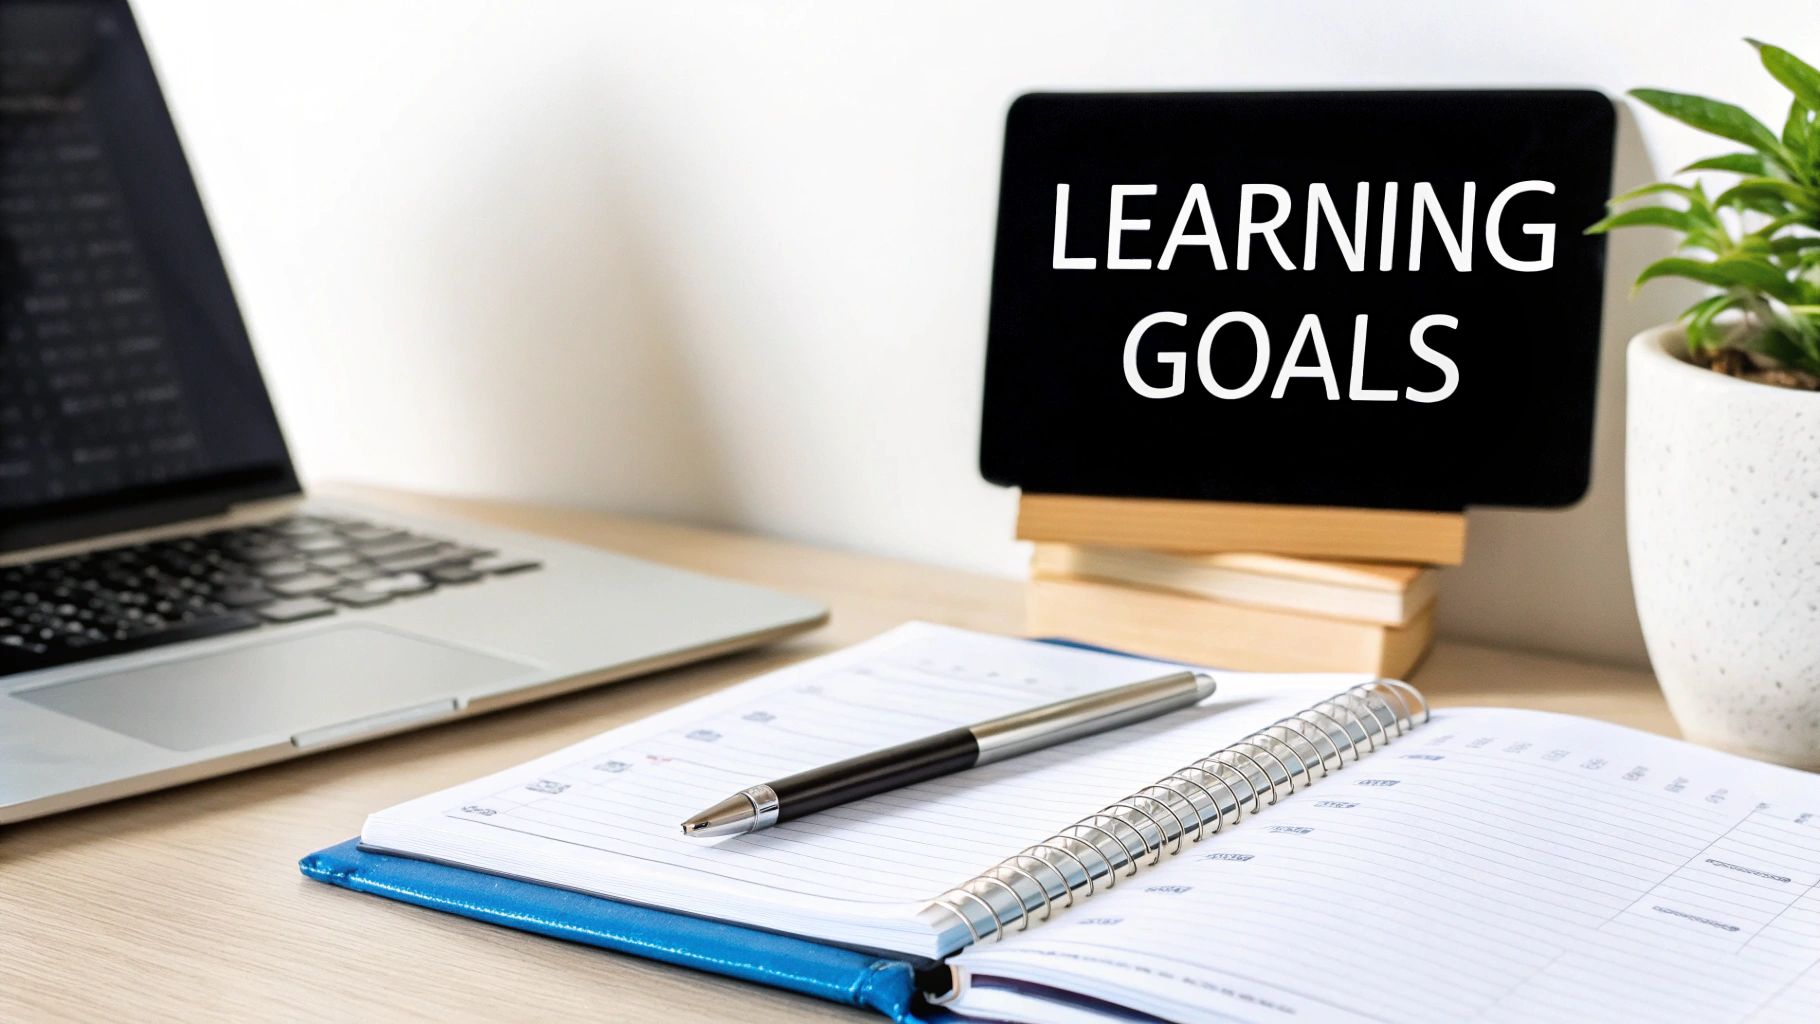
What’s the Point? Define Your Learning Objectives
First things first: what should your audience be able to do after watching your video? Answering this question is the most critical step. A vague goal like "learn about photosynthesis" isn't going to cut it. You need to be specific.
Frame your objectives with action verbs. A much stronger goal would be: "After watching, the viewer can list the three key inputs for photosynthesis and explain the role of chlorophyll." See the difference? This level of clarity guides your entire creation process, from scripting to editing.
To really get this foundation right, check out this a comprehensive guide to making educational videos that get results.
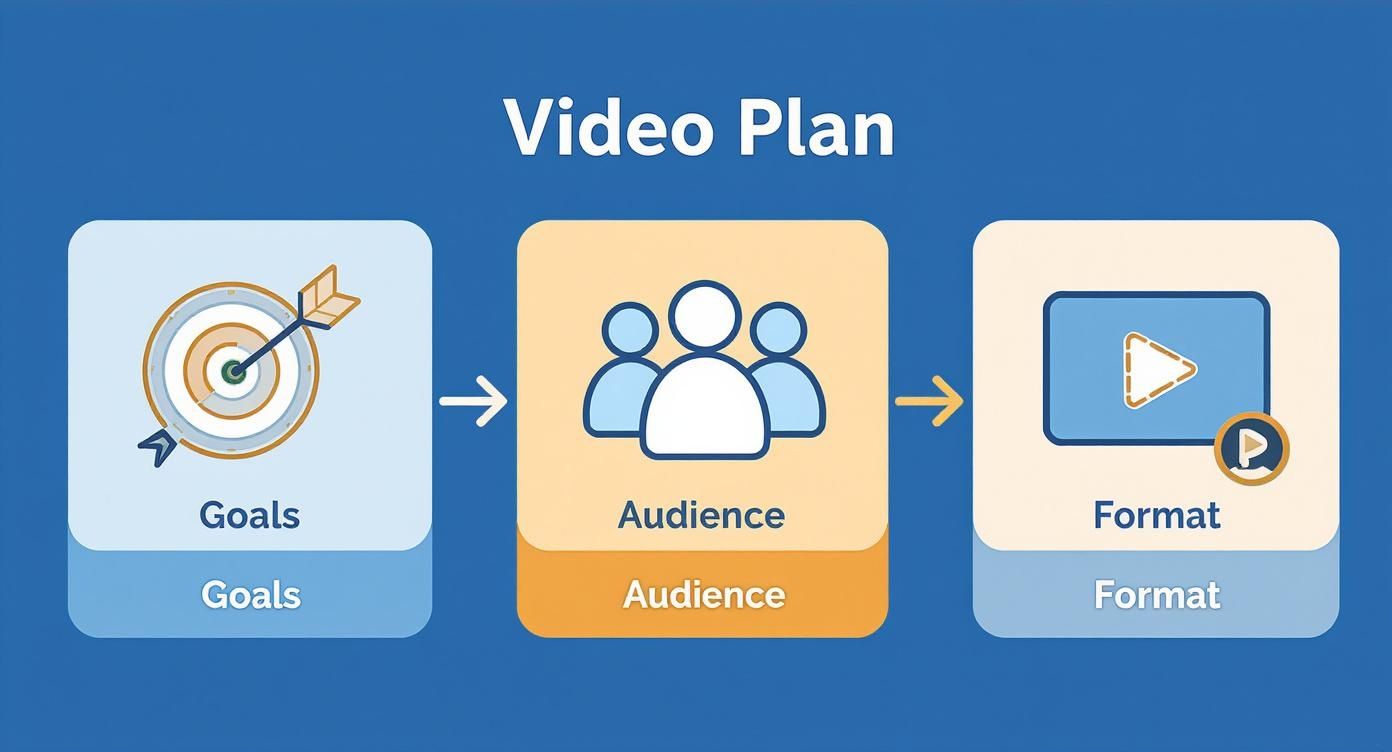
This simple framework keeps you focused on what truly matters: your goals, who you're talking to, and the best way to present your information.
Who Are You Talking To? Know Your Audience
Once your goals are set, shift your focus to your viewers. The way you explain a concept to a high school student is completely different from how you'd present it to a seasoned professional. You have to meet them where they are.
Think about these questions:
- Prior Knowledge: Are they total beginners, or do they just need a quick refresher?
- Learning Context: Will they be watching in a quiet classroom, at their desk at work, or on a noisy train during their commute?
- Motivation: What problem are they hoping your video will solve for them?
Knowing the answers helps you nail the tone, complexity, and pacing of your video. For instance, a tutorial for busy executives should be concise and get straight to the point. On the other hand, a video for younger learners might work better with more humor and vibrant graphics.
Key Takeaway: A deep understanding of your audience lets you create content that resonates on a personal level. It's the difference between talking at someone and having a real conversation with them.
What’s the Best Format? Match Your Style to Your Message
With your goals and audience in mind, it's time to pick a format. There's no single "best" style—the right choice depends entirely on what you're trying to teach. A software walkthrough demands a different approach than a deep dive into historical events.
This table breaks down some of the most common formats to help you decide.
Choosing the Right Educational Video Format
| Video Format | Best For | Key Strengths | Potential Challenges |
|---|---|---|---|
| Screencast | Software tutorials, step-by-step process walkthroughs, app demos. | Highly practical, easy to follow, shows the "how" directly. | Can feel impersonal; requires clear audio narration. |
| Talking-Head | Expert interviews, conceptual explanations, course introductions. | Builds personal connection and authority, feels direct and conversational. | Can be visually static if not shot dynamically. |
| Whiteboard Animation | Explaining complex or abstract ideas, simplifying data, storytelling. | Visually engaging, breaks down tough topics into digestible chunks. | Can be time-consuming to create; may not suit all topics. |
| Lecture Recording | Capturing in-depth presentations, academic lessons, conference talks. | Delivers a large amount of information, captures live event energy. | Often long; requires good editing to maintain engagement. |
Ultimately, the format you choose should serve your learning objectives and cater to your audience's needs. A screencast is perfect for showing a process, while a talking-head video can build the trust needed to explain the why. Getting this planning stage right saves you from massive headaches later and ensures every second of your video has a purpose.
Scripting a Story That Actually Teaches
Let's be honest: an educational video that's just a recorded lecture is a recipe for boredom. The most impactful learning videos don't just present facts; they tell a story. Before you even think about hitting 'record,' the single most important thing you can do is turn your raw ideas into a solid script. This script is your roadmap, guiding every single decision you'll make from here on out.
This is where a lot of creators get tripped up. They either try to improvise on camera—which usually leads to rambling and a lack of focus—or they write a script that sounds like it was lifted from a textbook. You have to find that sweet spot: structured enough to be crystal clear, but conversational enough to actually connect with your audience.
Write Like You Talk, Not Like You Type
The golden rule of video scripting? Ditch the formal, academic language. What looks good on paper often sounds stiff and completely unnatural when spoken. Your real goal is to sound like you're having a genuine, one-on-one conversation with the person on the other side of the screen.
Here’s a simple but powerful trick: read every line of your script out loud as you're writing it. Does it feel natural? Are you stumbling over words you'd never actually say? If it sounds clunky, it’s time to simplify.
- Use contractions. Nobody says "it is" in casual conversation. Go with "it's" and "don't" to sound more human.
- Ask questions. Pull your viewer into the conversation with things like, "Make sense?" or "So, what happens if we do this?"
- Keep sentences punchy. Long, winding sentences are a nightmare to follow. Break your thoughts down into shorter, more digestible bits.
This approach instantly builds a connection. When people feel like they're learning from a real person instead of a formal document, they pay closer attention and remember more.
The Three-Act Structure of a Great Script
Believe it or not, every great educational video follows the same basic structure as a good story. It has a clear beginning, middle, and end. This framework isn't just for movies; it's a proven way to present information logically and help your audience hang on to the key ideas.
1. The Hook (The Beginning) You’ve got about 8-10 seconds to convince someone to keep watching. Seriously, that’s it. So, start with something that grabs them—a surprising question, a shocking statistic, or a direct statement about the problem you’re about to solve. Instead of a flat "Today, we're going to learn about photosynthesis," try something like, "What if I told you plants literally eat sunlight? Here’s how they pull it off."
2. The Core Content (The Middle) This is the heart of your lesson. Lay out your points in a logical order, usually starting with the simplest concepts and building up to the more complex ones. This is where you bring in real-world examples, helpful analogies, and any visuals that will make the material click.
3. The Summary and Call-to-Action (The End) Don't just stop. Wrap it up by quickly summarizing the most critical points. You can reinforce the learning objective by saying, "So, the three key things to remember are..." Then, give your viewer something to do next. This could be anything from a prompt to try a new skill, a link to download a worksheet, or a suggestion to watch the next video in your series.
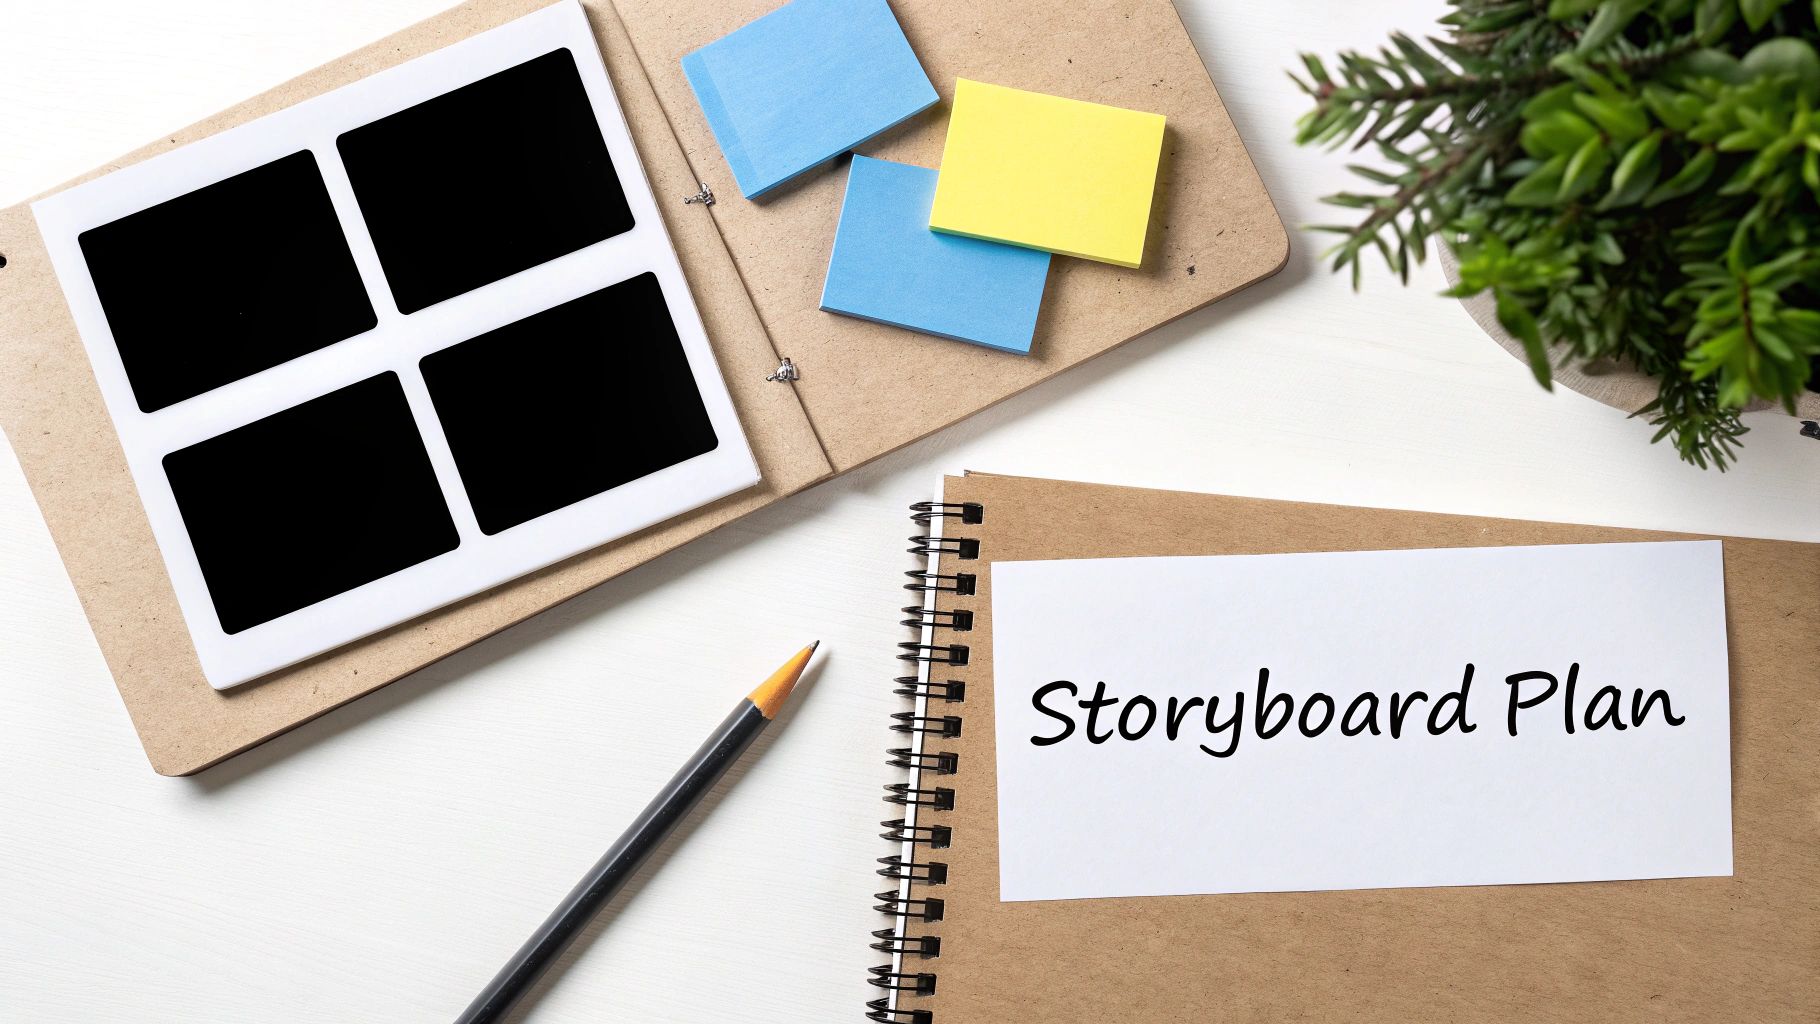
From Words to Pictures with Storyboarding
Once your script feels solid, it's time to think visually. That's where storyboarding comes in. And no, you don't need to be an artist. A storyboard is just a visual plan that maps out what your video will look like, shot by shot. It's your blueprint for a smooth and efficient shoot.
A good storyboard is your insurance policy against a chaotic and inefficient shoot. It forces you to think through your visuals before you record, saving you countless hours of guesswork and reshoots later.
You can create a dead-simple storyboard with stick figures or even just text descriptions. A two-column table works perfectly. On the left, put a line from your script. On the right, describe what the viewer will be seeing.
- Scene 1: Script: "First, open the XYZ software." | Visual: A clean screencast showing the cursor clicking on the software's icon.
- Scene 2: Script: "This is where most people get stuck." | Visual: Cut to a talking-head shot of me looking right at the camera with an encouraging expression.
- Scene 3: Script: "Now, look at the settings panel on the right." | Visual: Back to the screencast, but with a red box animated around the settings panel to draw attention.
Going through this process helps you see exactly where you need to add graphics, find some B-roll footage, or pop in some on-screen text, making sure your visuals truly support your words.
Recording Professional Video on a Budget
So many creators think they need a Hollywood-sized budget to produce educational videos that look and sound fantastic. The good news? You absolutely don't. The truth is, a few smart choices and foundational techniques matter far more than the price tag on your camera. Getting crisp, clear results is all about mastering the essentials.
And believe me, putting in that little bit of extra effort pays off big time. Viewers are remarkably willing to stick with well-produced instructional content. In fact, how-to videos often boast the highest retention rates out there. Videos under one minute can see an 82% completion rate, and even longer-form content (up to 30 minutes) often keeps over 50% of viewers watching until the end. This just goes to show that when you deliver value clearly, your audience will stay engaged. You can discover more insights on video engagement statistics if you want to dive deeper.
Your Audio is More Important Than Your Video
If you take only one piece of advice from this entire guide, let it be this: people will forgive slightly grainy video, but they will not tolerate bad audio. It’s the fastest way to lose an audience. Muffled, echoey, or distorted sound instantly makes your content feel unprofessional and is incredibly distracting for the learner.
So, before you even think about upgrading your camera, invest in a decent microphone.
You don't need to spend a fortune. Here are a couple of affordable options that make a massive difference:
- Lavalier Microphones: You’ve seen these—the small clip-on mics that are fantastic for talking-head videos. A simple wired lav mic that plugs right into your smartphone can cost as little as $20-$30 and will provide dramatically better sound than your device's built-in mic.
- USB Microphones: If you're mainly recording voiceovers for screencasts at your desk, a USB condenser mic is a brilliant choice. They offer rich, clear audio and are incredibly simple to set up—just plug and play.
Pro Tip: Record in a room with soft surfaces. Think carpets, curtains, or even a closet full of clothes. These materials absorb sound and kill the echo that can make your audio sound amateurish.
Simple Lighting Tricks for a Professional Look
Good lighting is the secret sauce that makes any camera, even the one on your smartphone, look incredible. You don't need a complex, three-point lighting setup to get started. The goal is simple: get a soft, even light on your face.
The cheapest and most effective light source? A window.
Just position yourself so you are facing the window, letting that natural daylight illuminate your face. Whatever you do, avoid having a bright window behind you, as this will turn you into a dark, mysterious silhouette.
If natural light isn't a reliable option, an inexpensive ring light is a total game-changer. Position it directly behind your camera, just a bit above eye level, to create a flattering and professional look without any harsh shadows. This one simple addition can instantly elevate your video quality.
Nailing Your Camera and Screencast Setup
Once your sound and lighting are sorted out, a few final tweaks to your setup will ensure a polished result. Whether you're on camera or recording your screen, a clean and intentional presentation keeps the focus right where it belongs: on your lesson.
On-Camera Presence: Get your camera at or slightly above eye level. Looking down at a camera is never flattering, and looking up can feel a bit awkward. A simple stack of books under your laptop can achieve the perfect angle. Most importantly, speak with confidence and energy! If you're excited about your topic, your audience will be, too.
Clean Screencast Recordings: When you're doing a software tutorial, a tidy screen is non-negotiable. Before you hit record, close unnecessary tabs and applications, and—please—turn off your notifications. Use a clean desktop background. This minimizes distractions and helps your viewers focus on exactly what you’re trying to show them.
Editing Faster and Smarter with AI Tools
Editing is where the magic really happens. This is the stage where all your raw footage—the good, the bad, and the sometimes messy—gets shaped into a polished, professional learning experience. While the fundamentals of editing haven't changed—cutting out mistakes, adding transitions, and dropping in B-roll—a new generation of AI tools is completely changing how we do it.
These aren't just novelties anymore. Think of them as a powerful assistant for any educator or creator who wants to make great videos without spending countless hours on tedious tasks. You get to hand off the repetitive stuff and focus on what really matters: the story, the teaching, and the connection with your audience.
The Core Editing Workflow
Before we get into the cool AI stuff, let's nail down the basics. Your first editing pass should always be about cleaning up the raw footage. That means trimming the fluff at the beginning and end, and more importantly, hunting down every "um," awkward pause, or fumbled line. A tight, clean edit is a sign of respect for your viewer's time and keeps the energy up.
With your main footage assembled, it's time to add visual interest. B-roll, which is just supplemental footage that illustrates what you're talking about, is absolutely essential for keeping viewers engaged. If you're explaining a historical event, for example, you can cut away from your talking head to show archival photos or maps. Smooth transitions between these clips are also key to preventing jarring cuts and giving the video a seamless, professional feel.
Unleashing AI in Post-Production
This is where you can start clawing back a serious amount of time. Modern editing software and dedicated AI platforms can now handle some of the most time-consuming parts of the job with just a few clicks. This shift is making high-quality video production more accessible than ever before.
In fact, new data shows that advanced technologies like AI-generated video are making production faster and more personalized. This is a huge deal for educators who can now create explainer videos and learning modules more efficiently, scaling up the amount of great content they can produce. Recent e-learning video trends really highlight this impact.
Here are a few specific tasks that AI just crushes:
- Automatic Silence Removal: These tools can instantly find and zap long, dead-air pauses, tightening up your video's pacing in seconds.
- Text-Based Editing: This is a game-changer. Some platforms transcribe your video so you can edit the footage just by deleting words or sentences from the text. Made a mistake? Just find the word and delete it.
- AI Audio Enhancement: Instantly remove distracting background noise, kill echo from a room, and automatically balance volume levels. The result is crisp, clear audio that sounds like it was recorded in a studio.
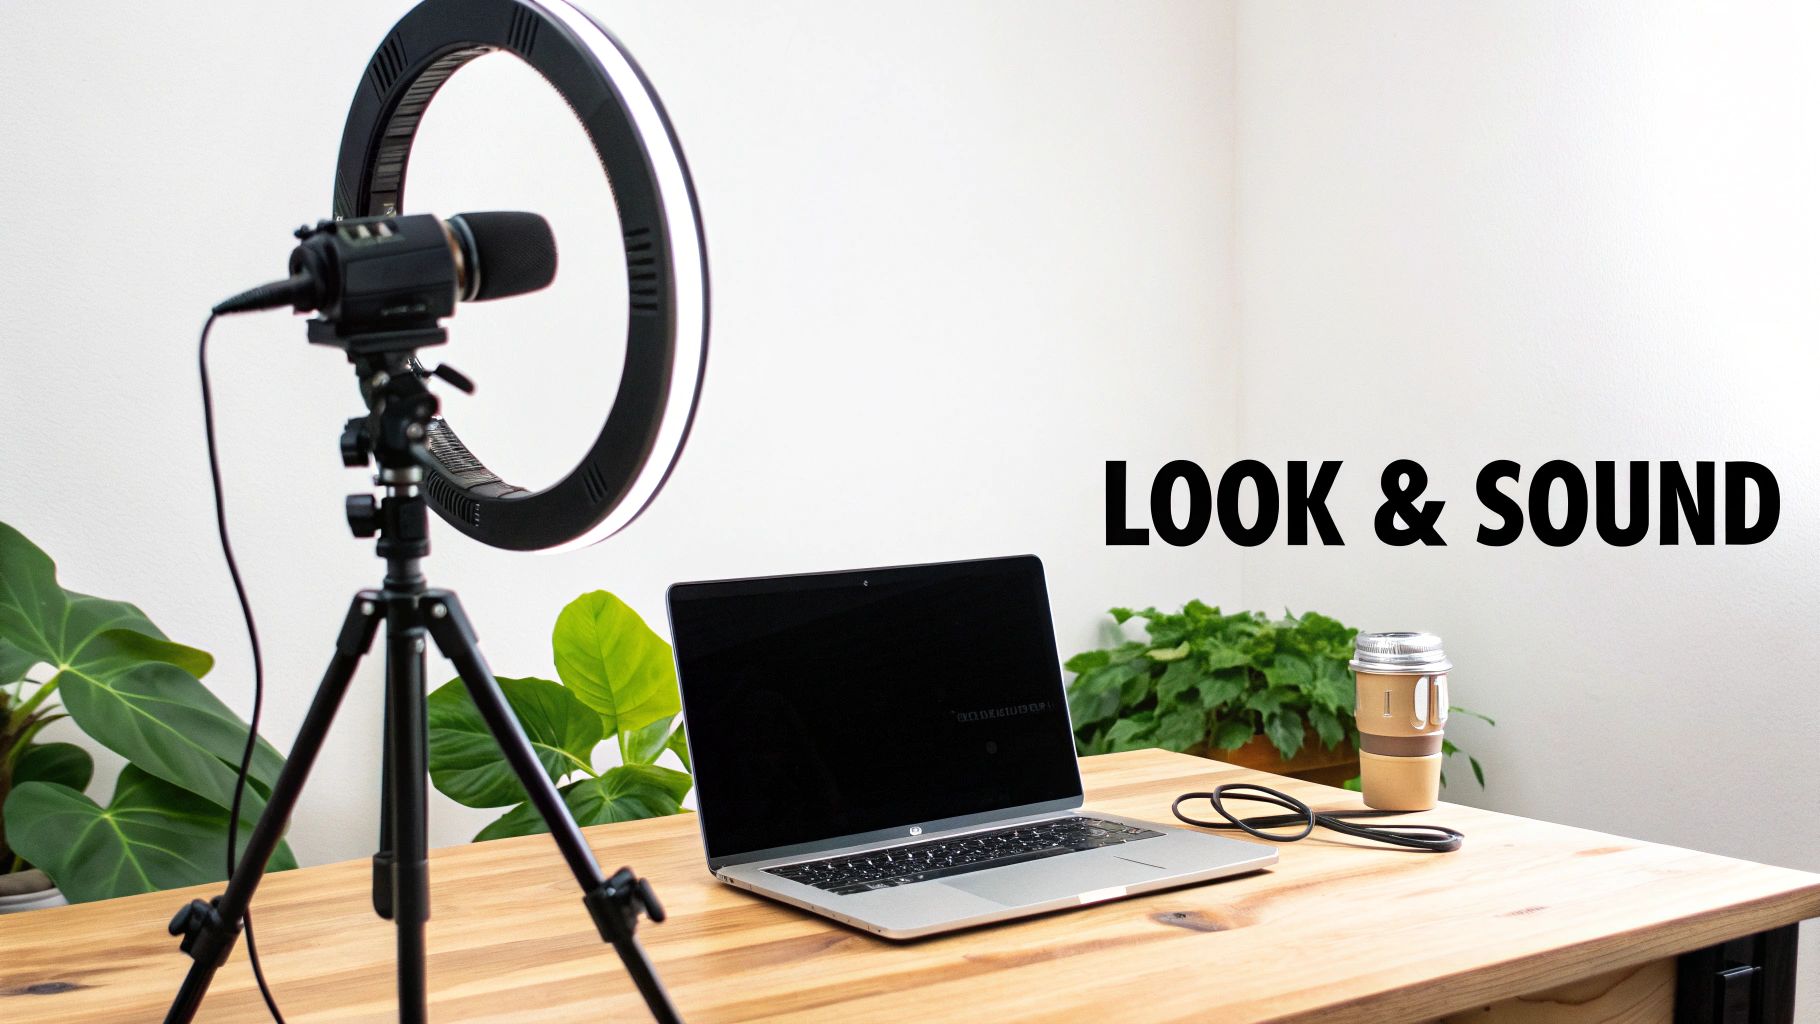
The image above shows a pretty standard creator setup, but what's changing is the software on that laptop. It's moving toward a script-first process where AI can handle a huge chunk of the visual production, making things incredibly fast.
Essential vs AI-Powered Editing Tasks
To see how much things have changed, it's helpful to compare the old way of doing things with the new, AI-assisted approach. Here’s a quick breakdown:
| Editing Task | Traditional Approach | AI-Powered Solution |
|---|---|---|
| Rough Cut | Manually scrubbing through footage to find and trim mistakes. | Editing by deleting words from an auto-generated text transcript. |
| Pacing | Manually identifying and cutting out awkward pauses to improve flow. | "Silence Remover" tools automatically detect and snip out dead air. |
| Audio Cleanup | Using complex filters (equalizers, compressors) to reduce noise. | One-click "Enhance Speech" buttons to balance levels and remove noise. |
| B-Roll Sourcing | Hours spent searching through stock footage libraries for the right clip. | Generating custom, perfectly-matched B-roll from a simple text prompt. |
| Captions | Manually transcribing and timing every word of dialogue. | Auto-transcription tools generate accurate, timed captions in minutes. |
As you can see, AI isn't replacing the editor; it's giving them superpowers by automating the most repetitive parts of the job.
Generating Visuals and Animations with AI
AI is more than just a cleanup crew; it's also becoming a powerful creative partner. Many platforms now have features that can generate visuals from scratch, which is fantastic for explaining abstract concepts when you don't have a background in graphic design. Imagine explaining the water cycle and using an AI tool to create a simple, clean animation that shows the process visually.
By delegating repetitive editing tasks to AI, you reclaim valuable time and mental energy. This allows you to invest more in what truly matters: refining your message, clarifying complex topics, and creating an educational experience that genuinely connects with your audience.
Some dedicated AI video platforms, like Auralume AI, even pull together multiple top-tier video generation models into a single interface. This means you can create cinematic B-roll, animate a still image, or bring a concept to life just by typing what you want to see. Instead of digging through stock libraries, you can create the exact visual you need in seconds. To see this in action, check out our guide on AI-powered video creation tools.
This approach doesn't just make your workflow faster. It fundamentally expands your creative toolkit, letting you produce more dynamic and engaging educational videos than ever before.
Getting Your Video Seen by the Right People
Creating a brilliant educational video is a huge accomplishment, but the journey isn't over when you click "export." A masterpiece is useless if it never finds its audience. Now comes the final, critical phase: ensuring your content gets in front of the right people in a way that’s accessible and compelling.
This is where distribution and optimization come into play. It involves more than just uploading a file; it's a strategic process of preparing your video to be discovered, understood, and shared. A few thoughtful steps at this stage can dramatically multiply your video's impact.
Make Your Content Accessible to Everyone
Before you even think about SEO or social media, your top priority should be accessibility. When you make your educational videos accessible, you aren't just checking a box—you're opening the door to a wider audience and ensuring every single learner can benefit from your work.
This is a non-negotiable part of creating modern educational content. It supports viewers with hearing impairments, non-native speakers, and even people watching in noisy environments where they can't use audio.
- Add Accurate Captions: While many platforms auto-generate captions, they are often riddled with errors. Take the time to review and edit them for accuracy. This small step makes a huge difference in comprehension and professionalism.
- Provide a Full Transcript: A transcript is a text version of your video's audio. It's fantastic for viewers who prefer to read along or quickly search for specific information within your lesson. It also gives search engines more text to crawl, which can boost your video's discoverability.
Making accessibility a core part of your workflow ensures your teaching is truly inclusive.
Optimize Your Video for Search and Discovery
For platforms like YouTube—the world's second-largest search engine—optimization is what separates videos that get seen from those that get lost. Video SEO is all about signaling to the platform's algorithm what your content is about and who it's for.
Think of it this way: you’ve created the perfect answer to a question. Now you need to make sure people asking that question can find you.
Key Insight: Video SEO isn't about tricking an algorithm. It's about clarity. By using the right keywords and metadata, you're simply making it easier for the platform to connect your valuable content with the learners who are actively searching for it.
Write Titles and Descriptions That Work
Your video's title and description are your primary tools for grabbing attention and providing context.
Crafting Magnetic Titles
Your title is your first impression. It needs to be clear, concise, and keyword-rich. A generic title like "Photosynthesis Lesson" just won't cut it.
Instead, try something more specific and compelling like, "How Photosynthesis Works: A Simple Explanation for Beginners." This title includes the core keyword and clearly defines the target audience.
Writing Keyword-Rich Descriptions
The description is where you provide deeper context. The first 2-3 sentences are most important, as they often appear in search results. Start with a clear summary of what the video teaches, naturally including your main keywords.
Use the rest of the space to add more detail, link to resources, and include timestamps (chapters) to help viewers navigate longer videos.
Design Thumbnails That Beg to Be Clicked
On a crowded platform, your thumbnail is your visual sales pitch. A great custom thumbnail can dramatically increase your click-through rate. It should be bright, clear, and consistent with your brand.
Include a high-contrast image (like a shot of you or a key visual from the lesson) and a small amount of bold, easy-to-read text that complements the title. Avoid clutter—the goal is to be instantly understandable, even at a small size.
Finally, think beyond the initial upload. The smartest creators know that one video can fuel an entire content strategy. The real magic happens when you repurpose your educational videos for maximum reach by turning them into blog posts, social media clips, or even podcast episodes. This approach extends the life of your hard work and connects with audiences on their favorite platforms.
Common Questions About Making Educational Videos
Even with a perfect plan in hand, jumping into video creation for the first time is bound to stir up some questions. It’s completely normal. Getting those nagging uncertainties out of the way is often the key to building the confidence you need to hit record.
Let's walk through some of the most common questions I hear from creators just starting out.
What’s the Ideal Length for an Educational Video?
This is the big one, isn't it? The short answer is almost always: shorter is better.
While there's no single magic number, extensive data shows the sweet spot for keeping people glued to the screen is somewhere between 6 and 12 minutes. Once you creep past the 10-minute mark, you start to see a significant drop-off in viewership.
If your topic is dense and really needs more time, don't try to cram it all into one 30-minute epic. That's a recipe for viewer fatigue. A much better approach is to break it down into a mini-series of shorter, digestible videos.
A great rule of thumb is to dedicate one video to a single, clear learning objective. This respects your audience's time, keeps them focused, and makes it way easier for them to actually remember what you taught them.
Do I Really Need Expensive Gear to Get Started?
Absolutely not. This is probably the biggest myth that holds people back. The truth is, you likely already have a fantastic camera right in your pocket: your smartphone.
The single best place to invest a little money isn't your camera—it's your audio.
- Audio is Everything: Viewers are surprisingly forgiving of less-than-perfect video quality, but bad audio is an instant dealbreaker. If they can't hear you clearly, they're gone.
- An Affordable Fix: You can get a simple lavalier (lapel) mic that clips to your shirt for about $20-30. This one small purchase will improve your production value more than a $1,000 camera ever could.
- Work with What You've Got: For lighting, just start by facing a window. Natural light is free, and it looks great.
Get the fundamentals down first—clear sound, good lighting, and a steady shot. You can worry about upgrading your camera rig way down the road.
How Can I Make My Videos More Engaging?
Engagement isn’t about fancy graphics or special effects. It’s about creating variety and connecting with your audience on a human level. A static, ten-minute talking head is a guaranteed way to send viewers clicking away.
To keep people hooked, you have to constantly give their eyes and brains something new to process.
- Vary Your Visuals: Keep things moving. Cut away from your face to show relevant B-roll clips, pop-up text that emphasizes a key point, or simple diagrams. This visual rhythm is what makes a video feel dynamic instead of static.
- Talk Like a Real Person: Write your script the way you actually speak. Let your personality and enthusiasm for the topic shine through. If you sound bored, your audience will be bored.
- Involve the Viewer: Ask questions. Even rhetorical questions work wonders because they prompt the viewer to stop passively watching and start actively thinking about what you're saying.
- Tell a Story: Humans are wired for stories. Whenever you can, frame your lesson within a relatable story or a real-world example. It’s one of the most powerful tools we have for making information stick.
When you blend these techniques, you're no longer just delivering a lecture; you're creating a memorable learning experience.
Ready to bring your educational video ideas to life without the complexity? Auralume AI turns your text prompts and still images into cinematic, professional-quality video clips in seconds. Stop searching for stock footage and start creating the exact visuals you need. Explore what you can create at auralumeai.com.