How to Make Product Videos That Sell
Before you even think about hitting record, the real work begins. Honestly, a solid plan is what separates a product video that actually sells from one that just adds to the internet's noise. This pre-production phase is your blueprint, making sure every single second of your video has a job to do.
It all boils down to one simple question: what do you want people to do after they watch?
Crafting Your High-Impact Video Blueprint
This initial planning is non-negotiable. Getting this right saves you from the headache and expense of reshoots down the line and ensures your message lands perfectly.
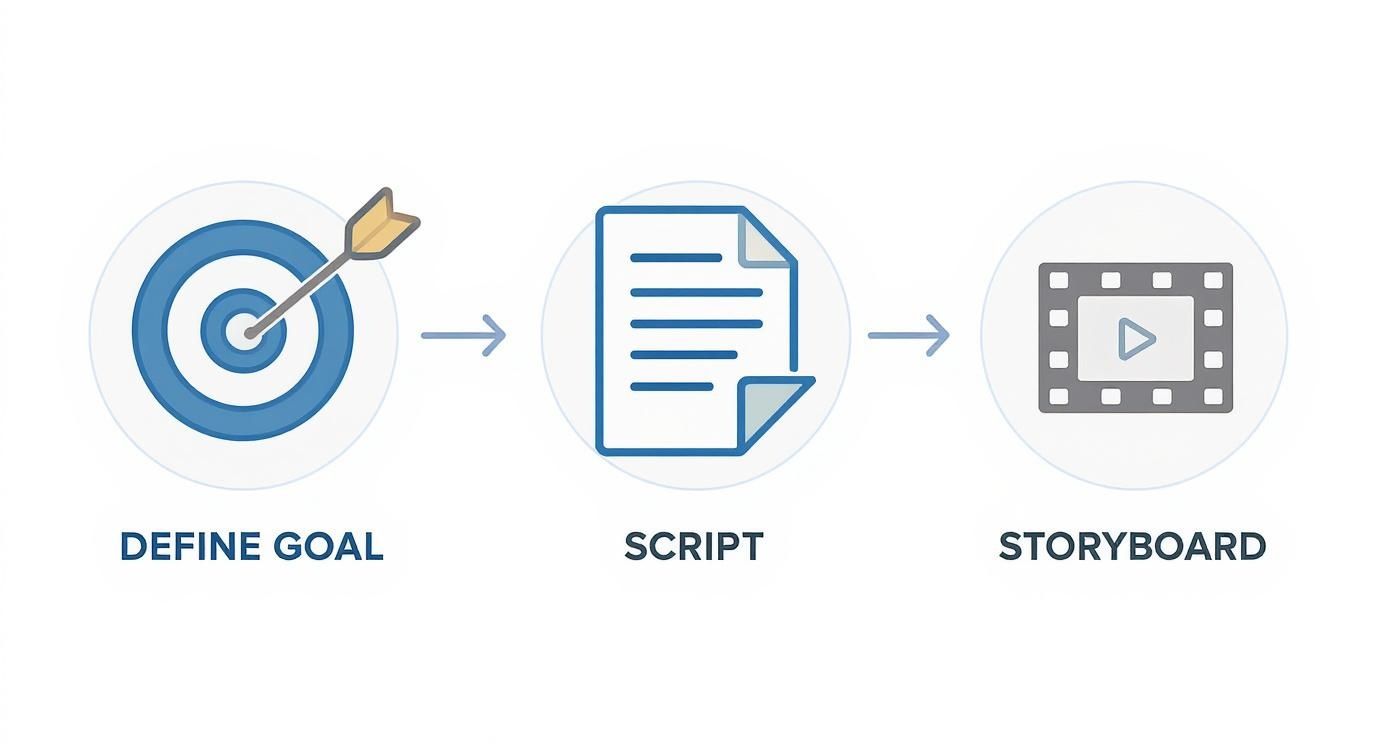
Define Your Core Objective
First things first, you need a single, clear mission for your video. A video trying to do everything at once will accomplish nothing.
- Drive Sales: Is the goal to get someone to click "Buy Now"? Your video needs to be persuasive, packed with benefits, and have a can't-miss call to action.
- Educate and Explain: Trying to demystify a complex product? You'll want a clear, step-by-step demo that focuses on solving a user's problem.
- Build Brand Awareness: If you're introducing your brand to a new crowd, the video should tell a story and create an emotional connection. It’s less about the "what" and more about the "why."
There's a reason we're so focused on this. The data doesn't lie: watching a product demo has pushed around 87% of users to make a purchase. That's a massive conversion rate, and it all starts with a clear goal.
Script a Narrative That Resonates
With your objective locked in, it's time to write a script that speaks directly to your ideal customer. Don't just list features—tell a story that solves their problems.
A fantastic framework I always come back to is the Problem-Agitate-Solve (PAS) formula. It’s simple and incredibly effective.
- Problem: Kick things off by calling out a pain point they know all too well. "Tired of spending hours sifting through video clips?"
- Agitate: Next, pour a little salt in the wound. Remind them how frustrating it is. "It’s tedious, it kills your creative flow, and it grinds your entire content schedule to a halt."
- Solve: Finally, swoop in with your product as the hero. "With Auralume AI, you can generate cinematic shots from a single text prompt in seconds."
This structure grabs attention right away because it's relatable. For more on creating videos that get results, check out this guide on how to make product demo videos that convert.
Visualize Your Story with a Storyboard
A storyboard is just a fancy term for sketching out your shots in sequence. You don't need to be an artist; stick figures work just fine. The point is to create a visual map of your video before you start creating assets or filming.
This step is a lifesaver. It helps everyone on the team get on the same page and lets you map out the visual flow, ensuring every shot serves the story. By seeing the video shot-by-shot, you can spot pacing problems, refine transitions, and make sure the final cut will be engaging and easy to follow.
To keep everything on track, I find a simple checklist does wonders.
| Essential Product Video Planning Checklist |
|---|
| Planning Stage |
| Define The Goal |
| Script The Narrative |
| Create a Storyboard |
| Key Action |
| Choose one primary objective: drive sales, educate users, or build brand awareness. |
| Write a script using the Problem-Agitate-Solve (PAS) formula to address customer pain points. |
| Sketch out each scene to visualize the flow, shot composition, and key visual elements. |
| Why It Matters |
| A clear goal ensures every element of the video serves a single, measurable purpose. |
| A compelling story connects emotionally with the audience and makes your solution memorable. |
| This visual plan aligns the team, prevents confusion, and saves significant time during production and editing. |
This simple sequence—Goal, Script, Storyboard—is the foundation that supports every great product video. Nailing these three steps will make the rest of the process smoother, faster, and far more effective.
Sourcing and Creating Your Visual Assets

Alright, with your blueprint locked in, it’s time for the fun part: gathering the visual ingredients that will actually tell your story. This is where your video starts to take shape. You basically have two ways to go here—you can shoot fresh, live-action footage, or you can get clever and build a dynamic video from still images and screen recordings.
One path isn't better than the other; it really just depends on your product and your resources. If you’re selling something physical, like a handcrafted wallet or a new skincare line, seeing it in the real world through live video often has the most impact. But for a software platform or a mobile app, a polished video made from screen recordings and animated images can be far more effective.
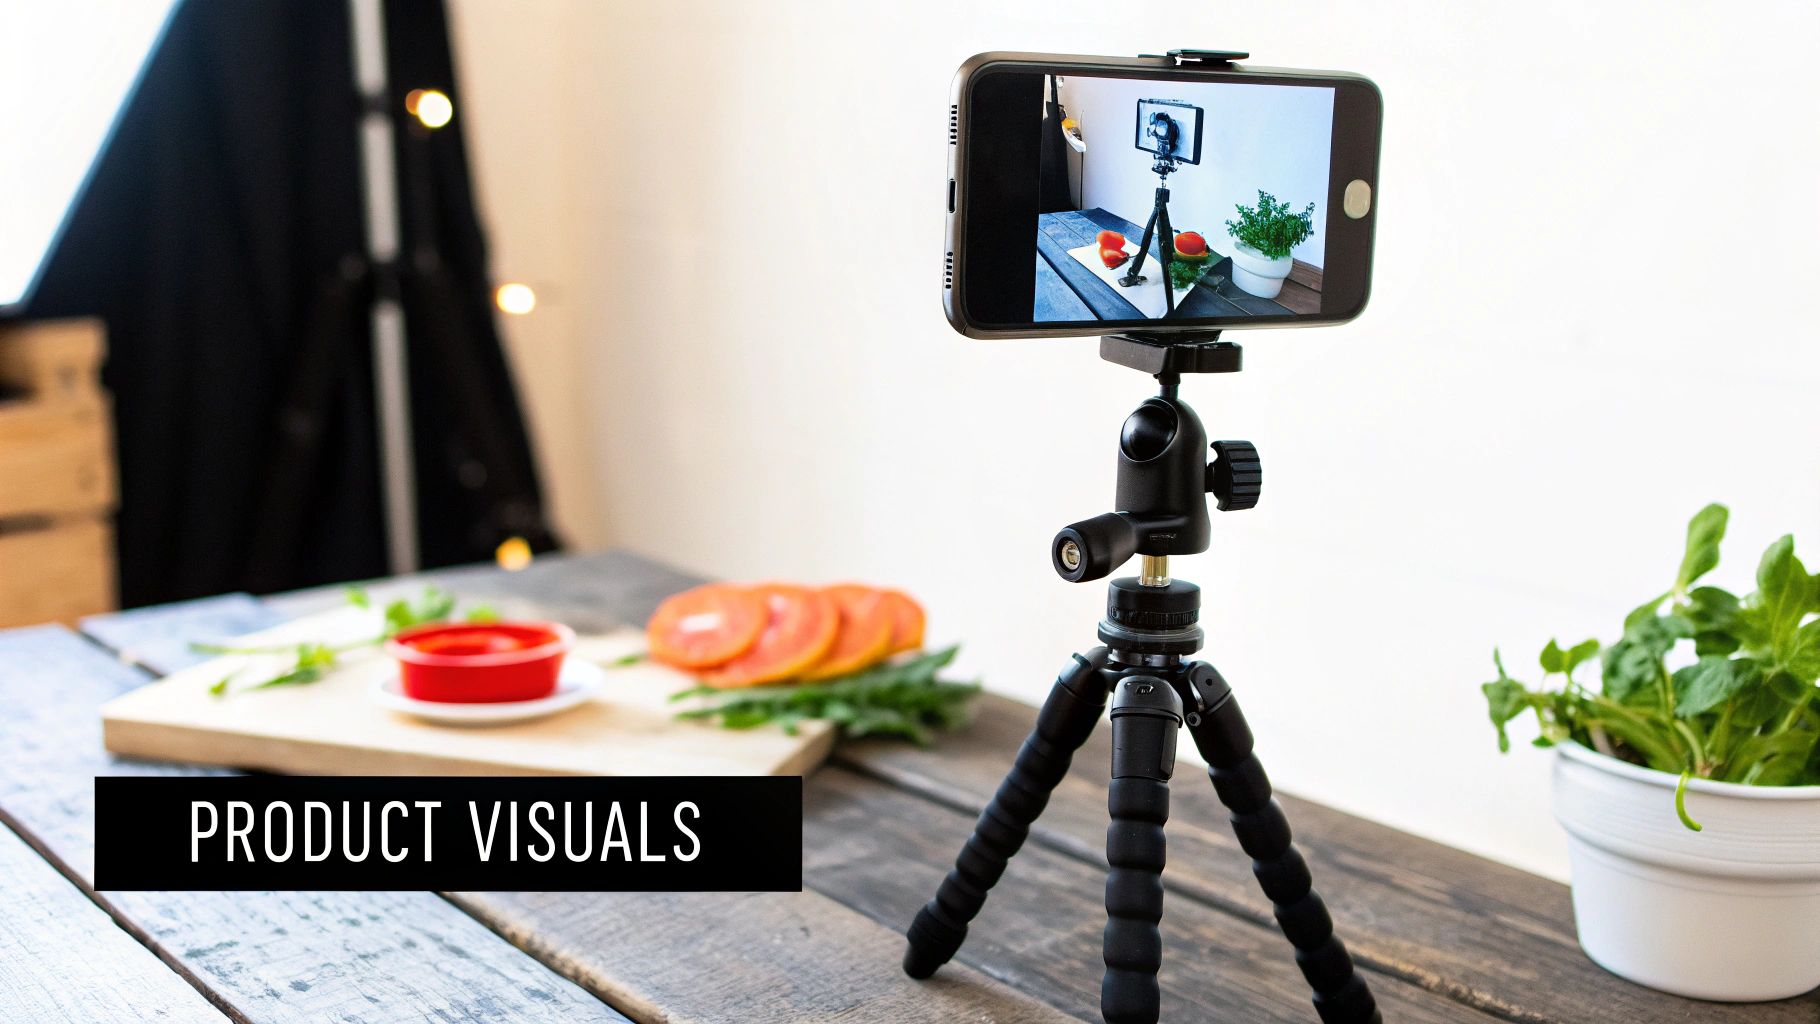
Filming Your Product In-House
Let’s get one thing straight: you don't need a Hollywood budget or a fancy studio to get professional-looking shots. Your smartphone is an incredibly powerful camera. The secret is to nail the fundamentals that separate amateur work from pro-level content: lighting, stability, and your environment.
Good lighting is everything, but it doesn't have to be expensive. Your best bet is often free—find a large window and let that soft, natural daylight do the work. Just try to avoid direct, harsh sunlight, which creates ugly shadows. For a simple pro trick, grab a white poster board and use it to bounce light back onto the product, which helps fill in any dark spots.
A shaky camera is the fastest way to make your video look cheap. A simple smartphone tripod is probably the best $20 you'll ever spend on your video marketing. It guarantees every shot is steady, sharp, and looks intentional.
Finally, pay attention to what's behind your product. A messy, cluttered background is distracting and pulls focus from what you're actually trying to sell. Use a plain wall, a clean tabletop, or a seamless paper backdrop. You want your product to be the undeniable hero of the shot.
Creating Videos from Still Assets
What if shooting new footage just isn't in the cards? No problem. You can create a surprisingly polished and powerful video using assets you probably already have. This is a game-changer for digital products, services, or anyone on a tight budget. It’s all about being resourceful.
Animating Still Images
Those high-resolution product photos on your website are a goldmine. Instead of just showing them as a static slideshow, you can bring them to life with subtle motion. Most video editing software has a "Ken Burns" effect, which lets you slowly pan and zoom across an image. This simple trick creates a sense of movement and helps guide your viewer’s eye exactly where you want it to go.
If you want to take it a step further, tools like Auralume AI can analyze a still photo and add realistic, natural motion to it. It essentially turns a flat picture into a short, captivating video clip—perfect for adding a little visual flair without needing any animation skills.
Using Screen Recordings
For any software, app, or website, screen recordings are non-negotiable. They give viewers a direct, over-the-shoulder look at how your product actually works.
- Plan your moves. Don't just hit record and start clicking around. Follow your script and storyboard to capture the specific workflows that show off your product's biggest benefits.
- Clean up your screen. Before you start, close out of extra tabs and turn off notifications. A clean desktop looks far more professional.
- Zoom in for emphasis. When you’re editing, use zooms to highlight important buttons or features as you talk about them. It’s a simple way to direct attention.
When you combine sharp, animated product shots with clear screen recordings and a strong voiceover, you can create a demo video that looks and feels incredibly professional. It just goes to show that you can make a killer product video by working smarter with the assets you have, not just by spending more on gear.
Using AI for Faster and Smarter Video Creation
Let's be real—AI has gone from a tech buzzword to a genuinely useful partner in creating videos. For marketers and creators, this means we can now produce seriously high-quality product videos without a film degree or a massive budget. These tools can jump in at any stage, from kicking around ideas to adding that final layer of polish.
The numbers don't lie. In 2024, a solid 41% of marketing pros said they were using AI for video creation. That's a massive leap from just 18% the year before. This isn't just a trend; it's a fundamental shift, with AI-driven production already cutting video costs by an average of 23%.
Generating Ideas and Assets with AI
We’ve all been there: staring at a blank screen, waiting for inspiration to strike. This is where AI really shines as a brainstorming sidekick. You can go from a vague concept to a working script in a matter of minutes.
Just feed an AI scriptwriter a simple brief about your product and who you're trying to reach. It can spit out multiple script angles, taglines, and even voiceover ideas in different tones. It’s a huge time-saver that gives you a solid starting point to build from, rather than pulling ideas out of thin air.
Modern video generators work on the same principle, creating entire scenes from just a few descriptive sentences.
Mastering Prompts for Cinematic Results
Getting great visuals from an AI video generator is all about learning how to "speak its language." A lazy, vague prompt gets you a lazy, generic result. But a specific, descriptive prompt? That gives you real creative control. You have to think like a director giving clear instructions to your crew.
To get the AI to see what's in your head, pack your prompts with these details:
- Shot Type: Don't just ask for a shot; define it. Use terms like "dramatic close-up," "sweeping aerial shot," or "smooth dolly zoom tracking."
- Subject and Action: Be crystal clear. Instead of "a drone," try "A sleek black drone hovering silently over a misty forest at sunrise."
- Lighting and Style: Set the mood. Words like "warm cinematic lighting," "high-contrast shadows," or "vibrant, saturated colors" make a huge difference.
- Artistic Influence: Give the AI a reference point. Phrases like "in the style of a Wes Anderson film" or "hyperrealistic 8K render" are powerful shortcuts.
A well-crafted prompt is the difference between a forgettable stock clip and a cinematic shot that perfectly captures your brand's aesthetic. The more detail you provide, the closer the AI will get to your vision.
Some platforms, like the Auralume AI video generator, even have built-in features like a Prompt Wizard to help you refine your inputs on the fly. This is a game-changer for anyone new to prompting, guiding you toward the kinds of details that produce professional results.
AI in Post-Production and Enhancement
The magic doesn't stop once you have your clips. AI is also a workhorse in post-production, automating tasks that used to be a massive time suck.
Need captions? AI tools can generate incredibly accurate subtitles in minutes. This is non-negotiable for social media, where most videos are watched on mute. AI can also handle audio cleanup, scrubbing background noise or balancing levels to make sure your voiceover is perfectly crisp and clear.
One of the most practical uses, though, is asset enhancement. If you have product photos or video clips that are a bit blurry or low-res, AI can sharpen and enlarge them without sacrificing quality. Using an AI image upscaling tool is a fantastic way to make sure every shot looks sharp and professional, no matter where it came from.
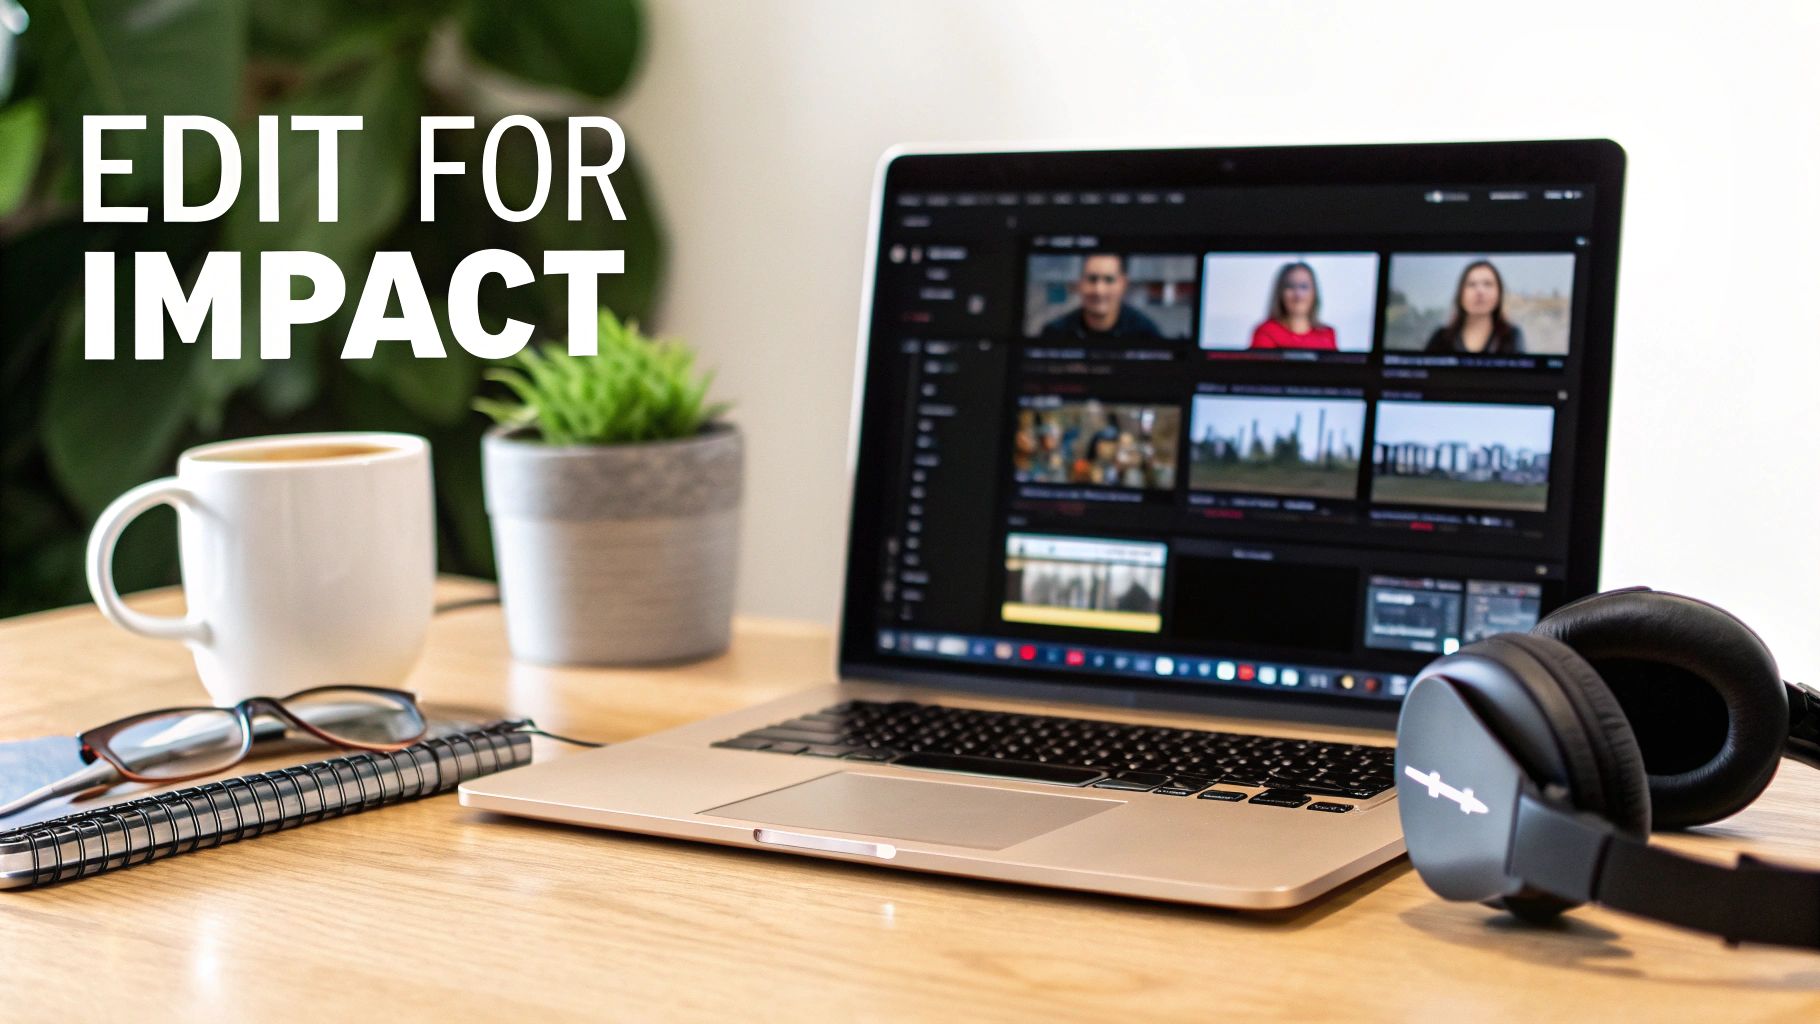
Editing Your Video for Maximum Impact
This is where the magic really happens. You've done the heavy lifting—the planning, scripting, and asset gathering. Now, it's time to bring it all together in the edit. Think of the editing suite as your workshop, where you’ll shape your raw materials into a story that grabs attention and holds it. A good edit isn't just about stringing clips together; it's about crafting an experience.
https://www.youtube.com/embed/bzoTOgqD15I
Your first move is to build the skeleton of your story. Just get your main clips, what we call the A-roll, onto the timeline. Lay them out in the order you mapped out in your storyboard or script. Don't sweat the small stuff yet—the goal here is simply to get the basic structure in place.
Assembling Your Story and Setting the Pace
With the main narrative laid out, the real craft begins: pacing. This is all about trimming the fat. Every clip has a little bit of "air" at the beginning and end that you just don't need. Slicing that out tightens everything up, creating a rhythm that feels sharp and professional, not sluggish.
One of the biggest mistakes I see is letting shots hang on for too long. We live in a world of short attention spans. If a shot isn't actively moving the story forward, it’s probably killing your momentum. Be ruthless. Cut decisively.
This is also the perfect time to start weaving in your B-roll. These are your supporting shots—the close-ups, the screen recordings, the lifestyle clips. Layering these over your A-roll or voiceover is what transforms a static video into a dynamic one. It breaks up the monotony and gives your audience something new to look at.
For instance, if your voiceover mentions a specific feature, don't just talk about it. Show it! Cut to a B-roll clip that demonstrates that feature in action. It's the classic "show, don't tell" principle, and it makes your message stick.
Polishing Your Audio and Adding Text
You can have the most stunning visuals in the world, but if your audio is bad, people will click away. It’s that simple. Your two key audio elements are almost always the voiceover and the background music.
First, make sure your voiceover is pristine. It needs to be clean, clear, and completely free of distracting background noise. If you recorded it yourself, run it through some basic noise reduction in your editing software. You're aiming for that crisp, professional sound that’s effortless to listen to.
Next up is the music. The right track can completely change the feel of your video, setting the mood and adding emotional depth.
- Get the Volume Right: The music is there to support the voiceover, not fight it. A good starting point is to duck the music volume whenever someone is speaking so the words are always clear.
- Match the Vibe: A high-energy track is great for a product launch, but a more chill, ambient piece might be better for an explainer video. The music should feel like it belongs.
- Use Royalty-Free Music: Don't risk a copyright strike. Use a trusted source for royalty-free music to keep your video safe.
Text overlays are another fantastic tool for reinforcing key points. Use them to highlight a specific benefit, call out your product's name, or drive home a crucial piece of information. Just keep the text clean, simple, and easy to read.
Your most important piece of text is your call-to-action (CTA). At the end of the video, spell it out. Use a bold text overlay and a clear verbal cue to tell people exactly what you want them to do next, whether it’s “Shop Now,” “Learn More,” or “Download the App.”
The Final Polish: Color and Sound
You’ve built your story, balanced the audio, and added your text. Now it's time for the final layer of gloss that separates the amateurs from the pros. This comes down to two things: color and sound.
Color correction is about making sure all your clips look like they belong in the same video. It smooths out any jarring differences in lighting or color temperature, creating a consistent, professional look. Even a simple one-click color correction tool in your software can make a world of difference.
Finally, do one last "audio mix" pass. Put on a good pair of headphones and listen to the entire video from start to finish. Are the volume levels consistent? Is anything too loud or too quiet? This final check ensures a smooth, enjoyable viewing experience for your audience. It's the little details like this that truly elevate your final product.
Optimizing Your Video for Every Platform
So you've created an incredible product video. That's a huge win, but the work isn't over yet. Honestly, a brilliant video is just the starting point. The real magic happens when you get that video in front of the right people, on the right platforms, in a way that feels completely natural.
This is where so many creators drop the ball. They upload the exact same file everywhere and wonder why engagement is low. Each platform is its own unique ecosystem with different rules, audience expectations, and technical quirks. To get the most out of your hard work, you need to adapt.
Tailoring Your Video for Key Channels
First, think of your main video as your "hero" asset. This is probably a widescreen 16:9 version that lives on your website or main YouTube channel. It can be a bit longer, maybe 1-3 minutes, diving into the good stuff.
But for social media, that approach just won't cut it.
For platforms like Instagram Reels, TikTok, and YouTube Shorts, you have to go vertical. We're talking a 9:16 aspect ratio. And this isn't just about cropping your widescreen video and calling it a day—that often looks clunky and unprofessional. You'll need to reframe your shots, adjust any text overlays, and make sure the core action is front and center. And keep it snappy; anything under 60 seconds is the goal.
Don't treat social media as a dumping ground for your main video. Create platform-native versions. A fast-paced, vertical cut for Reels will always beat a letterboxed widescreen video. It shows you get the platform and respect the viewer's experience.
A little planning during production goes a long way here. If you know you'll need a vertical cut, try to keep the most important visual information in the center of your frame during filming or animation. It will save you a massive headache in the editing room.
Mastering YouTube and Video SEO
YouTube isn't just a video library; it's the second-biggest search engine on the planet. People go there to find answers and solutions, which is a massive opportunity for your product. Getting discovered requires a bit of Video SEO.
It all starts with your video's metadata:
- Create Compelling Titles: Think like your customer. What would they actually type into the search bar? Instead of a generic "New Blender Demo," try something like, "How to Make the Perfect Green Smoothie (New Blender in Action)." It's both searchable and intriguing.
- Write Detailed Descriptions: Don't leave this blank! Use the description to expand on your video, weaving in relevant keywords naturally. Most importantly, add a clear link back to your product page right at the top.
- Design an Engaging Thumbnail: Your thumbnail is basically a tiny billboard for your video. It needs to be bright, high-contrast, and clear. A great shot of the product or a person's expressive face works wonders. Add a few words of bold text to create curiosity.
Nailing these basics can be the difference between getting buried and consistently showing up in search results for months or even years.
Building a Multi-Channel Distribution Plan
With your different video versions ready to go, it's time to get them out into the world. A coordinated plan ensures you're hitting your audience from multiple angles. You want to be everywhere they are.
This isn't just about "post and pray." A solid strategy combines the channels you own with opportunities for paid and earned media.
To make this easier, here’s a quick-reference guide for optimizing your video across the most common marketing channels.
Video Platform Optimization at a Glance
| Platform | Optimal Aspect Ratio | Recommended Length | Key Consideration |
|---|---|---|---|
| Your Website | 16:9 (Widescreen) | 1–3 minutes | Embed high-quality video directly on the product page to inform and convert visitors. |
| YouTube | 16:9 (Widescreen) | 2–5 minutes | Optimize title, description, and tags for search discovery. Use a custom thumbnail. |
| Instagram/TikTok | 9:16 (Vertical) | 15–60 seconds | Hook viewers in the first 3 seconds. Use trending audio and native text styles. |
This table provides a great starting point, but don't stop there.
Integrate the video into your next email newsletter. Share it across all your social profiles with native captions and relevant hashtags. If you have a budget, even a small one, consider running targeted ads to get your video in front of a perfectly curated audience. This holistic approach is how you turn a single video into a genuine business asset that drives results.
Got Questions? We've Got Answers.
Even the best-laid plans can hit a snag. When you're diving into making product videos, a few questions are bound to pop up. Let's walk through some of the most common ones I hear from creators and marketers so you can get ahead of the curve.
How Long Should a Product Video Be?
There's no magic number here—it all comes down to where you're posting it and what you're trying to achieve. The platform dictates the playbook.
On platforms built for quick scrolling, like TikTok or Instagram Reels, you have to be fast. Think under 60 seconds, and make sure you hook them within the first three. If your video is destined for your website's product page or a YouTube tutorial, you can stretch your legs a bit. For those, 1-3 minutes is usually the sweet spot to explain the benefits without seeing your viewer count drop off a cliff.
What's the One Thing I Absolutely Can't Mess Up?
Great visuals are nice, but if your message is muddy, you've already lost. The single most important part of any product video is clarity.
Your viewer has one question on their mind: "What's in it for me?" Your video needs to answer that question, and fast. A gorgeous video that leaves people scratching their heads about what your product actually does won't sell a thing. This is why a solid, benefit-driven script is your true foundation. Everything else is just there to make that core message shine.
A crystal-clear message will always outperform a visually impressive but confusing video. Nail down what you need to say before you worry about how it looks.
Can I Make a Good Video with Just My Phone?
You absolutely can. Modern smartphone cameras are incredible, and honestly, the camera itself is rarely the weak link. The real difference between "amateur" and "pro" comes down to a few fundamentals that have nothing to do with the price of your gear.
- Light it right. Find a big window and use that natural light. It's the best (and cheapest) lighting you'll ever get.
- Stabilize your shot. A simple, inexpensive smartphone tripod is your best friend. Nothing screams homemade like shaky footage.
- Capture clean audio. Your phone's mic is surprisingly decent, but only if you record in a quiet space without echo. Find a room with soft surfaces, like a carpet or curtains, to absorb sound.
Master these three things, and you’ll be amazed at the quality you can get right from the device in your pocket.
Realistically, How Much Will This Cost?
This one truly runs the gamut. The cost of a product video is all about the path you choose.
If you go the full DIY route—shooting on your phone and using free editing software—your only cost is your time. If you bring in an AI video generator, you're likely looking at a monthly subscription, often under $50. Hiring a freelancer can set you back anywhere from a few hundred to a few thousand dollars. And if you go all-in with a full production agency, expect a price tag anywhere from $2,000 to $50,000+ for a single, polished video.
Ready to create stunning, cinematic product videos in seconds? Auralume AI gives you the power to turn text and images into professional-quality video content without any technical skills. Start creating for free today at auralumeai.com.