
How to Make Training Videos That Actually Work
Let's be honest, creating a training video that people actually want to watch can feel daunting. The secret isn't just about what you say, but how you plan it from the very beginning. It all boils down to a clear framework: define your goals, write a script that connects, pick your production style (whether that’s filming in-house or using AI), and then add that final polish in post-production.
Think of this as your blueprint. A solid plan is what separates a forgettable video from one that genuinely helps your team learn and grow.
The Blueprint for Modern Training Videos

We've all sat through those painfully long, dry training presentations. The good news? Those days are over. Effective training videos today are carefully crafted learning tools meant to drive real, measurable improvements in skills and performance. The magic isn't in the expensive camera; it's in a well-thought-out process that turns a simple idea into an impactful learning experience.
This approach marries proven instructional design with engaging video production. Before you even think about hitting the record button or writing an AI prompt, you need to build a strong strategic foundation. For a more detailed look at the end-to-end process, this creator's guide to engaging training video content is an excellent resource.
Laying the Groundwork for Success
This initial planning stage is, without a doubt, the most important part of the entire project. This is where you ask the tough questions that will guide every decision you make down the line.
- What’s the one thing people need to learn? Don't try to cram everything into a single video. Focus on a single, core objective or skill. A video that tries to teach everything often ends up teaching nothing.
- Who are you talking to? A training video for a group of brand-new hires should feel completely different from one made for senior leaders. Know your audience.
- What does success look like? Define the desired outcome from the start. Should the viewer be able to perform a new task perfectly, or is the goal to change their perspective on a key concept?
Getting clear answers to these questions upfront will save you a ton of time and headaches later. It ensures every word in the script and every second of footage has a purpose.
To put it all together, here’s a quick overview of what a successful project looks like from start to finish.
Core Components of a Successful Training Video Project
This table summarizes the essential stages and key considerations for creating an effective training video from start to finish.
| Stage | Primary Goal | Key Activities |
|---|---|---|
| 1. Planning & Strategy | Define clear learning objectives and audience needs. | Identify target audience, set measurable goals, outline content. |
| 2. Pre-Production | Prepare all assets and logistics before recording. | Scriptwriting, storyboarding, location scouting, talent casting. |
| 3. Production | Capture all necessary video and audio content. | Filming B-roll, recording on-screen talent, screen recording. |
| 4. Post-Production | Assemble, edit, and enhance the raw footage. | Video editing, adding graphics, sound mixing, color correction. |
| 5. Distribution & Review | Deliver the final video to the audience and gather feedback. | Hosting on an LMS, sharing via email, analyzing view metrics. |
Each of these stages builds on the last, ensuring a cohesive and professional final product that meets its intended goals.
Corporate training videos have become a cornerstone of learning and development, especially as remote and hybrid work models have become the norm. Video provides a flexible, scalable, and engaging way to deliver critical information to a distributed workforce, meeting employees where they are. You can learn more about what's current in corporate training video production.
Crafting Your Script and Storyboard
Let's be honest: a great training video is made long before anyone hits the record button. This is the pre-production phase, and it's where the real magic happens. This is where we take a good idea and build the blueprint for a learning tool that actually works. It all boils down to knowing exactly what you want your audience to walk away with.
If you don't have a clear goal, you'll end up with a video full of information that doesn't lead anywhere. We need to get past vague ideas like "teach them the new software" and get granular. What, specifically, should they be able to do after watching?
Define Sharp Learning Objectives
Before you even think about writing a script, you have to nail down your learning objectives. These aren't fluffy goals; they are specific, measurable actions you expect from your viewers. Think clear, concise, and action-oriented.
For example, "Understand the expense reporting system" is a terrible objective. It's not measurable. A much better set of objectives would be:
- Submit a multi-item expense report using the correct category codes.
- Successfully upload and attach a digital receipt to a line item.
- Identify and flag a non-compliant expense for review.
See the difference? These objectives become your North Star. They dictate what content is absolutely essential and, more importantly, what you can cut. I've learned that keeping a video focused on just one or two of these objectives is crucial. The data backs this up—shorter, single-topic videos consistently outperform long ones in both engagement and knowledge retention.
The most common mistake I see is trying to cram everything into one video. A video that tries to teach everything ultimately teaches nothing. Zero in on one core skill or solve one specific problem. Your training will be infinitely more powerful.
Write a Script That Connects
With your objectives set, it’s time to script. The script is so much more than just the words that will be spoken; it’s the soul of your video. It establishes the tone, dictates the pacing, and provides the structure for the entire learning experience.
A solid script always has these three key parts:
- The Hook: You have less than 10 seconds to convince someone to keep watching. I like to start with a relatable problem, a shocking statistic, or a direct question that hits on a pain point.
- The Body: This is the meat of the instruction. Break down the process into simple, logical chunks. Always use conversational language. Ditch the corporate jargon that makes people's eyes glaze over.
- The Conclusion: Quickly recap the main points and finish with a clear call to action. This hammers home the learning objectives and tells the viewer exactly what to do next.
Here’s a pro tip: always read your script out loud. You'll immediately catch awkward phrasing and stiff sentences. You're writing for the ear, not the page. A conversational tone feels like a helpful chat with a knowledgeable colleague, not a dry lecture from HR.
Visualize Your Video with a Storyboard
Next up is the storyboard, which is basically a visual roadmap of your video, scene by scene. Don't worry, you don't need to be an artist. Simple stick figures, basic shapes, or even a series of screenshots work perfectly. The whole point is to map out what the viewer will be seeing while they hear the narration.
This process is a lifesaver because it helps you spot problems before you've invested time and money into production. A storyboard forces you to think through:
- Pacing: Does this section feel like it's dragging on, or are we moving too fast for someone to follow?
- Visuals: What on-screen text, graphics, or supporting footage do I need to make this point clear?
- Clarity: Is what I’m showing on screen a perfect match for what I'm saying?
For instance, if your script says, "First, click the 'Export' button in the top right corner," your storyboard frame should show a screenshot with a big, can't-miss-it arrow pointing right at that button. This simple act of matching visuals to narration makes your instructions foolproof. By planning your script and visuals in tandem, you create a cohesive game plan that makes the entire production process smoother and the final product far more effective.
Choosing Your Production Workflow
Alright, with your script and storyboard finalized, you’ve reached a fork in the road. How are you actually going to make this video? Broadly, you have two main paths: the traditional, hands-on route of recording it yourself (in-house), or the increasingly powerful option of using AI video generation.
Your decision here will ripple out, affecting your budget, your production timeline, and the overall feel of the final training. One path gives you total creative control and human nuance; the other offers incredible speed and efficiency. Neither is "better"—it's all about what's right for this specific project.
This is where all your upfront planning pays off. That audience analysis and scripting work form the bedrock of your production, no matter which path you choose.
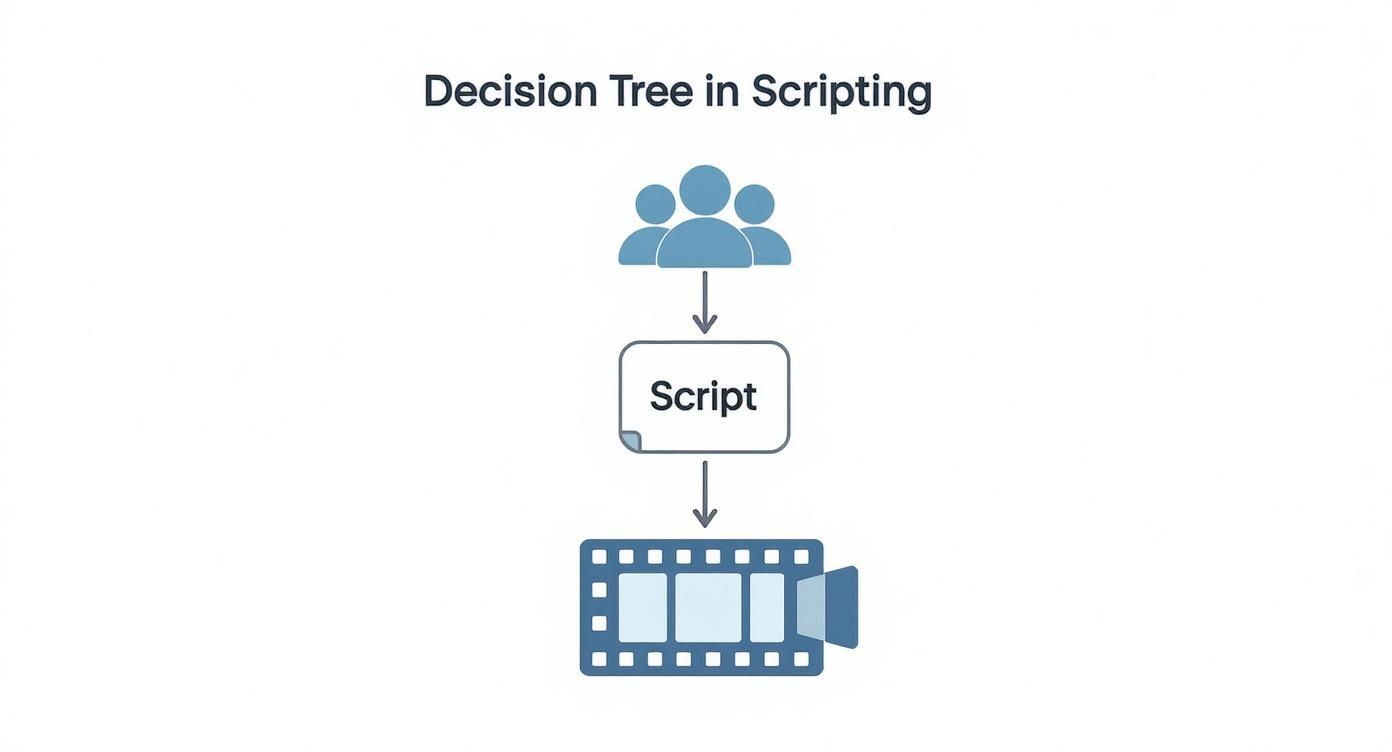
As the diagram shows, a solid script and storyboard, born from knowing your audience, is the non-negotiable foundation before you ever hit "record" or "generate."
The In-House Recording Approach
Going the in-house route means you’re the one capturing the footage. This is the perfect choice for training that needs a real human touch—think authentic leadership messages, demonstrations of physical tasks, or nuanced soft skills training. The best part? You really don't need a Hollywood budget to get clean, professional results.
Honestly, the camera on your smartphone is probably more than capable. Pair it with good lighting and clear audio, and you can create fantastic footage for most training scenarios. If you have a bit of a budget, stepping up to a DSLR or mirrorless camera gives you more creative control.
But let's be clear about the most important piece of gear. It's not the camera. It's the microphone.
Viewers will forgive slightly shaky video, but they will absolutely not tolerate bad audio. If it’s muffled, echoey, or full of background noise, people will click away. A simple lavalier or USB microphone is the single best investment you can make to improve your video quality.
Setting up a decent recording space is also a game-changer. You don't need a dedicated studio. Just find a quiet room with minimal echo, choose a simple, uncluttered background, and get some basic lighting in place. A simple three-point lighting setup (a key light, fill light, and backlight) is the classic formula for a reason—it eliminates harsh shadows and makes your speaker look professional.
The AI Video Generation Route
What if you want to skip the cameras, mics, and lights entirely? That's where AI video generation platforms like Synthesia, HeyGen, or our own Auralume AI come in. This is a completely different way of working, and it's a lifesaver for content that needs to be produced fast, scaled across multiple languages, or updated on a regular basis.
The workflow is surprisingly simple. You feed it a script, pick an AI avatar (either stock or a custom one), choose a background, and the platform generates a polished video. It opens up video creation to anyone on your team, no technical filming skills required. It's no wonder that 41% of professionals have already started using AI tools in their video production.
This shift is all about efficiency. The data shows that AI-driven tools can cut video production costs by an average of 23%, a massive help for teams with tight budgets. You can dig into more stats on video marketing trends and AI adoption if you're curious.
The trick to getting great results from these tools is writing effective prompts. Don't just paste your script and hope for the best. Guide the AI with specific context.
- For the avatar's tone: "Deliver this script with an enthusiastic and encouraging tone, like a helpful coach."
- For the visuals: "Use a clean, modern office background. Add on-screen text for these key terms: [term 1], [term 2]."
- For the delivery: "Pause briefly after each of the three main points for emphasis."
The more detail you provide upfront, the closer the AI will get to your vision on the first try, saving you a ton of back-and-forth. This workflow is a fantastic fit for software tutorials, compliance training, or quick informational updates where speed and consistency are king.
Comparing In-House Recording and AI Video Generation
So, which path should you take? The right choice really comes down to the specifics of your content, timeline, budget, and the skills you have on your team. This table breaks down the key differences to help you decide.
| Factor | In-House Recording | AI Video Generation |
|---|---|---|
| Control & Authenticity | High. You have complete control over the performance, nuance, and tone. | Medium. You're relying on the capabilities of the AI avatar, which can feel less personal. |
| Speed & Scalability | Low. This process is manual and involves scheduling, shooting, and hands-on editing. | High. You can generate videos in minutes and easily translate them into other languages. |
| Cost | Variable. Can be very low with minimal gear, but costs can climb with equipment and crew. | Predictable. Typically based on a subscription or a credit system, making budgeting easy. |
| Best For | Leadership messages, hands-on skill demos, sales training, and soft skills coaching. | Software tutorials, compliance and policy updates, and multi-language training rollouts. |
Ultimately, many teams find that a hybrid approach is the most practical solution. You might film a personal welcome message from your CEO in-house, then use AI to efficiently generate the five software tutorials that follow. By understanding the strengths and weaknesses of each workflow, you can pick the most effective method to create training videos that truly connect with your learners and achieve your goals.
Polishing Your Video in Post-Production
The edit is where the magic really happens. This is where your raw footage—all those takes, screen recordings, and audio clips—starts to look and feel like a professional learning experience. You’re essentially assembling the puzzle, putting your A-roll (the main footage), B-roll (your supporting shots), and audio together into a cohesive story.
Think of post-production as the final, and arguably most critical, step. It’s your chance to shape the narrative, fix any mistakes, and ensure the video isn't just informative, but genuinely engaging and easy to follow. A great edit respects the viewer's time by getting straight to the point in a compelling way.
Mastering the Art of Pacing
Pacing is the heartbeat of your training video. If it drags, you’ll lose your audience to boredom. If it’s too fast, they’ll be left confused and frustrated. Your goal is to find that sweet spot, a rhythm that feels natural and keeps the learner locked in.
The first order of business? Be ruthless with the delete key. Seriously. Cut out every "um," awkward pause, and redundant sentence. These tiny cuts do wonders—they tighten up the delivery, make the speaker sound more confident, and dramatically improve the overall viewing experience.
Once the timeline is clean, focus on the flow between topics. Simple transitions, like a clean cut or a quick fade, are almost always your best bet for moving from one idea to the next. Ditch the flashy, distracting wipes and starbursts; they often scream "amateur." The best editing is invisible.
Enhancing Visuals for Better Comprehension
Let’s be honest, even the most charismatic speaker can become a bit monotonous after a few minutes. Post-production is your opportunity to layer in visuals that break up that monotony and reinforce your key learning points. This is how you make your video dynamic.
Try incorporating a mix of these elements:
- On-Screen Text: Simple, bold text callouts are perfect for highlighting key terms, statistics, or important takeaways. It’s a huge help for visual learners.
- Simple Graphics: You don't need a degree in graphic design. Adding a simple arrow to point something out on screen or a circle to highlight a button can make all the difference in a software tutorial.
- Relevant B-Roll: Whenever possible, cut away from the speaker to show what they're talking about. This could be footage of a process, a relevant environment, or even well-chosen stock footage that illustrates a concept.
These aren't just for decoration; they serve a vital instructional purpose. When you show as well as tell, you cater to different learning styles and give knowledge retention a serious boost. Many of the newer AI tools, like those you might find exploring https://www.auralumeai.com/, can even automate adding relevant B-roll and graphics, saving you a ton of time.
The single best way to elevate a training video is to support every key point with a visual. Whether it's a line of text, a simple graphic, or a piece of B-roll, visuals turn passive viewing into active learning by reinforcing your message.
Adding Essential Final Touches
Okay, the core edit is done. Now it's time for a few final touches that can take your video from good to great. These elements add a layer of professionalism and make your content accessible to everyone.
First, weave in your branding. A small, subtle logo in the corner and using your brand's colors for text and graphics creates a consistent, polished look that reinforces your company’s identity.
Next, consider adding some quiet background music. A simple, instrumental track can set a positive tone and smooth over any moments of silence. The key is to keep the volume low—it should never compete with the narrator's voice.
Finally, and this is non-negotiable: add captions. Captions are an absolute must for accessibility, ensuring learners who are deaf or hard of hearing can fully engage. But the benefits don't stop there. Studies show a huge number of people watch videos with the sound off, especially on mobile or in public spaces. Adding captions makes your video more effective for everyone. For a deep dive, check out this guide on how to add captions to videos to make sure you’re following best practices.
Distributing and Measuring Your Video's Impact
So you’ve created a fantastic training video. That’s a huge win, but the project isn't over once you export the final file. An incredible video that no one sees is just taking up space on a server. The final, and arguably most critical, phase is all about getting your content in front of the right people and then figuring out if it actually worked.
This is where distribution and measurement come in. Your first big decision is where the video will live. The right hosting platform is essential for everything from security and user experience to gathering the data you need to prove its value. Simply tossing it up on a public site like YouTube is almost never the right call for internal training, as you lose all control over privacy and meaningful analytics.
Choosing the Right Hosting Platform
Where you host your video directly impacts who can see it and what you can learn from their viewing habits. There's no one-size-fits-all answer, so you need to match the platform to your specific training goals.
Here are the usual suspects when it comes to hosting training content:
- Learning Management System (LMS): This is your go-to for anything formal. An LMS is built to track course completions, manage quizzes, and handle certifications, which is perfect for compliance training or structured onboarding programs.
- Secure Video Platform (e.g., Wistia, Vimeo): These platforms give you serious control. You get robust privacy settings, incredibly detailed analytics like viewer heatmaps, and customizable players. They’re fantastic when you need to see exactly how individual users are engaging with your video.
- Internal Company Portal (e.g., SharePoint, Intranet): For less formal, just-in-time resources like a quick software tutorial, your company’s internal portal is a great, low-friction option. It keeps helpful content right where employees are already working.
Investing in a proper platform isn't just a "nice-to-have" anymore. It reflects a major shift in how businesses operate. In fact, 89% of businesses now use video for training and marketing, a testament to its effectiveness. Companies are putting their money where their mouth is, too. Over half plan to increase their video budgets, while only a tiny 5% are cutting video spending. This shows that organizations see video as a strategic imperative, not an expense. You can find more data on the rise of video in business strategy.
Don't let your distribution strategy be an afterthought. The platform you choose is just as important as the video itself. It's the difference between simply making a video and creating a measurable learning tool.
Smart Distribution Strategies
Once your video is hosted, you have to make sure people know it exists and actually want to watch it. Trust me, a generic "new training available" email is a one-way ticket to the bottom of a crowded inbox.
You'll have much better luck with a multi-channel approach. If the training is mandatory, you need clear communication from leadership explaining why it's important. Then, make it ridiculously easy to access by linking directly to the video in your LMS or your main communication channels like Slack or Microsoft Teams.
For optional, skill-building content, you need to think more like a marketer. Create a short, punchy preview or an animated GIF to share in team channels. Frame the video as a solution to a real problem or a way to save time. When you focus on the direct benefit to the employee, it stops feeling like a chore and starts looking like a valuable resource.
Metrics That Truly Matter
The real magic of using a proper video platform is the data you get back. By tracking the right metrics, you can move beyond simple view counts and start to understand if people are actually learning. This feedback is gold for making your next video even better.
These are the key performance indicators (KPIs) I always focus on:
| Metric | What It Tells You | How to Use It |
|---|---|---|
| Completion Rate | The percentage of viewers who watched the entire video. | A low completion rate on a critical training video is a huge red flag. It tells you the video might be too long, boring, or unclear. |
| Viewer Engagement | A visual map (often a heatmap) showing which parts were watched, re-watched, or skipped entirely. | Look for those drop-off points. If everyone bails at the same spot, that section is a problem. It’s either confusing or irrelevant and needs a rethink. |
| Play Rate | The percentage of people who clicked "play" after the page loaded. | A low play rate might mean your video title, thumbnail, or the description isn't compelling enough to earn a click. |
| Quiz Scores | How people performed on assessments tied to the video content. | This is your most direct measure of knowledge retention. It tells you, point-blank, if your learning objectives were met. |
By analyzing these metrics, you close the loop on the entire video creation process. You get hard data that not only proves the ROI of your work but also gives you a clear roadmap for making your next training video even more effective.
Common Questions About Training Videos
As you start diving into making training videos, you'll find that questions pop up left and right. Getting straight answers from the get-go can save you a world of frustration and help you avoid the classic rookie mistakes.
Think of this section as your personal cheat sheet. We're tackling the most common questions we hear, giving you the practical advice you need to create something truly effective.
How Long Should a Training Video Be?
It's a classic question, and while there's no single magic number, the answer is almost always shorter. For most topics, you should be aiming for microlearning videos between 3-7 minutes. This hits the sweet spot for modern attention spans and makes your content much easier to absorb and remember.
What if you're covering a complex topic that just can't fit into seven minutes? Don't force it. The best move is to break that beast of a topic down into a series of smaller, focused videos.
This approach creates a learning path where people can:
- Move at their own pace.
- Jump back to specific segments for a quick refresher.
- Get a small win and a sense of progress after each video.
What Is the Biggest Mistake to Avoid?
If there's one thing that will sink your training video faster than anything else, it's poor audio quality. It’s the one mistake viewers simply will not forgive. People are surprisingly tolerant of video that's a little grainy or shaky, but they'll click away in a heartbeat if they can't clearly hear what you're saying.
Muffled sound, buzzing, or distracting background noise immediately screams "unprofessional" and makes for a miserable learning experience.
Your audio is more important than your video. Always invest in a basic external microphone. Even an inexpensive USB or lavalier mic is a huge step up from your laptop or camera's built-in mic. And please, do a quick soundcheck before you hit record every single time. It's non-negotiable.
How Can I Make My Videos More Engaging?
Engagement isn't magic; it's a mix of variety and relevance. Staring at a single "talking head" for five minutes is a recipe for boredom. You have to keep things moving visually and, most importantly, connect the content to your audience's actual needs.
To really pull people in, you need to go beyond a static shot and layer in other elements.
- Bring in visual aids: Use text on the screen to highlight key terms, simple animated graphics to explain a tricky concept, or screen recordings for software tutorials.
- Use B-roll footage: When you're talking about a process, cut away to footage that actually shows it happening. This reinforces the lesson in a way words alone can't.
- Tell a story: Instead of just listing facts, frame your training around a problem your viewer can relate to. Then, position your content as the solution they've been looking for.
This approach turns someone from a passive viewer into an active learner, ensuring your message doesn't just get heard, but actually sticks.
Ready to bring your ideas to life without the hassle of cameras and microphones? Auralume AI turns your text prompts into cinematic videos in seconds. Our platform aggregates the world's best AI video models, giving you unparalleled creative power. Start creating for free today at https://auralumeai.com.