Image to video converter: Turn photos into stunning videos in minutes
An image to video converter is a clever AI tool that breathes life into static pictures, turning them into short, animated videos. It intelligently analyzes your photo and adds realistic motion—think subtle camera pans, dramatic zooms, and cool depth effects—transforming a single, frozen moment into a small visual story. This opens up a ton of creative potential for images that might otherwise just sit there.
Why Your Still Photos Need to Move
Let's face it, in a world saturated with visual content, a static photo can easily get lost in the noise. Adding even a little bit of motion can be the difference between someone scrolling past and someone stopping to look. Converting images to video isn't about ditching traditional videography. It’s about giving your existing photos a second life and beefing up your creative arsenal without the hassle of a film crew or wrestling with complicated software.
This approach is quickly becoming a go-to for smart content strategies. If you've ever wondered how to make your images pop, trying a dedicated Image to Video tool is a great way to see the magic for yourself. The whole process is surprisingly simple: the AI interprets your image and spits out a surprisingly compelling video clip.
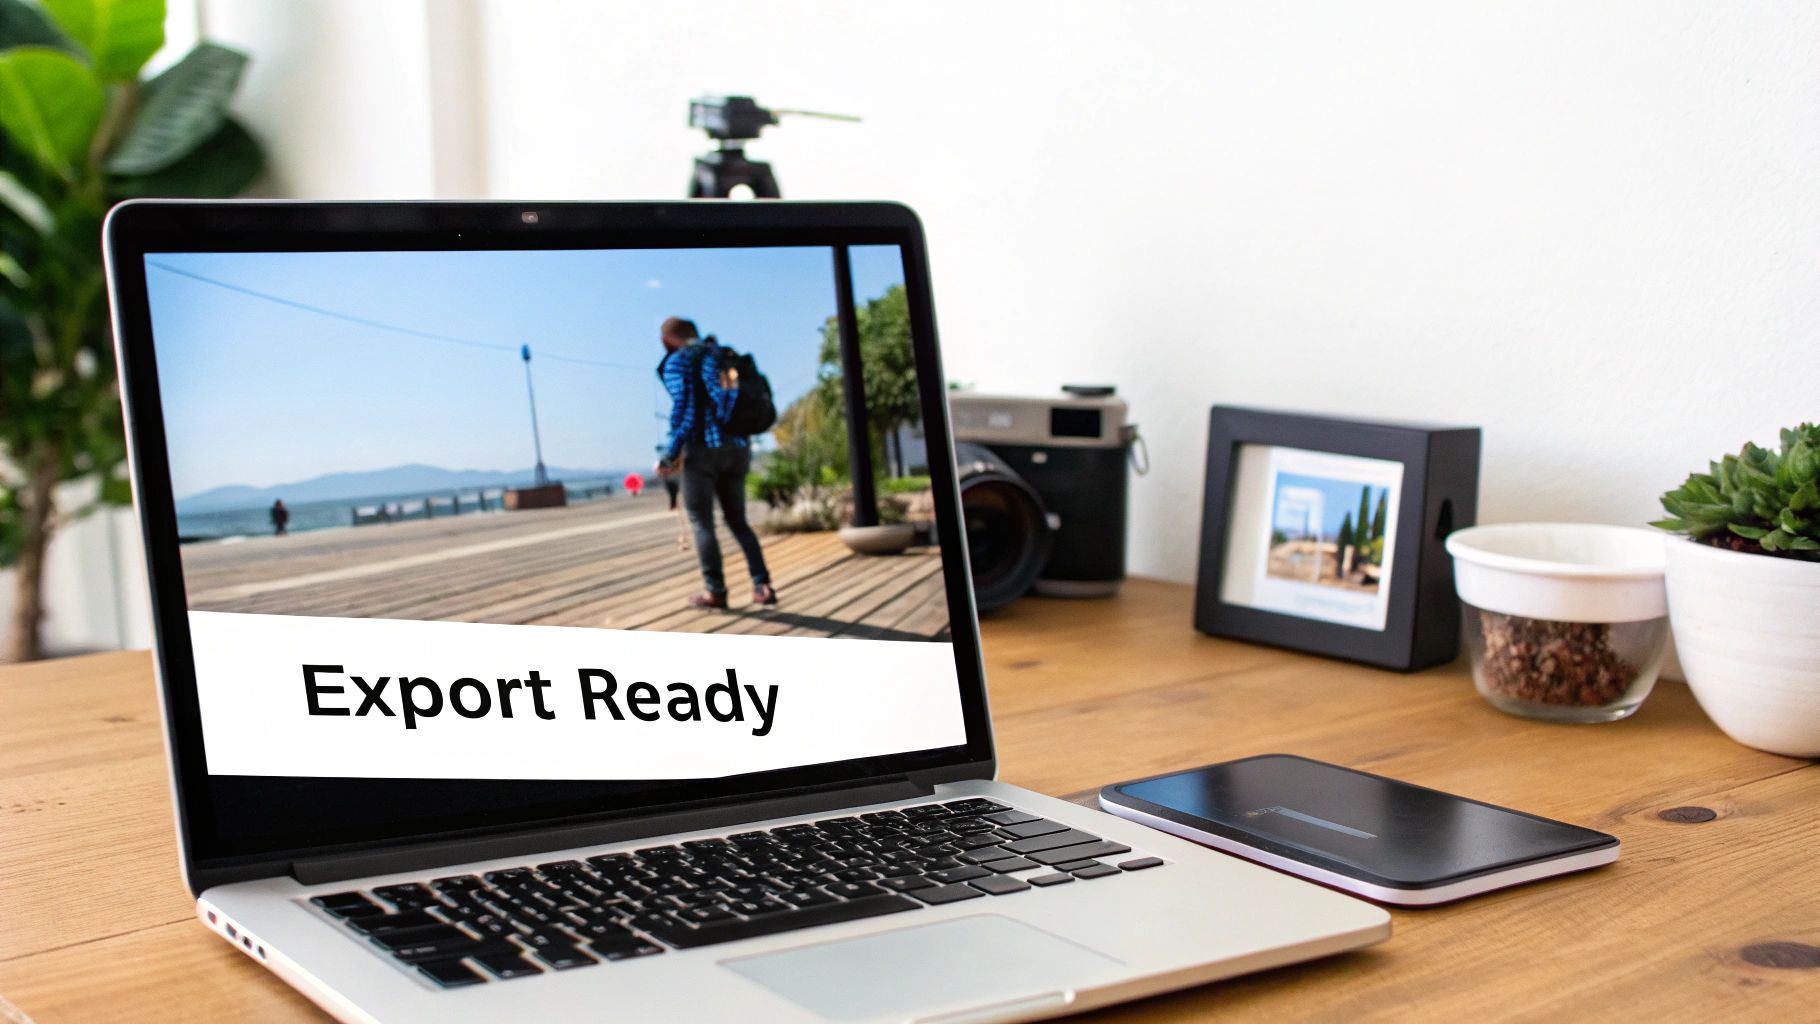
Here’s a look at how straightforward this conversion really is. The AI is the engine that does all the heavy lifting.
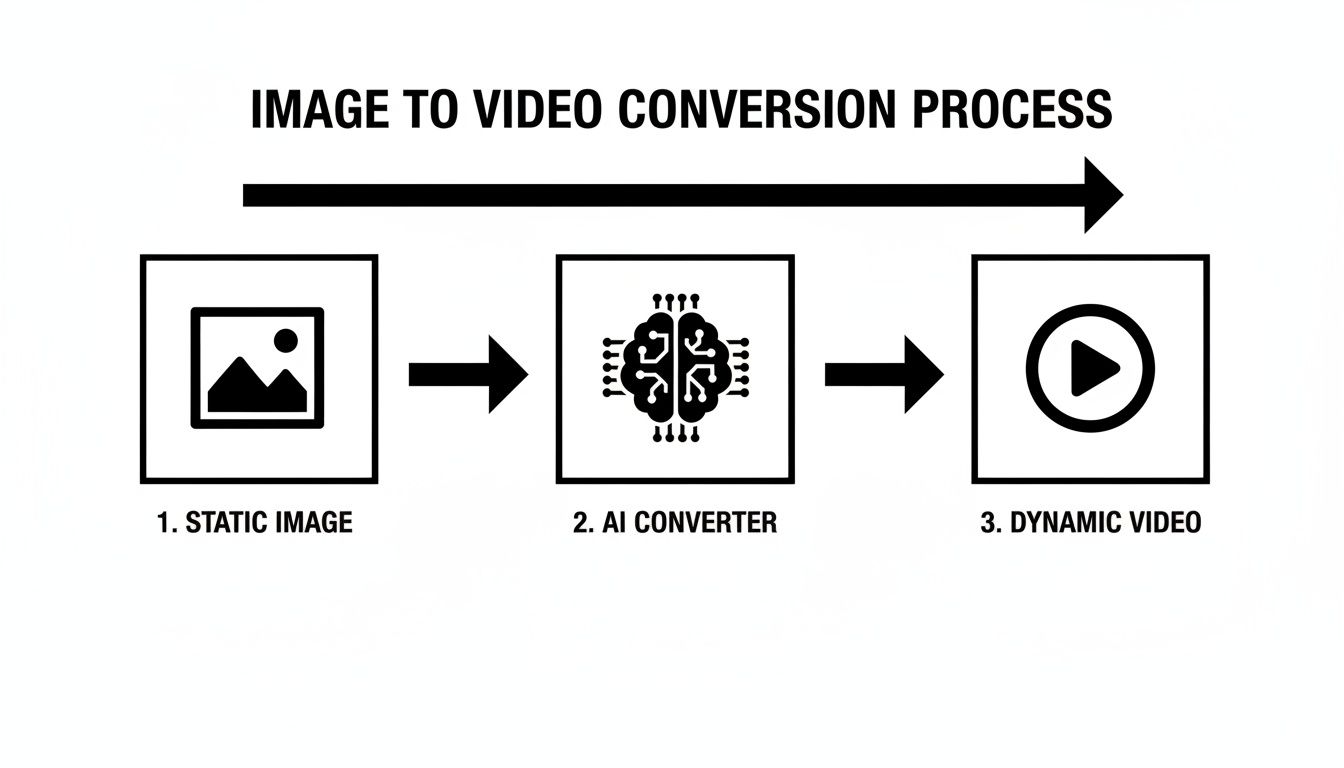
As you can see, it’s a direct path from a single photo to a polished, moving clip that’s ready to go.
The Soaring Demand for AI Video
This isn't just a fleeting trend; it’s a real shift in how we create content. The AI video generator market was already valued at USD 554.9 million in 2024 and is on a steep upward curve. Why? Marketers are reporting they’ve been able to cut production costs by as much as 25% just by using these tools to scale up their video creation.
When you animate a still photo, you give it the power of a story. A picture of a mountain isn't just a picture anymore—it becomes a slow, majestic reveal. A standard product shot can turn into an exciting, attention-grabbing zoom. This technology really puts video creation into everyone's hands.
This newfound accessibility means anyone, from solo creators to large businesses, can pump out high-quality video content fast. Platforms like Auralume AI even bring multiple AI models together under one roof, which makes finding the perfect motion style for any project much easier. Suddenly, you can create anything from a subtle background animation for your website to a dynamic social media ad that actually stops the scroll.
Preparing Your Image for a Starring Role
The secret to a stunning video almost always starts with the right image. Before you even touch an image to video converter, remember that the quality and composition of your source photo will make or break the final result. It's like casting a lead actor for a movie—the better the actor, the more compelling the performance.
A high-resolution image is non-negotiable. I always start with something that's at least 1920x1080 pixels for standard online video. This single step prevents that awful blurry, pixelated look, especially when your video gets viewed on a decent-sized screen. While a lossless format like PNG is technically best, a high-quality JPEG gets the job done just fine most of the time.
Beyond the technical stuff, the artistry of the photo itself is what really matters. Find pictures with a clear focal point. Ask yourself: what do I want people to look at? An image with a well-defined subject against a simpler background gives the AI a clear roadmap for what to animate and what to leave alone.
Choosing Images with Natural Depth
The real magic of these AI tools is how they can fake a sense of 3D space. To give the AI a head start, you should pick photos that already have a natural feeling of depth. That just means having distinct layers—a foreground, a midground, and a background.
A classic example is a landscape shot with mountains way off in the distance and a field of flowers right up close. The AI is smart enough to move the foreground flowers a bit faster than the distant mountains, creating that realistic parallax effect you see in professional camera work.
Here's a simple rule of thumb I use: ask yourself, "Does this image have layers?" If you can mentally peel the scene apart into different planes, the AI can probably do it too. That's what gives you a truly dynamic and immersive video.
This isn't just for landscapes, either. It works for anything. A portrait where the person pops against a blurred background, or a product shot with items staged at different distances from the lens, will always turn out better than a photo that looks flat.
Before we jump into the AI part, it's worth taking a few minutes to prep your image. This quick checklist covers the essentials I run through to make sure the AI has the best possible material to work with.
Image Prep Checklist for Better Video Conversion
Use this quick guide to ensure your source image is optimized for the best possible video output, covering both technical specs and creative elements.
| Checklist Item | Why It Matters | Recommended Setting/Action |
|---|---|---|
| High Resolution | Prevents pixelation and ensures a crisp final video. | Minimum 1920x1080 pixels |
| Clear Focal Point | Guides the AI's motion and the viewer's attention. | Choose an image with one main subject. |
| Natural Depth | Allows the AI to create a convincing 3D parallax effect. | Look for distinct foreground/background elements. |
| Good Lighting | Helps the AI differentiate between objects and textures. | Avoid overly dark or blown-out images. |
| Aspect Ratio Match | Ensures the final video fits its intended platform. | Crop to 16:9 for YouTube, 9:16 for Reels/Shorts, etc. |
| Clean Background | Prevents distracting or awkward AI-generated motion. | Use a spot-healing tool to remove clutter. |
Taking just a couple of minutes to run through these checks makes a huge difference. A well-prepared image is the foundation for a professional-looking result.
Simple Pre-Edits for a Polished Result
You don't need to be a Photoshop wizard, but a few small tweaks can dramatically improve your video. These quick adjustments help define the elements in your photo, giving the AI a much better canvas.
- Boost the Contrast: A slight bump in contrast can help sharpen the lines between your subject and the background. This makes it much easier for the AI to tell the layers apart.
- Clean Up Distractions: See a stray object in the corner or something weird in the background? Zap it with a simple spot-healing tool in your favorite photo editor. A cleaner image always leads to cleaner animation.
- Check the Aspect Ratio: Make sure your image's shape matches your final video. If you're making a vertical video for Instagram Stories (9:16), it’s way better to crop your horizontal photo yourself beforehand. That way, you control the composition, not the software.
By spending just a few minutes on prep, you're setting the stage for the AI to do its best work. This is easily the most important step in turning a static photo into something that truly moves.
Choosing the Right AI Motion for Your Story
Okay, your image is prepped and ready to go. Now for the fun part—this is where your creative vision really starts to take shape. Using an image to video converter is so much more than just hitting a button and letting the AI add some generic movement. To get a truly compelling result, you need to think like a cinematographer.
The kind of camera movement you pick has a huge impact on the final video's emotional tone. A slow, graceful pan across a mountain range feels majestic and calming. On the other hand, a fast, punchy zoom-in on a product creates a sense of excitement and makes you want to look closer. These are deliberate choices that guide how your audience feels.
This level of creative control is a game-changer, especially in marketing. Think about it: a staggering 46% of retailers are already using image-to-video tools to create product videos without the need for expensive, time-consuming photoshoots. It's a massive shift, and 87% of executives expect AI-generated visuals to slash their creative costs by at least 25% by 2026. If you're curious about the data behind this trend, you can dig into the latest AI image generation statistics.
Aligning Motion with Your Goal
To get results that really land, you have to connect the AI motion to the story you want to tell. Before you choose an effect, ask yourself: what do I want the viewer to feel?
- For Serenity and Scale: Go for slow pans, tilts, or dolly movements. Picture a wide shot of a peaceful beach at sunset; a slow horizontal pan gives the viewer a moment to soak in the sheer vastness of it all.
- For Excitement and Focus: A quick zoom or a rapid dolly-in is your best friend here. This is perfect for highlighting a key feature on a new phone or creating a high-energy reveal in a social media ad.
- For a Sense of Discovery: A subtle "dolly zoom" (where the camera dollies in while zooming out) can create a wonderfully dramatic, almost surreal effect. It's a classic cinematic trick that's great for intros.
The motion is the message. A gentle drift says one thing, while a sudden jolt says something entirely different. Your job is to pick the right "verb" for your visual sentence.
When you're this intentional with your choices, you're not just animating a picture—you're crafting a piece of visual storytelling. This makes your content infinitely more engaging than what a generic, one-click effect could ever produce.
Selecting the Right AI Model
Many of the more advanced platforms out there, like Auralume AI, give you access to several different AI video generation models. This choice is just as critical as the camera motion itself. Not all AI models are built the same; most are trained to excel at specific visual styles.
Here's a quick rundown of what you'll typically find:
| Model Type | Best For | Common Use Cases |
|---|---|---|
| Photorealistic Models | Creating motion that feels like it was filmed with a real camera. They're brilliant at subtle, natural movements. | Animating portraits, landscape photos, real estate images, and product shots. |
| Stylized or Artistic Models | Generating more creative, painterly, or fantastical animations. These often add unique textures and effects. | Turning digital art, illustrations, or concept designs into animated shorts. |
| Hybrid Models | Blending realistic motion with stylistic visual elements, giving you a unique middle ground for branded aesthetics. | Creating branded content, music video visuals, or eye-catching social media ads. |
Trying to use a photorealistic model on a piece of abstract digital art can produce some seriously uncanny, odd-looking results. In the same way, applying a heavily stylized model to a corporate headshot probably won't give you that professional tone you’re after.
Always keep your brand's voice and the specific story in mind. To really get the hang of this, it helps to explore broader strategies and unlock the potential of AI-powered content creation. The key is to experiment. Play around with different models and motion settings until you find that perfect combination that brings your static image to life just the way you imagined.
How to Write Prompts That Direct the AI
Your image sets the scene, but your prompt is the director’s script. This is where you go from creating a generic animation to a custom-directed cinematic moment. Using a good image to video converter is less about giving simple commands and more about learning to “talk” to the AI in a language it understands.
The foundation of a great prompt is descriptive language. You can't just say, "make it move." You have to paint a picture with your words. Think in terms of action verbs, mood-setting adjectives, and specific directions that control the speed, style, and camera path.
Giving the AI this level of detail provides clear instructions to work with. The result is motion that feels intentional and truly aligns with your creative vision. The more specific you are, the less the AI has to guess.
From Vague Ideas to Specific Directions
Let's see how this plays out with a real-world example. Imagine you have a beautiful photo of a forest in autumn. A vague prompt will get you a vague, and likely disappointing, result.
- Vague Prompt: "Make the trees move."
- Likely Outcome: The AI will probably apply a generic, wobbly effect across the whole image. Sure, there's movement, but it lacks any story or realism.
Now, let's try that again, but this time with specific, cinematic language that tells the AI precisely what you want.
- Specific Prompt: "A gentle breeze rustles the golden leaves on the branches as the camera slowly drifts to the right."
- Likely Outcome: This prompt specifies the action (rustling leaves), the mood (gentle breeze), the subject (golden leaves), and the camera's path (slowly drifts right). The final video will feel much more natural and engaging.
Your prompt should answer three key questions for the AI: What is moving? How is it moving? And where is the camera going? When you provide those details, you take back control of the creative process.
This approach works for any kind of image. For a cityscape, "slowly pushing in on the brightly lit skyscraper" is far more effective than just "zoom in." For a portrait, "her hair gently sways in the wind" creates a more dynamic and lifelike effect than a simple "animate the person."
Building a Better Prompt
Crafting the perfect prompt is rarely a one-and-done deal; it's an iterative process. I usually start with a core idea and then build upon it with layers of detail. Having a solid structure can help guide your thinking and ensure you're giving the AI enough information to work with.
A good prompt almost always includes these elements:
- The Subject: Clearly identify the main element you want to animate. Is it the clouds, a car, the water, or a person's expression?
- The Action Verb: Use powerful verbs that truly describe the motion. Words like drifts, rushes, sways, glides, or billows are much more descriptive than a generic term like moves.
- The Adverb or Adjective: Modify the action to set the pace and mood. "Slowly pans" feels completely different from "quickly pans."
- Camera Direction: Don't forget to direct the camera. Explicitly state its movement using commands like pan left, tilt up, zoom in, dolly forward, or arc right.
Let’s take an image of a coffee cup with steam rising from it. A layered, effective prompt could be: "Wisps of steam gently curl upwards from the hot coffee as the camera performs a subtle, slow zoom in on the cup." This detailed instruction ensures the AI focuses on the right elements with the right feeling, turning a static photo into an inviting, cozy scene.
Finalizing and Exporting Your New Video
You’ve done the creative work, and your animation is looking fantastic on your screen. But the final few technical steps are what make sure it looks just as impressive for everyone else, no matter where they watch it. This is where upscaling and smart export settings come in, turning your clip from a simple animation into a professional-grade asset.
A lot of creators using an image to video converter skip over upscaling, but it’s a genuine game-changer. AI upscalers, like the one built into Auralume AI, use smart algorithms to bump up your video’s resolution—often from 1080p to a crisp 4K—without making it blurry. This is how you get that sharp, detailed look, even on massive HD screens.
This step is more important now than ever. The market for generative image and video models hit USD 4,628.2 million in 2024 and is expected to balloon to USD 27,739.8 million by 2030. This boom is fueled by creative professionals, and 62% of them prefer integrated platforms that bundle conversion with powerful editing and upscaling tools. You can discover more insights about the growth of generative models and see how these all-in-one tools are shaping the industry.
Mastering Your Export Settings
Once your video is upscaled, it’s time to export it correctly. The settings you pick here are a trade-off between file size and visual quality. Don't let the technical terms throw you off; they're simpler than they seem and give you complete control over your final video.
Think of these settings as the final coat of polish. Getting them right ensures your video not only looks great but also loads quickly and plays smoothly on whatever platform you’re posting it to.
Your export settings are the bridge between your creative vision and your audience's viewing experience. A perfectly animated video can be ruined by poor compression, while a well-exported one preserves every detail.
Key Settings to Know
When you hit that "Export" button, you’ll typically be faced with a few key options. Knowing what each one does is crucial for striking the perfect balance between quality and performance.
-
Codec (H.264/AVC): This is the tech that compresses your video. For anything you're putting on the web, H.264 (also known as AVC) is the gold standard. It gives you an excellent mix of high quality and small file size, meaning it will play on pretty much any device or platform out there.
-
Frame Rate (24 or 30 FPS): This setting determines how many individual images flash on the screen per second. A rate of 24 FPS gives you that classic, cinematic feel. For most online content, 30 FPS provides slightly smoother motion and is a very common standard.
-
Bitrate (5-10 Mbps for 1080p): Bitrate is all about how much data is used for each second of video. A higher bitrate equals better quality but a much larger file. For a 1080p video heading to YouTube, somewhere between 5 and 10 Mbps is a great sweet spot. If it's for a website background, you might want to go lower—around 2-4 Mbps—to make sure it loads fast for visitors.
Got Questions About Turning Images Into Videos?
Even when you've got a great tool in your hands, you're bound to run into a few questions when turning a static photo into a moving video. Getting the right answers quickly can be the difference between a frustrating afternoon and a stunning final product. Here are a few of the most common things we hear from creators and marketers trying to master image-to-video AI.
We'll cover everything from the nitty-gritty of file formats to the creative side of making motion feel just right.
What’s the Best Image Format to Use?
For the absolute best results, start with a high-resolution, lossless format like PNG or TIFF. Think of it this way: these formats keep every single pixel of detail intact, giving the AI a much richer canvas to work with when it starts generating motion. More data in equals better quality out.
JPEGs are everywhere, of course, but their compression can introduce tiny visual artifacts. You might not even notice them in a still photo, but they can become glaringly obvious once the image starts moving. As a baseline, I always recommend using an image that’s at least 1920x1080 pixels (Full HD) to keep things sharp.
Can I Control How Long the Video Is?
Yes, most modern image-to-video tools give you direct control over the clip's duration. You'll typically find a simple setting that lets you choose a length between 3 and 10 seconds.
Some of the more advanced platforms take it a step further, letting you adjust the speed of the animation within that time. This is where you can really start to art-direct the final product. A slow, cinematic reveal feels entirely different from a quick, energetic burst of movement, even if they're both the same length.
The secret to great-looking motion isn't just the movement itself—it's the pacing. A three-second clip with slow, dreamlike motion tells a completely different story than a three-second clip with a rapid zoom. Don't be afraid to experiment with both duration and speed to nail the right mood.
How Can I Make the AI Motion Look Natural, Not Robotic?
Getting that smooth, natural motion is a two-part process. It starts with a good source image—one with a clear sense of depth and separation between the foreground and background. After that, it's all about how you guide the AI.
- Use descriptive, subtle language: Instead of just "move," try prompts like "a gentle breeze sways the trees," "slowly pan left across the horizon," or "a subtle zoom in on her face."
- Avoid sudden, jerky commands: Telling the AI to do something too fast or abrupt is the quickest way to get a result that looks unnatural and robotic.
- Try different AI models: Many platforms offer several AI models, and some are specifically trained to produce that smoother, more cinematic motion you're looking for.
What About Copyright? Can I Use Any Image I Find Online?
This is a huge one, and it's easy to get wrong. You absolutely must have the legal right to use whatever image you're converting. Transforming a copyrighted photo into a video doesn't bypass copyright law; it's still considered infringement if you don't have permission.
To keep yourself safe, stick to images that fall into one of these buckets:
- Images you created yourself.
- Stock photos you’ve purchased a license for.
- Images confirmed to be in the public domain.
- Photos available under a permissive Creative Commons license.
Ready to turn your best photos into stunning, cinematic videos? Auralume AI provides an all-in-one platform with multiple AI models, intuitive controls, and powerful upscaling to bring your vision to life in seconds. Start creating for free today at Auralume AI.